Before we start: Donemax Data Recovery for Mac can help you repair damaged drives on Mac and help you recover lost data due to improper ejection or erasing external hard drive. It also can help you mount external hard drive on Mac, reformat USB flash drive, etc.
PAGE CONTENT:
When you are working on a Mac and attempt to eject a disk, but you encounter the frustrating message, "The disk couldn't be ejected because the Finder is using it," it can be a puzzling and inconvenient issue. Mac users commonly face this problem when trying to safely remove an external hard drive, USB stick, or other connected storage devices. Fortunately, understanding why this happens and knowing how to resolve it can help you get your work done without the worry of losing data or damaging your drive.
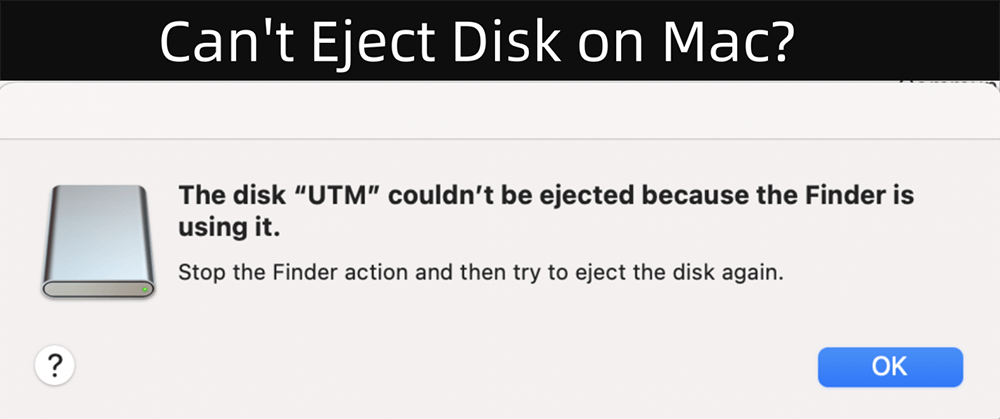
In this article, we will explore the root causes of this error and provide a range of solutions to fix the issue and prevent it from occurring in the future. Whether you're dealing with an external hard drive, USB device, or even an internal disk, these steps will help you troubleshoot and safely eject your devices.
Understand the Ejecting Problem: Why the Finder Is Using It
First, it's important to understand what the Finder is and why it's related to this error message. Finder is the file management application built into macOS. It’s responsible for helping you navigate your files, folders, and connected devices. Every time you connect a new device to your Mac, whether it's a USB stick, an external hard drive, or a CD/DVD, Finder mounts that device and makes it accessible from your desktop or Finder window.
The error message in question occurs when Finder is still using or accessing the device, even though you're trying to eject it. When you attempt to eject the device, macOS sees that Finder is still interacting with it, such as reading or indexing files, and prevents the disk from being safely ejected. This is a protective measure designed to prevent data corruption or damage to the disk, as abruptly disconnecting it can lead to data loss.
Common Causes of the "Finder is Using It" Error:
- Open Files or Folders: If you have any files or folders open that are stored on the disk, Finder will be actively accessing them. This could include documents, images, or any other file type that was opened from the disk.
- Background Processes: Other processes on your Mac, such as Time Machine backups or Spotlight indexing, may also be using the disk. For instance, Time Machine can automatically back up your data to external drives, while Spotlight indexes files for search functionality.
- Finder's Hidden Operations: Sometimes Finder itself could still be indexing or previewing contents from the disk in the background, even if you don’t see any open windows or files.
- Corrupted Finder Preferences: In rare cases, Finder's preferences could become corrupted, which can cause it to incorrectly think it is still using the disk, even if it's not.
8 Solutions to Fix the "Finder is Using It" Error
Now that we understand what causes this error, let's dive into the solutions you can try to safely eject your disk.
Solution 1. Close Open Files or Applications Using the Disk
The most common reason for this issue is that the Finder, or another application, is using the disk. Here's what you can do:
- Check Open Files: Ensure that you don't have any files open from the disk. This could include documents you are currently working on or files that were recently opened. If you're unsure, try closing all applications and files on your Mac.
- Close Finder Windows: Even if you don't have files actively opened from the disk, you might have a Finder window or tab that is accessing the device. Close any Finder windows displaying the contents of the disk.
- Close Running Applications: Some applications, such as media players or photo editors, might be accessing files stored on the disk. Make sure all applications that might be using the device are closed.
Solution 2. Eject Using the Context Menu
Try right-clicking on the disk icon in Finder or on your desktop and selecting "Eject." If this doesn't work, you can try the following:
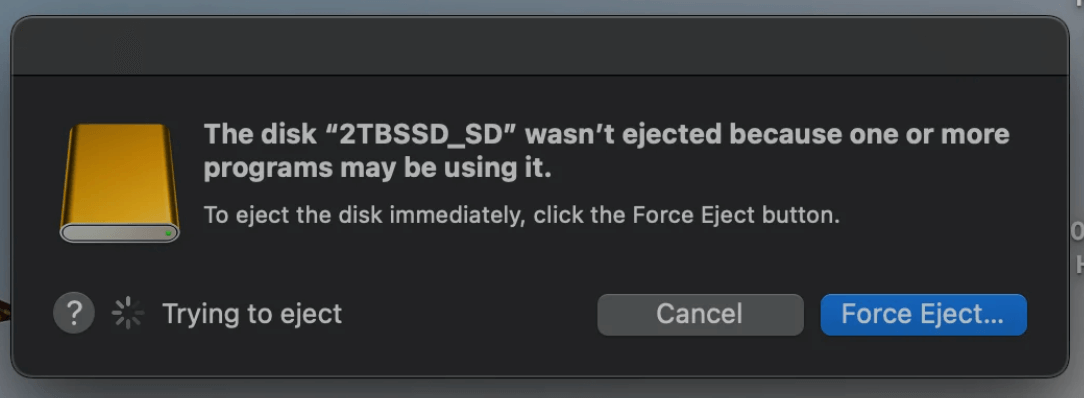
Force Eject from Finder: Hold down the Option key and right-click on the disk. You'll see an option to "Force Eject," which can bypass some of the issues that prevent the normal eject process.
Solution 3. Quit the Finder Process
Sometimes Finder itself can be the culprit, even if you don't have any open files. Restarting Finder can often solve the issue:
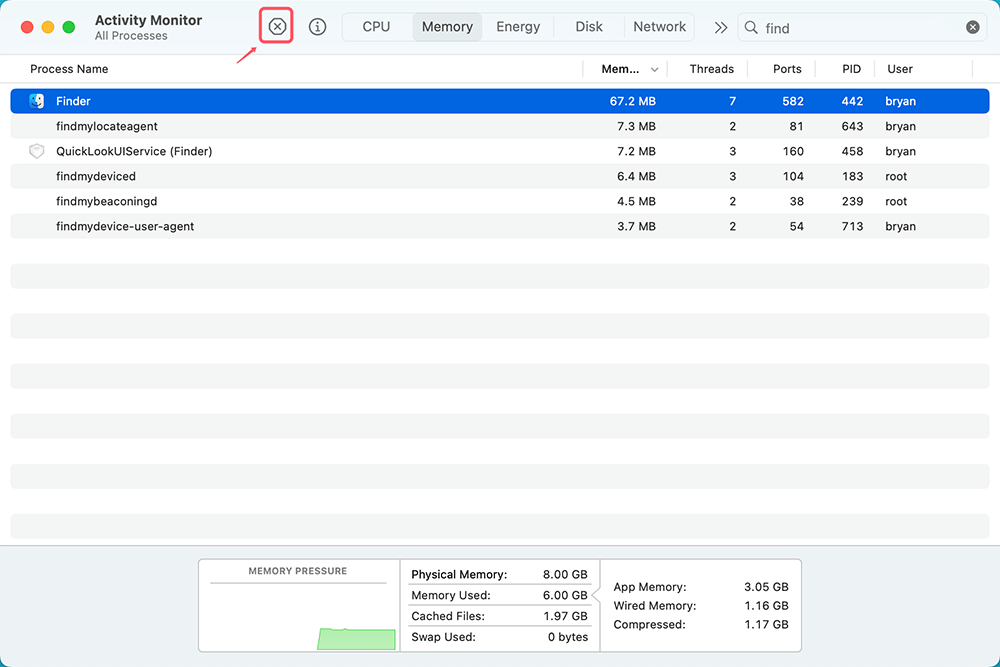
Quit Finder from Activity Monitor:
- Open Activity Monitor (located in Applications > Utilities).
- Search for "Finder" in the list of running processes.
- Select Finder and click the "X" button to quit the process.
![Quit Finder from Activity Monitor]()
- Finder will automatically restart, and you can try ejecting the disk again.
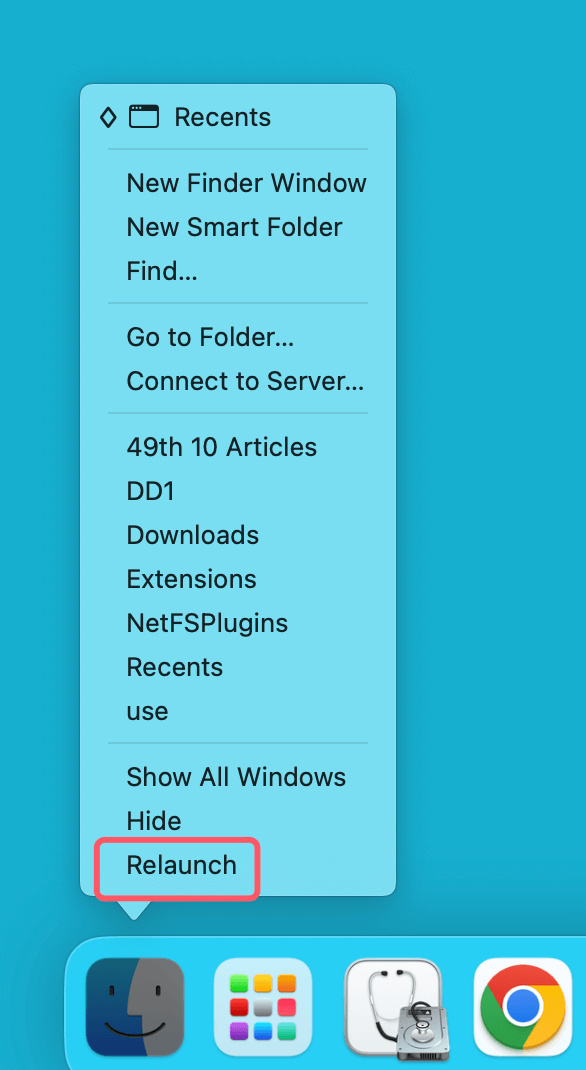
Restart Finder from the Dock:
- Hold down the Option key and right-click on the Finder icon in the dock.
- Select Relaunch from the options. This will restart Finder, which might stop any processes that were preventing the eject.
![Restart Finder from the Dock]()
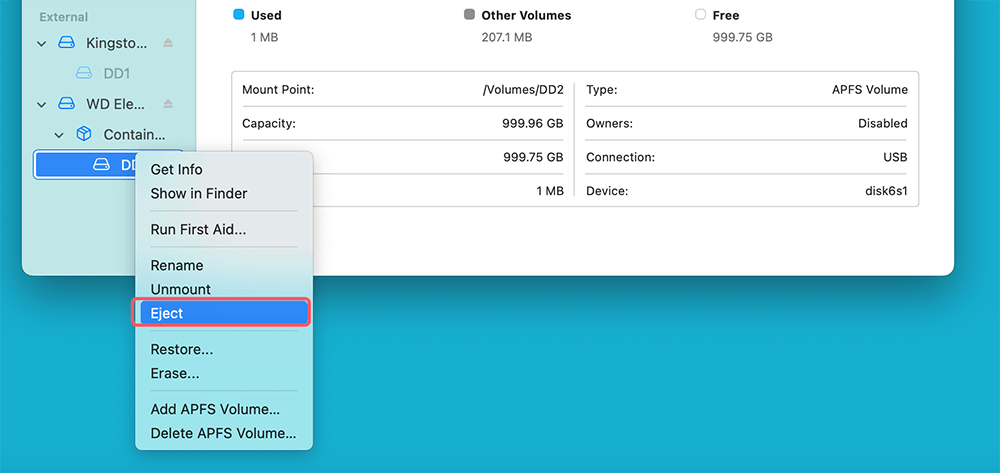
Solution 4. Use Disk Utility to Eject the Disk
If Finder itself is being difficult, Disk Utility can often help you eject the device. Here's how to do it:
- Open Disk Utility (Applications > Utilities).
- Select the disk you want to eject from the list of drives.
- Click on the Eject button in the toolbar at the top of the Disk Utility window.
![Use Disk Utility to Eject the Disk]()
This tool is useful when Finder isn't cooperating, as it directly interfaces with your Mac's disk management system.
Solution 5. Check for Background Processes Using the Disk
Sometimes the issue lies with a background process that's using the disk, like Time Machine backups or Spotlight indexing. Here's how you can stop these processes:
- Open Activity Monitor: This tool displays all running processes on your Mac. You can use it to identify which processes are using your disk.
- Look for processes such as mds (Spotlight indexing) or backupd (Time Machine backups).
- Select the process and click on the Quit Process button (the "X" in the top left of the Activity Monitor window).
Stopping these background processes can free up the disk and allow you to safely eject it.
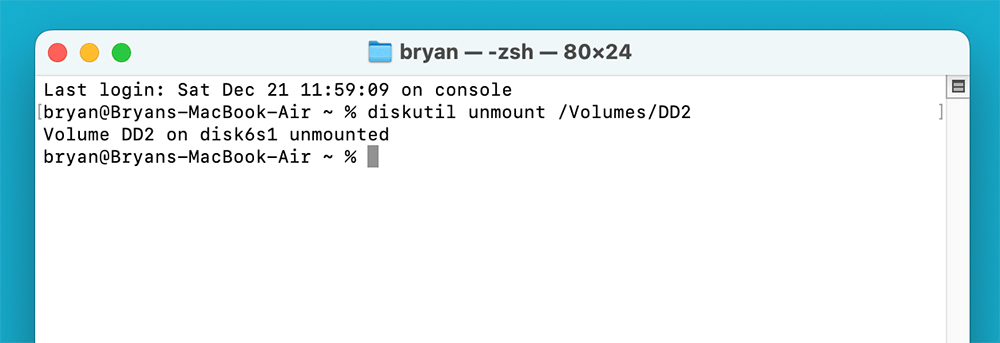
Solution 6. Unmount Using Terminal
If all else fails, you can use the Terminal app to unmount the disk. Here's how:
- Open Terminal (Applications > Utilities).
- Type the following command:
diskutil unmount /Volumes/[Disk Name]
Replace "[Disk Name]" with the actual name of your disk (you can find this by looking at the disk's name in Finder).
![Unmount Using Terminal]()
- Press Enter, and this will force the disk to unmount. You should then be able to safely eject it.
Solution 7. Restart Your Mac
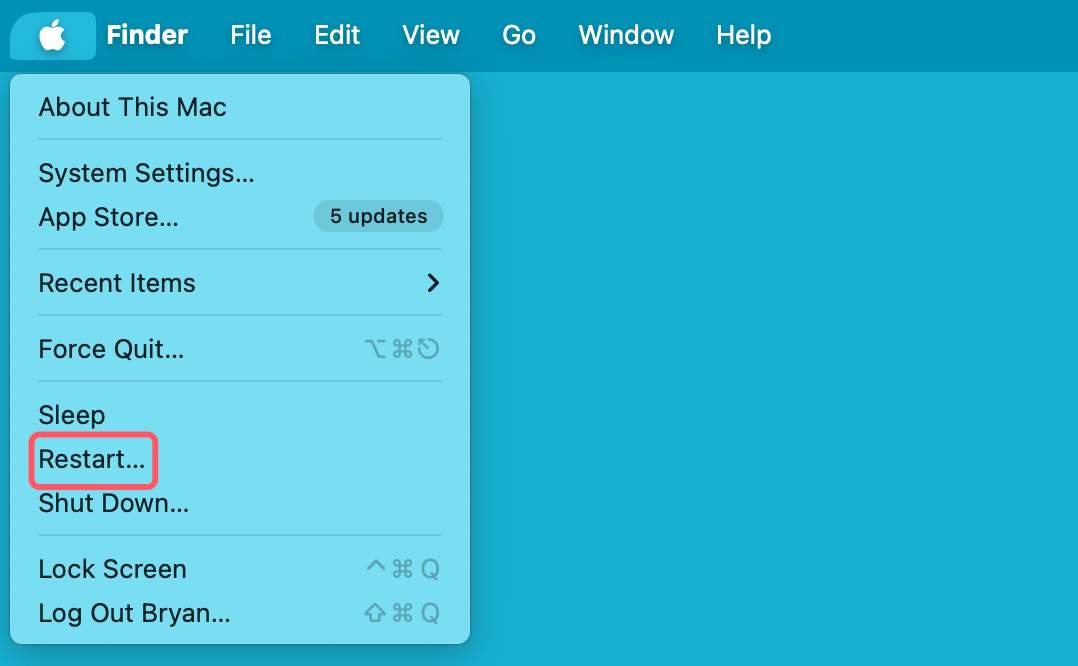
Sometimes, a simple restart can resolve this issue. Restarting your Mac will automatically close any open applications, kill background processes, and stop Finder from using the disk. Once your Mac reboots, you should be able to eject the disk without encountering the error.
Solution 8. Using Safe Mode
Booting into Safe Mode can help resolve issues related to the Finder using the disk. Safe Mode disables certain startup processes that may be causing the problem. To start your Mac in Safe Mode:
- Shut down your Mac.
- Turn it back on and immediately hold the Shift key.
- Release the Shift key when you see the Apple logo.
- Once your Mac starts in Safe Mode, try ejecting the disk again.
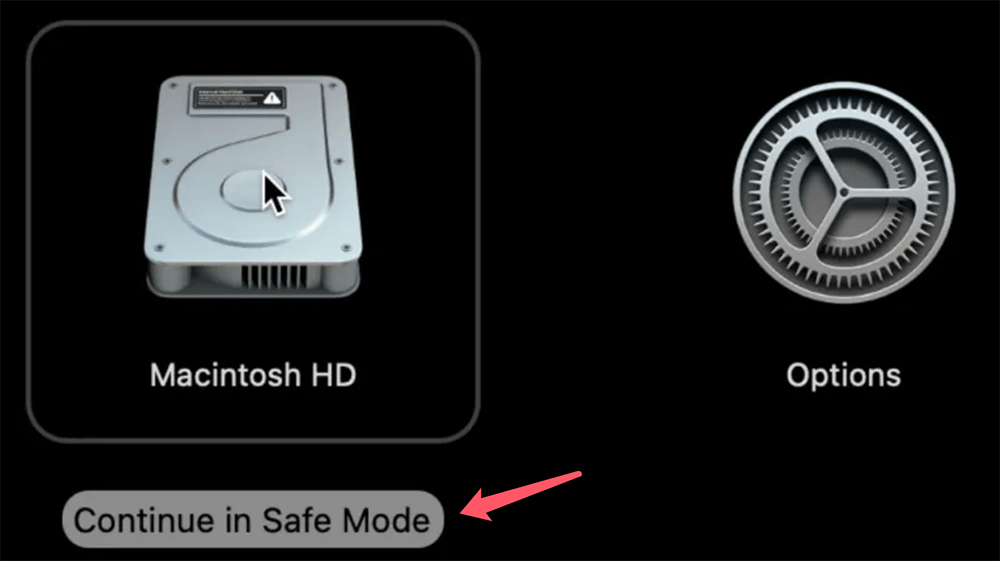
If you are using a Mac with Apple silicon, press and hold Power button when restarting the Mac, then select Macintosh HD in macOS Recovery mode, press and hold Shift key, choose Continue in Safe Mode.
Recover Lost Data from External Hard Drive on Mac?
Improper ejection may cause data loss on the external hard drive. Don't panic. Data recovery software - such as Donemax Data Recovery for Mac can help you securely and completely recover lost files from the external hard drive, USB drive, SD card, etc.
Step 1. Download and install the reliable Mac data recovery software - Donemax Data Recovery for Mac on your Mac.
Step 2. Open Donemax Data Recovery for Mac, select the external hard drive to start data recovery.

Step 3. Click on Scan button to deeply scan the external hard drive and find all deleted/formatted or lost files.

Step 4. Once the scan is completed, you can preview all recoverable files. Then select the wanted files, click on Recover button to save them.

Preventing the Issue in the Future
While you can fix the issue now, it's always better to avoid it in the future. Here are some tips to keep your system from encountering this problem again:
- Close Files and Applications Properly: Always ensure that you have closed any files or applications that are using the external disk before attempting to eject it.
- Eject Devices Regularly: Always eject external devices using Finder or the context menu. This ensures that macOS correctly unmounts the disk and prevents it from being used by background processes.
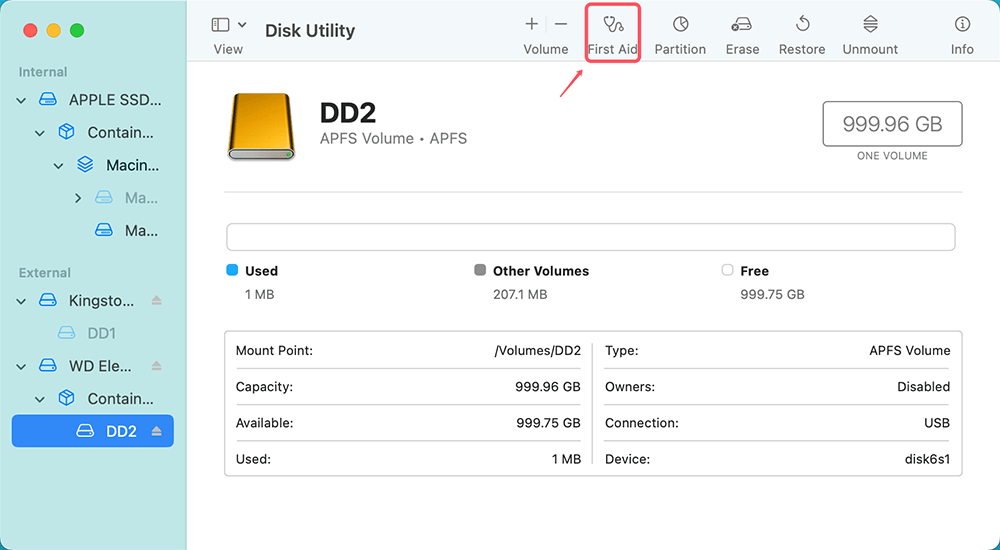
- Check Disk Health: Use Disk Utility’s "First Aid" feature to regularly check the health of your disks. This can prevent issues related to mounting and ejecting disks.
![Preventing the Issue in the Future]()
- Avoid Quick Removal: Do not quickly unplug devices without ejecting them first. This can lead to data corruption, especially if files are still open or being accessed by Finder.
- Disable Automatic Backups or Indexing (if not needed): If you don't need Time Machine backups or Spotlight indexing on a particular disk, consider disabling them temporarily to prevent them from using the disk during ejection.
Conclusion
The "The disk couldn't be ejected because the Finder is using it" error can be frustrating, but it's a common issue on macOS, and there are multiple solutions to fix it. By understanding the cause of the problem and using the appropriate troubleshooting steps, you can safely eject your disk and prevent data loss. Remember to close open files, use Disk Utility, and quit background processes to resolve the issue. Regular maintenance, such as keeping Finder preferences intact and ensuring proper disk ejection, will help avoid future problems.


Donemax Data Recovery for Mac
Donemax Data Recovery for Mac is one of the best Mac data recovery software. It is easy-to-use and can help in recovering deleted, formatted, inaccessible or lost data from Mac HDD/SSD, external disk, USB drive, SD card, camera or other storage devices.
Related Articles
- Feb 06, 20254 Solutions to Fix Pen Drive (or USB drive/flash drive) Shows Empty Although It Has Data
- Apr 29, 2025Fix ADATA External Hard Drive Not Detected/Not Recognized/Not Showing Up
- Jan 22, 2025How to Fix SD Card Not Showing Files? [7 Methods]
- Jun 03, 2025Fix Crucial P3 SSD Not Showing Up
- Apr 22, 2025How to Fix 'inaccessible Boot Device (Stop Code 0x0000007b)' Error?
- Feb 12, 2025Fix The Semaphore Timeout Period Has Expired Error Without Losing Data

Lucien
Lucien is a writer and a chief programmer of Donemax software who has worked in the company for 5+ years. He has written much of the content on the site and devotes to providing troubleshooting and solution for Windows and Mac users including disk cloning, data recovery, migration, eraser, error fixes.

Gerhard Chou
In order to effectively solve the problems for our customers, every article and troubleshooting solution published on our website has been strictly tested and practiced. Our editors love researching and using computers and testing software, and are willing to help computer users with their problems
Hot Donemax Products

Clone hard drive with advanced clone technology or create bootable clone for Windows/Mac OS.

Completely and easily recover deleted, formatted, hidden or lost files from hard drive and external storage device.

Certified data erasure software - permanently erase data before selling or donating your disk or any digital device.

