Before we start: Donemax NTFS for Mac is full compatible with macOS High Sierra. It can quickly grant full read-access to NTFS drives on Mac which is running macOS High Sierra. It also can help you mount NTFS drives on Mac, reformat NTFS drives on Mac, etc.
PAGE CONTENT:
When you plug an NTFS-formatted drive into a Mac running High Sierra, you may notice a limitation: you can only read files on the drive, not write to them. This is because NTFS (New Technology File System) is primarily designed for Windows, and macOS doesn't natively support write access for it. However, if you're using an NTFS drive on both Windows and macOS and need read-write access on your Mac, there are several solutions available.
In this article, we'll explore different methods to gain NTFS read-write access on macOS High Sierra. Whether you're a casual user who wants a simple solution or a more advanced user willing to delve into Terminal, you'll find an approach that suits you.
Understand NTFS Compatibility on macOS High Sierra
macOS has traditionally supported FAT32 and ExFAT, file systems that are more compatible with Windows and macOS. However, NTFS, developed by Microsoft, is largely read-only on macOS, including High Sierra.
- Read-Only Access: Apple has included native read-only support for NTFS to help users access files from Windows drives.
- Limitations: Without third-party help, you can't save files or edit documents directly on an NTFS drive from macOS.
- Potential Challenges: For users who frequently share data between Windows and macOS, these restrictions can be frustrating. Fortunately, there are several ways to enable read-write support.
By understanding NTFS and its limitations on macOS, users can better assess the methods that will work best for their needs.
Available Methods for Enabling NTFS Write Support on macOS High Sierra
To write to NTFS drives on macOS High Sierra, users can select from these three main methods:
- Using Native macOS Options: It's possible but complicated and potentially unstable, as it involves using Terminal commands to enable a limited form of NTFS write support.
- Third-Party Software Solutions: A more user-friendly, reliable approach is to install software that unlocks NTFS write access.
- Reformatting Options: Reformatting to a compatible file system, such as ExFAT, can offer cross-platform access without needing additional software.
Each of these options offers pros and cons, which we'll explore in more detail.
1. Enable NTFS Write Access with Third-Party Software
Using third-party software is the most reliable and straightforward way to enable NTFS read-write support on macOS High Sierra. These programs are designed to integrate NTFS functionality into macOS seamlessly, making NTFS drives behave almost like native Mac drives, allowing for full read-write access without technical workarounds. Let's look at some of the leading third-party NTFS software options and their specific features.
Donemax NTFS for Mac is one of the best NTFS for Mac tools. It supports to quickly enable NTFS read-write support on macOS 10.13 High Sierra. It also can help mount NTFS drives, reformat drives and repair drives on Mac.
Follow the steps below to enable writable for NTFS drives on Mac:
Step 1. Download and install the macOS High Sierra NTFS driver - Donemax NTFS for Mac.
Step 2. Open Donemax NTFS for Mac, then select the NTFS drive, click on Enable Writable button. Then you can write data to NTFS drives on macOS High Sierra without any limitation.

2. Enable NTFS Write Access via Terminal (Advanced Users)
For advanced users comfortable with command-line tools, macOS High Sierra has a hidden option to enable NTFS write support via Terminal. However, be warned that this method is less stable than third-party software and can cause data corruption if used incorrectly.
Warning:
Enabling NTFS write access through Terminal involves using experimental commands that Apple hasn't fully supported. This may result in errors or data loss, especially if the drive is used heavily. It's recommended to back up any important data before proceeding.
Step-by-Step Guide:
To enable NTFS write support via Terminal:
- Open Terminal on macOS.
- Type the following command to list all available drives:
diskutil list
- Locate your NTFS drive in the list and make a note of its identifier (e.g., disk2s1).
- Use the following command to unmount the drive:
sudo umount /dev/disk2s1
- Re-mount the drive with NTFS write access:
sudo mount -o rw,auto,nobrowse -t ntfs /dev/disk2s1 /Volumes/NTFS
Limitations:
The Terminal method has several limitations:
- Stability Issues: macOS may occasionally fail to recognize the drive or save changes correctly.
- No Official Support: Apple doesn't officially support this approach, so issues may not have fixes.
- Manual Re-mounting: You may need to repeat these steps each time you reconnect the drive.
This method is only advisable for those who are comfortable troubleshooting issues on their own.
3. Alternative Approach: Reformatting the Drive
If you don't necessarily need NTFS and just want cross-compatibility, reformatting the drive to a compatible file system can be a great alternative. macOS supports file systems like ExFAT, which offers read-write capabilities on both macOS and Windows.
When to Consider This:
Consider reformatting if:
- You don't have a critical need for NTFS.
- You regularly switch between macOS and Windows and want a hassle-free file-sharing experience.
Guide to Reformatting:
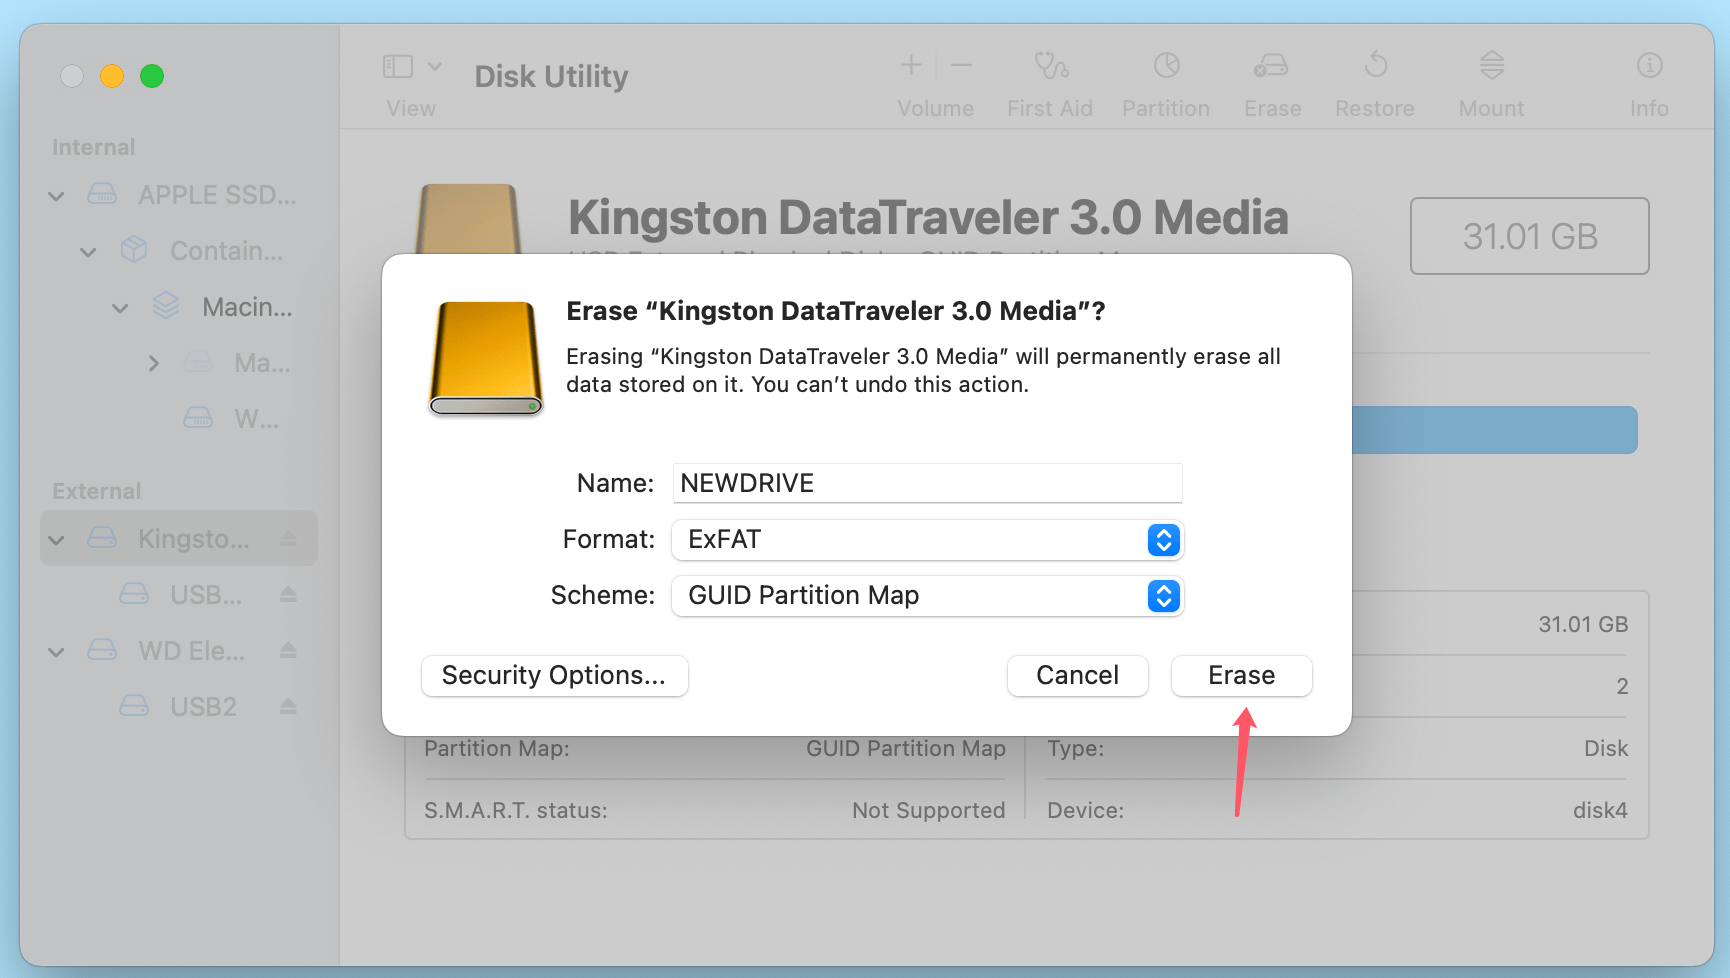
To reformat your NTFS drive to ExFAT:
- Open Disk Utility on your Mac.
- Select your NTFS drive from the list of external drives.
- Click on Erase at the top.
- Choose ExFAT as the format.
- Click Erase to reformat the drive.
![Methods for Read-Write Access]()
Caution:
Reformatting will erase all data on the drive, so make sure you back up any important files before proceeding. If you have lost data due to erasing the drive on macOS High Sierra, you can use Mac data recovery software to help you unformat the drive and get the lost data back.
Troubleshooting Common Issues
Enabling NTFS write support on macOS can occasionally result in issues. Here are some of the most common problems and ways to troubleshoot them:
Error Messages:
Some common error messages include "Access Denied" or "Drive not recognized."
Solution: Ensure your third-party software has the necessary permissions in System Preferences > Security & Privacy.
Software Conflicts:
Some antivirus software or security settings can interfere with NTFS write software.
Solution: Try disabling your antivirus temporarily or add your NTFS software to its list of allowed programs.
Access Denied Issues:
If you receive an "Access Denied" error when attempting to write, it could be due to user permissions.
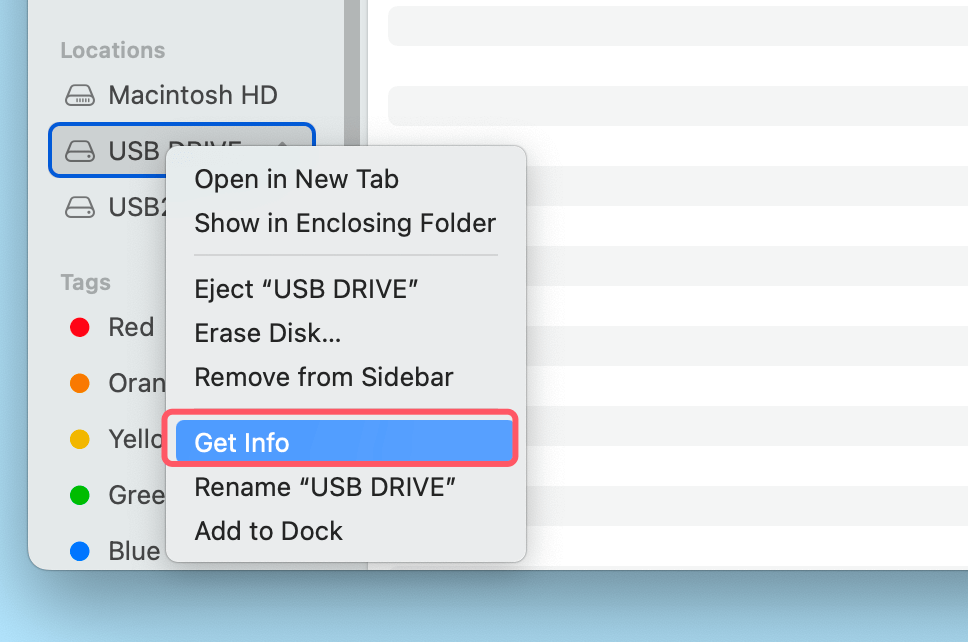
Solution: Right-click the drive in Finder, select Get Info, and ensure your user has read and write privileges.
Conclusion
While macOS High Sierra doesn't natively support NTFS write access, there are several ways to work around this limitation. For most users, third-party software offers the best balance of convenience and reliability. More advanced users can try the Terminal method, though it's riskier and less stable. Finally, for those who don't need NTFS specifically, reformatting to ExFAT can be a seamless solution.
Choose the method that best fits your needs, and enjoy the flexibility of accessing your NTFS drive from both macOS and Windows!
FAQs About Using NTFS Drive on macOS High Sierra
1. Does macOS High Sierra support NTFS file system?
macOS High Sierra can only read NTFS drives, but can't write data to them. It means macOS High Sierra only has read-only support for NTFS file system.
2. How to format an NTFS drive for macOS High Sierra?
You can use Disk Utility to format the drive to APFS, Mac OS Extended or ExFAT:
- Open Disk Utility.
- Select the NTFS drive, click Erase.
- Select a compatible file system.
- Click Erase again.
3. How to use NTFS drive on macOS High Sierra without formatting?
With NTFS for Mac tool - such as Donemax NTFS for Mac, you can read-write NTFS drive on macOS High Sierra without any limitation.
- Download and install Donemax NTFS for Mac and open it.
- Select the NTFS drive, click on Enable Writable button.
Then you can write data to NTFS drives on macOS High Sierra without any limitation.
4. What is the best NTFS driver for macOS High Sierra?
Here is the list of best 5 NTFS drivers for macOS High Sierra:
- Donemax NTFS for Mac
- Mounty for Mac
- NTFS-3G
- DoYourData NTFS for Mac
- Paragon NTFS for Mac

Donemax NTFS for Mac
An easy-to-use NTFS for Mac tool to help you enable writable for NTFS drives on Mac so that you can read-write NTFS drives on Mac without any limitation. It also can help you mount, format, repair, rename, open drive on your Mac.
Related Articles
- Jul 06, 2023External Hard Drive Not Mounting on Mac, How to Fix It?
- Nov 20, 2024Fix NTFS Drive is Read-Only on macOS Big Sur
- Dec 05, 2024SYSGeeker NTFS for Mac Review, How to Use It, Best Alternative
- Dec 17, 2024Read-Write NTFS Drive on Mac: A Complete Guide
- Jun 10, 2025Best 5 NTFS Driver for M4 (M4/M4 Pro/M4 Max) Mac
- Aug 21, 2023Why Can’t I Copy Files from My Mac to My External Hard Drive? How to Fix It?

Christina
Christina is the senior editor of Donemax software who has worked in the company for 4+ years. She mainly writes the guides and solutions about data erasure, data transferring, data recovery and disk cloning to help users get the most out of their Windows and Mac. She likes to travel, enjoy country music and play games in her spare time.

Gerhard Chou
In order to effectively solve the problems for our customers, every article and troubleshooting solution published on our website has been strictly tested and practiced. Our editors love researching and using computers and testing software, and are willing to help computer users with their problems

