Before we start: Donemax Disk Clone for Mac is a powerful Mac disk cloning application. It can clone all data including macOS High Sierra, user data, apps, settings from the Mac's internal disk to an external hard drive, creating an exact bootable copy for your Mac.
PAGE CONTENT:
With digital data becoming increasingly important, the need for effective backup solutions has never been more crucial. For macOS High Sierra users, creating a bootable clone backup is an excellent way to protect your data and ensure a quick recovery in case of system failure. This article will walk you through what a bootable clone backup is, why it's valuable, and how to create and maintain one for macOS High Sierra.
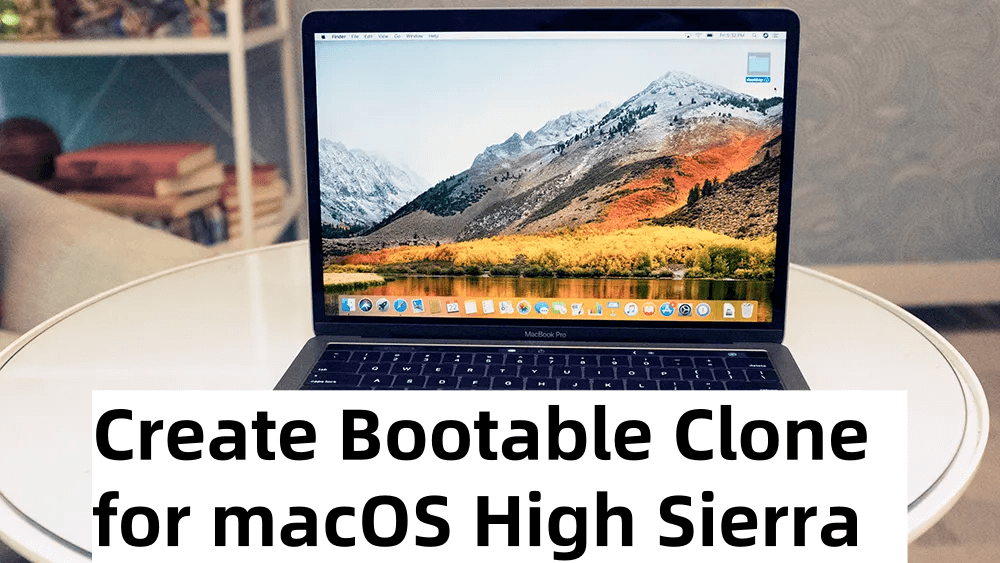
A bootable clone backup is a complete, identical copy of your Mac's internal drive that can be used to start up your system if the internal drive fails or becomes corrupted. Unlike a regular backup, which simply copies your files, a bootable clone preserves your entire operating system, applications, and files. If your Mac ever encounters a problem, you can quickly start up from this clone, saving time and reducing downtime. In this article, we'll explain each step for creating a reliable bootable clone for macOS High Sierra.
Understanding Bootable Clone Backups
What is a Bootable Clone Backup?
A bootable clone backup is an exact, bootable replica of your entire Mac's hard drive, including macOS, applications, system files, and personal data. This means that if your main drive fails, you can boot directly from the clone and continue working as if nothing happened. A bootable clone is different from regular backups because it enables a seamless, complete recovery.
Why Choose a Bootable Clone Backup for macOS High Sierra?
A bootable clone is highly beneficial in situations like:
- System Crashes: Restore your system quickly by booting from the clone and resuming your work.
- Major Updates: macOS updates can sometimes lead to unexpected issues. A bootable clone allows you to revert to a fully functional system without loss.
- Data Protection: Bootable clones offer an all-encompassing backup that includes everything, from the operating system to configuration settings.
Unlike other backup solutions that only back up data, a bootable clone backs up the entire environment, making it the ultimate safety net for your Mac.
Requirements for Creating a Bootable Clone Backup:
To create a bootable clone backup for macOS High Sierra, you'll need:
- External Drive: An external HDD or SSD with at least as much storage as your Mac's internal drive. Faster SSDs are preferred for quicker boot times and better performance.
- Compatible Software: Specialized software that supports bootable cloning, such as Donemax Disk Clone for Mac, Carbon Copy Cloner or SuperDuper!.
- macOS Compatibility: Ensure that your external drive is formatted correctly and compatible with macOS High Sierra, typically formatted as either APFS (for SSDs) or Mac OS Extended (Journaled) for HDDs.
Preparing Your Mac and External Drive
Before you create your bootable clone for macOS High Sierra, it's essential to prepare both your Mac and the external drive. Proper preparation not only ensures a smoother cloning process but also reduces the risk of errors or data loss. Here's what you need to know to get started:
Back Up Important Data:
While the bootable clone will act as a backup itself, it's always a good idea to make a separate backup of your important files before starting. This is because the cloning process involves overwriting data on the destination drive, which can lead to unintended data loss if something goes wrong.
Here are a few quick options to back up important data:
- Time Machine: macOS's built-in Time Machine backup is a quick and easy way to back up all your files. Connect an additional external drive (if available) and select it as the Time Machine backup disk. Once a full backup completes, you’ll have a complete copy of your system data.
- Cloud Storage: For critical files like documents and photos, using cloud storage (e.g., iCloud, Google Drive, or Dropbox) ensures these files are accessible even if the clone or internal drive fails.
- Manual Backup: You can also manually copy essential files to another external drive or USB stick. This quick method provides a failsafe for your most important files.
Format the External Drive:
The external drive you use for your bootable clone must be formatted in a way that's compatible with macOS High Sierra. The format ensures that your drive is ready to store all data, system files, and applications, making it bootable. Here's how to do it:
- Connect Your External Drive: Attach the external drive to your Mac via USB, Thunderbolt, or FireWire (depending on your drive's interface).
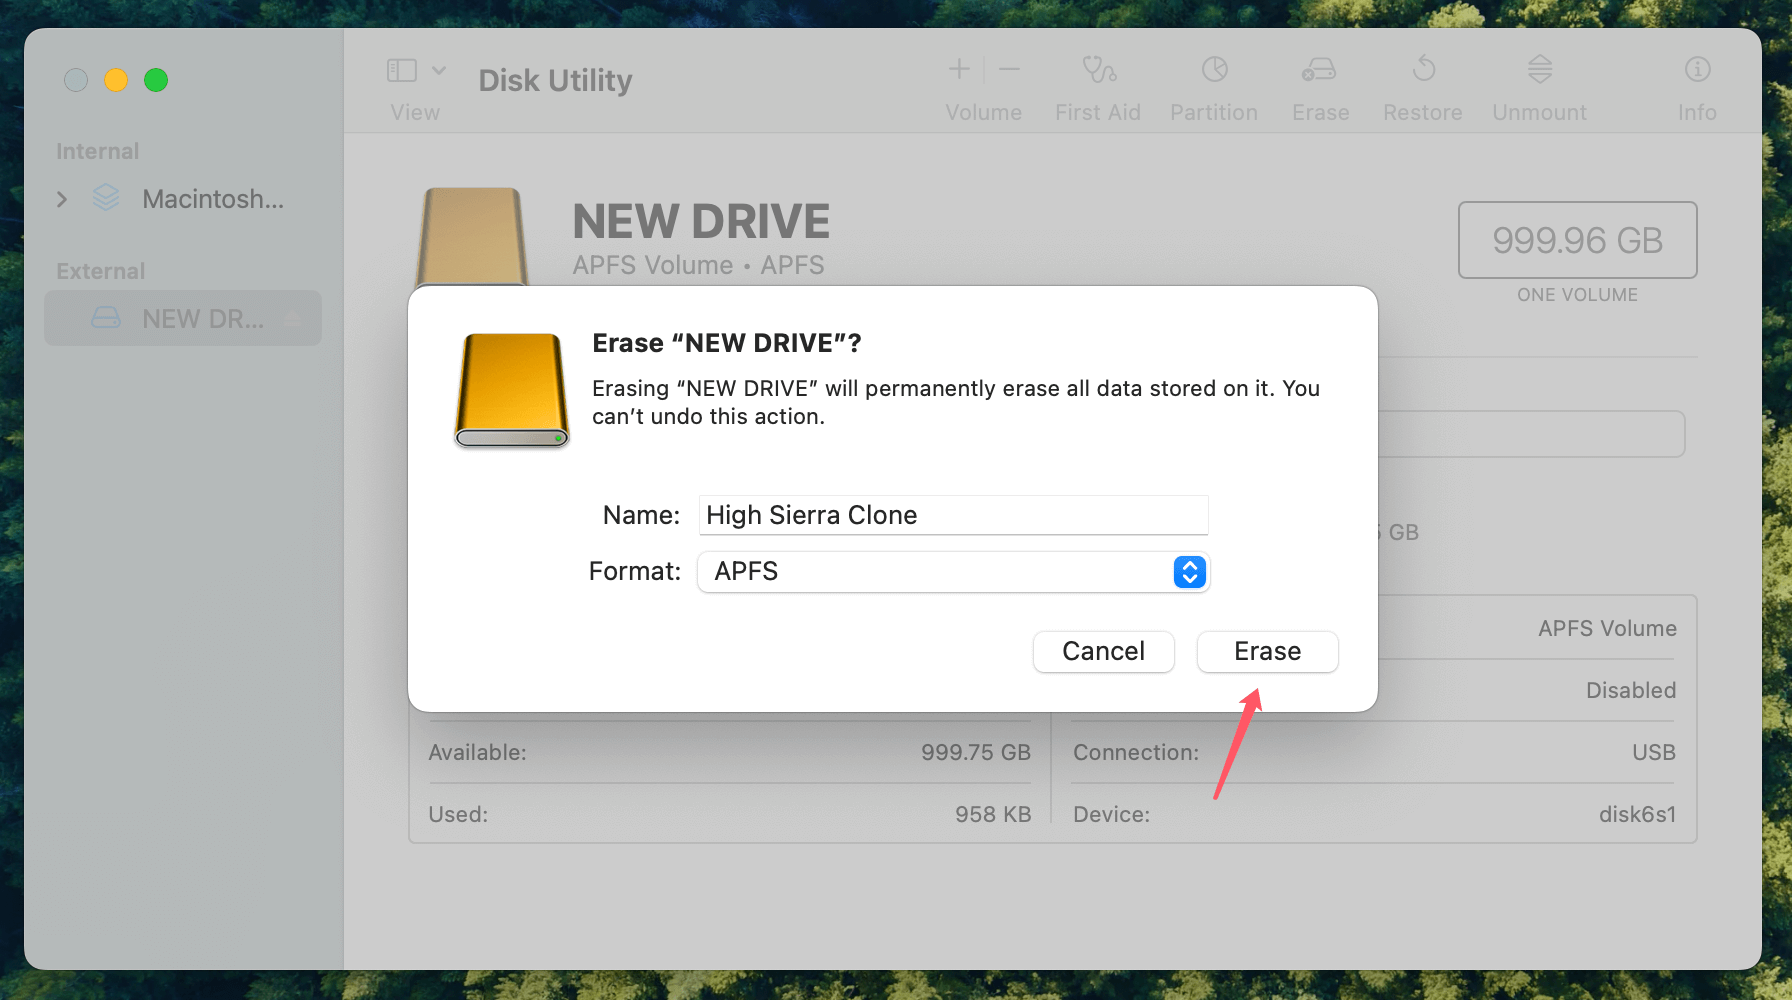
- Open Disk Utility: Go to Applications > Utilities > Disk Utility. Disk Utility is macOS's built-in tool for managing drives, formatting, and partitioning.
- Select Your Drive: In Disk Utility, locate your external drive in the left sidebar. Be sure to select the entire drive (usually listed at the top under its brand name), not just an existing partition.
- Erase and Format:
- Click the Erase button at the top of the Disk Utility window.
- For Format, choose Mac OS Extended (Journaled) for traditional HDDs or APFS for SSDs. APFS is optimized for SSDs, providing faster performance and better handling of data changes over time.
- Under Scheme, choose GUID Partition Map. This is essential, as it allows the drive to be used as a bootable device.
- Name the Drive: You can give your external drive a memorable name, like "High Sierra Clone" or "Backup Drive." A recognizable name helps avoid confusion later on when selecting drives.
![creating a reliable bootable clone for macOS High Sierra]()
Step-by-Step Guide to Creating a Bootable Clone Backup for macOS High Sierra
One of the best disk cloning applications for macOS High Sierra is Donemax Disk Clone for Mac. It can easily and securely create a full bootable clone backup for macOS High Sierra.
Step 1. Download and install Donemax Disk Clone for Mac, and connect the external hard drive to your Mac.
Step 2. Open Donemax Disk Clone for Mac, then choose OS Clone mode. Select the external hard drive as the destination drive.

Step 3. Click on Clone Now button to clone all data from the Mac's internal disk to the external hard drive and create a full bootable clone backup.

Another two popular tools for creating a bootable clone backup are Carbon Copy Cloner and SuperDuper!. Here's how to use each:
Use Carbon Copy Cloner:
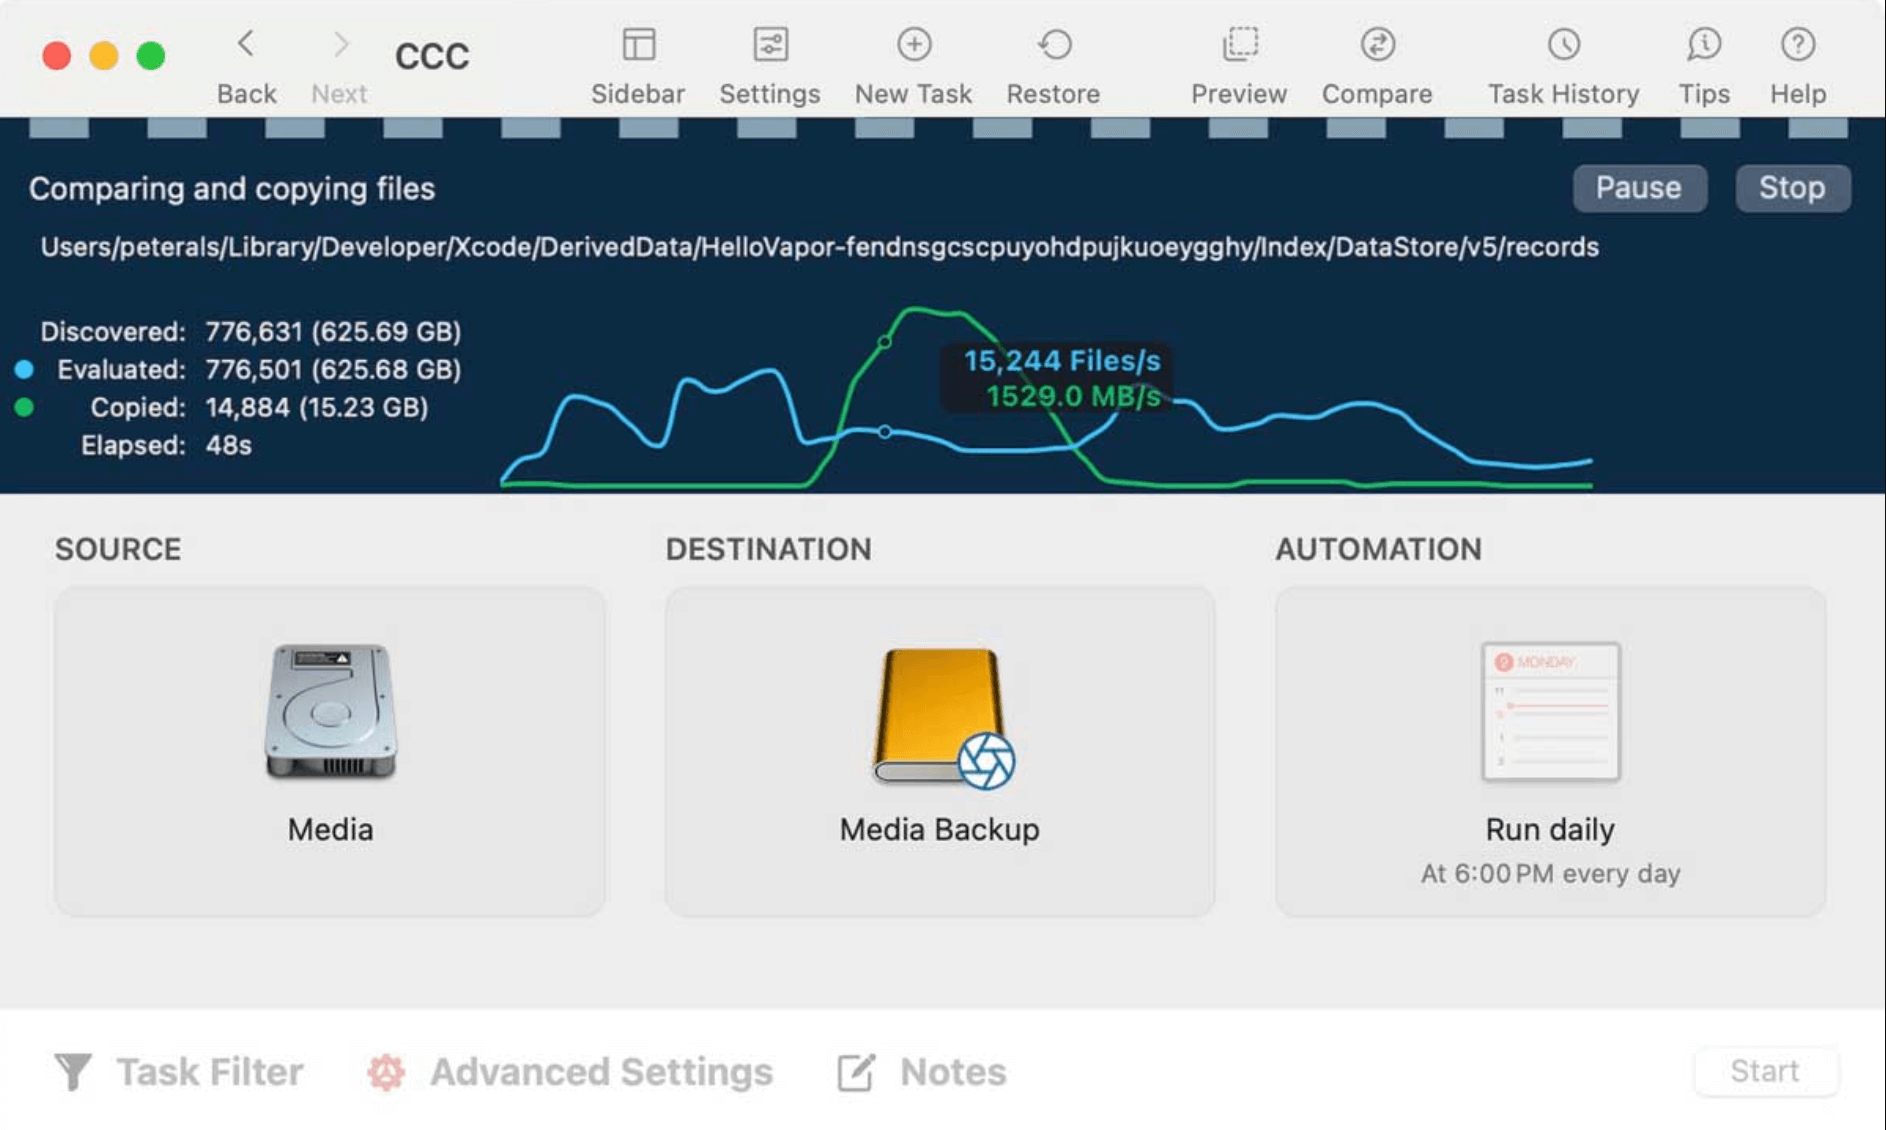
Carbon Copy Cloner (CCC) is known for its user-friendly interface and powerful features. Here's how to use it to create a bootable clone:
- Download and Install CCC: Visit the Carbon Copy Cloner website, download the application, and install it on your Mac.
- Open CCC: Launch CCC and you'll be greeted by an interface that guides you through the setup.
- Select Source and Destination Drives:
- Source: Select your Mac's internal drive as the source.
- Destination: Choose your external drive as the destination for the clone.
- Schedule Backups (Optional): CCC allows you to schedule regular backups, so your clone is always up-to-date. Setting up a weekly schedule ensures you have a recent clone ready.
![creating a reliable bootable clone for macOS High Sierra]()
- Start the Cloning Process: Click on "Clone" to begin. CCC will create an exact copy of your internal drive onto the external drive.
Use SuperDuper!
SuperDuper! is another reliable option, especially for High Sierra. Here's how to use it:
- Download and Install SuperDuper!: Download the software from the SuperDuper! website and install it.
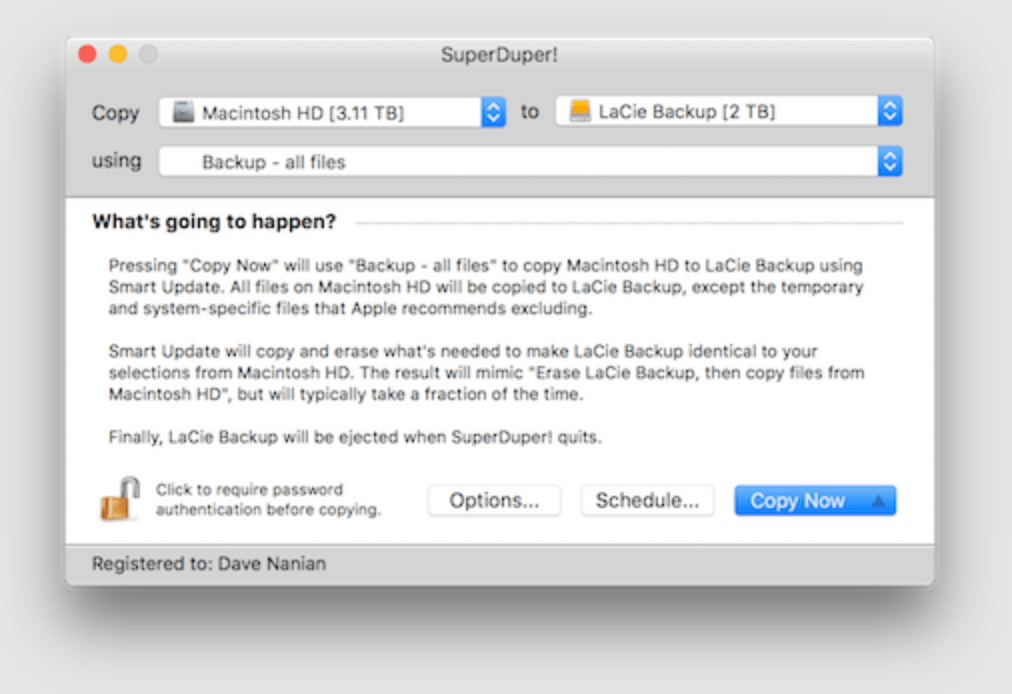
- Open SuperDuper!: Launch the application, which opens a simple interface.
- Choose Source and Destination:
- Source: Select your Mac's internal drive.
- Destination: Choose your external drive where the clone will be saved.
- Select Copy Option: Choose "Backup - all files" to ensure a complete clone.
![creating a reliable bootable clone for macOS High Sierra]()
- Start Cloning: Click "Copy Now" to start the cloning process.
SuperDuper! creates a complete, bootable clone of your system, and you can even set up smart updates, where only new or changed files are copied, saving time during updates.
Verify the Bootable Clone Backup:
After creating your clone, it's essential to test it to ensure it works correctly.
How to Test Your Bootable Clone:
- Restart Your Mac: Go to the Apple menu and select Restart.
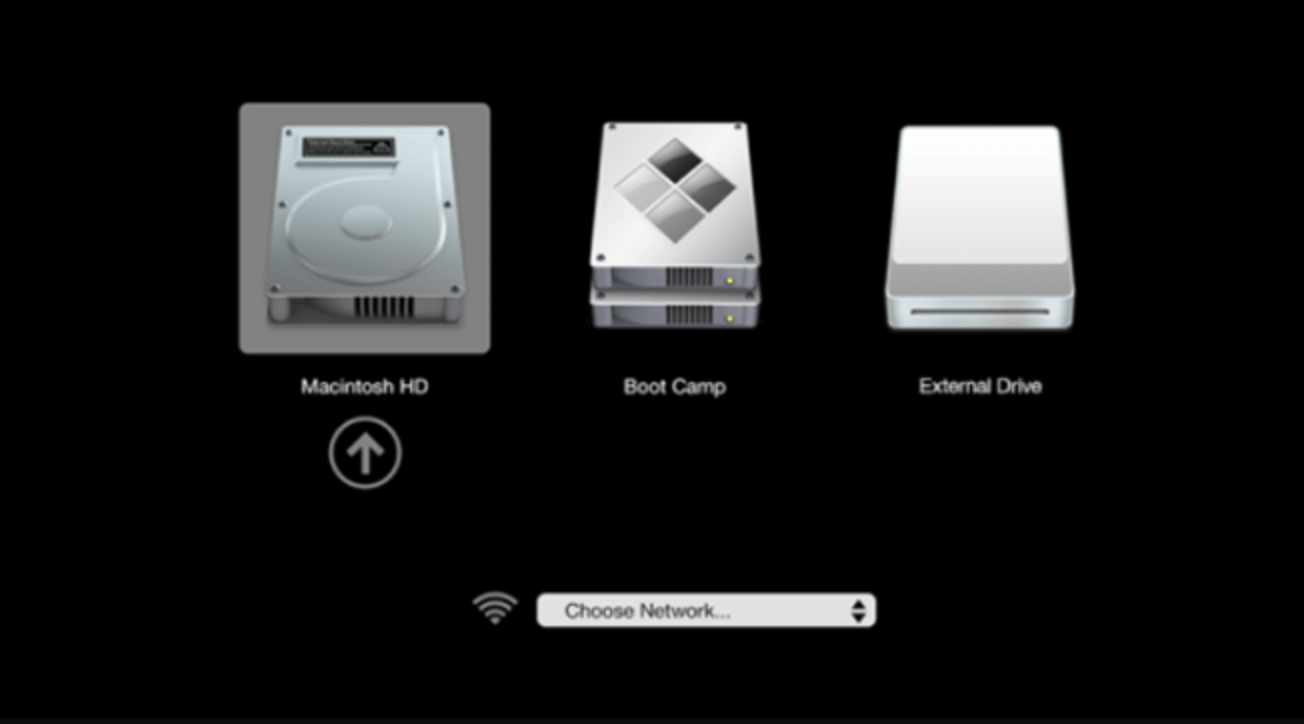
- Hold Down the Option Key: Immediately hold down the Option key on your keyboard during startup. This will bring up the Startup Manager.
- Select the External Drive: You should see your external drive listed. Choose it and press Return.
![creating a reliable bootable clone for macOS High Sierra]()
- Boot from the Clone: Your Mac should start up from the external drive. Once booted, check that everything works as expected, and that all your files and applications are present.
Testing the clone regularly (e.g., monthly) ensures that it’s functioning as expected and ready to use if needed.
Maintain and Update the Bootable Clone Backup:
To keep your bootable clone current, regular updates are necessary.
How Often to Update the Clone:
Update your clone at least once a month or after any significant changes, such as a macOS update or application installation. Frequent updates reduce the amount of data you could potentially lose in a system failure.
Setting Up Automatic Updates:
If you use Carbon Copy Cloner, it supports automated updates. Simply configure it to update your clone backup at intervals that suit your needs, like weekly or monthly.
Drive Maintenance Tips:
External drives require regular maintenance. Run disk checks every few months, especially if the drive is left unplugged for extended periods. Use Disk Utility to verify and repair the drive if needed.
Restore from a Bootable Clone Backup:
If you encounter a critical issue with your Mac, such as a failed drive or severe system corruption, restoring from your bootable clone backup can get you up and running quickly.
How to Restore from a Bootable Clone
- Connect the External Drive: Attach your bootable clone to the Mac.
- Restart and Boot into macOS Recovery Mode: Press and hold Command+R keys to boot into macOS Recovery mode.
- Restore from Clone Backup: Choose Disk Utility, then select the internal disk, click Restore. Select Restore from the clone backup.
- Verify the Restoration: After restore, restart your Mac from the internal drive and check that all files and applications are intact.
When to Use the Clone Backup:
Use the bootable clone when you encounter:
- Unrecoverable System Issues: If your Mac is unable to boot normally, using the clone can save you from prolonged downtime.
- macOS Crashes or Errors: If High Sierra becomes unstable or a macOS update causes unexpected issues, booting from the clone offers an immediate solution.
Conclusion
A bootable clone backup is one of the most comprehensive ways to protect your macOS High Sierra system, ensuring that every part of your digital life is safeguarded. Creating and maintaining a bootable clone might take a little effort, but the peace of mind it provides is well worth it. Regularly updating and testing your clone, as well as keeping it secure, ensures that it‘s always ready when you need it most.
By following the steps outlined in this article, you’ll have a reliable bootable clone backup in place, providing a quick and efficient way to restore your Mac in the event of a failure. Remember, data protection is all about preparation, and with a bootable clone, you'll be prepared for anything that comes your way.

Donemax Disk Clone for Mac
An award-winning disk cloning program to help Mac users clone HDD/SSD/external device. It also can create full bootable clone backup for Macs.
Related Articles
- Nov 19, 2024How to Create a Bootable Clone for macOS Monterey? [Step-by-step Guide]
- Jun 16, 2023Transfer macOS to SSD with or without Software
- Apr 01, 2025How to Create a Bootable Clone for MacBook Pro? [M1/M2/M3/M4 Supported]
- Nov 27, 2024Create Bootable Clone Backup for macOS Sonoma: A Complete Guide
- Mar 28, 2025Clone Mac to An SD Card: A Step-by-Step Guide
- Jun 22, 2024How to Clone Mac Data to LaCie External Hard Drive?

Maria
Maria is one of the senior writers & editors of Donemax who lives and works in Sydney, Australia. She loves PC, Mac and Internet Technology. She has 6 years of writing articles about data recovery on PC/Mac, disk cloning solution, data eraser and computer OS optimization, etc. She is also interested in testing various software and digital products.

Gerhard Chou
In order to effectively solve the problems for our customers, every article and troubleshooting solution published on our website has been strictly tested and practiced. Our editors love researching and using computers and testing software, and are willing to help computer users with their problems
