PAGE CONTENT:
When it comes to managing storage devices on your Mac, the built-in Disk Utility app often gets the job done. However, for users who need more control or want to perform advanced tasks, macOS's Terminal provides a powerful and efficient alternative. This guide delves into how to erase a drive using Terminal, offering step-by-step instructions, explaining key concepts, and highlighting precautions to ensure your data management tasks are handled safely and effectively.

Why would you want to erase a drive? There are several reasons: preparing a drive for reuse, securely wiping sensitive data, troubleshooting issues, or changing the drive's file system format for compatibility purposes. While macOS's graphical Disk Utility app can perform these tasks, it may not always offer the precision or flexibility required for advanced scenarios. This is where Terminal comes in.
Terminal is macOS's command-line interface, allowing users to execute commands directly. It is a tool that requires precision, and while its capabilities are impressive, misuse can lead to unintended consequences, such as data loss. Therefore, caution is key. This guide will walk you through erasing a drive via Terminal step by step, ensuring a smooth and successful process.
Prerequisites and Precautions
Before knowing how to erase a disk by using Terminal commands on Mac, it's crucial to prepare and take necessary precautions. Terminal commands are powerful and unforgiving. A single mistake can result in permanent data loss, especially when erasing storage devices.
- Backup Your Data: Always back up important files before proceeding. Whether it's an external drive or an internal partition, ensure that any valuable data is safely stored elsewhere. macOS's Time Machine or a third-party cloud storage solution are excellent options for this.
- Identify the Correct Drive: Misidentifying a drive can have catastrophic consequences. Double-check the target drive's name and properties before executing any commands.
- Administrator Privileges: Terminal operations often require administrator access. Make sure you're using an account with the necessary permissions, as you'll likely need to input your password during the process.
- Understand the Command: Terminal commands can seem cryptic, especially to beginners. Each part of a command serves a purpose, and misunderstanding even a small part can lead to unintended results. This guide will break down each command to ensure clarity.
Steps to Erase a Drive Using Terminal on Mac
Step 1: Open Terminal
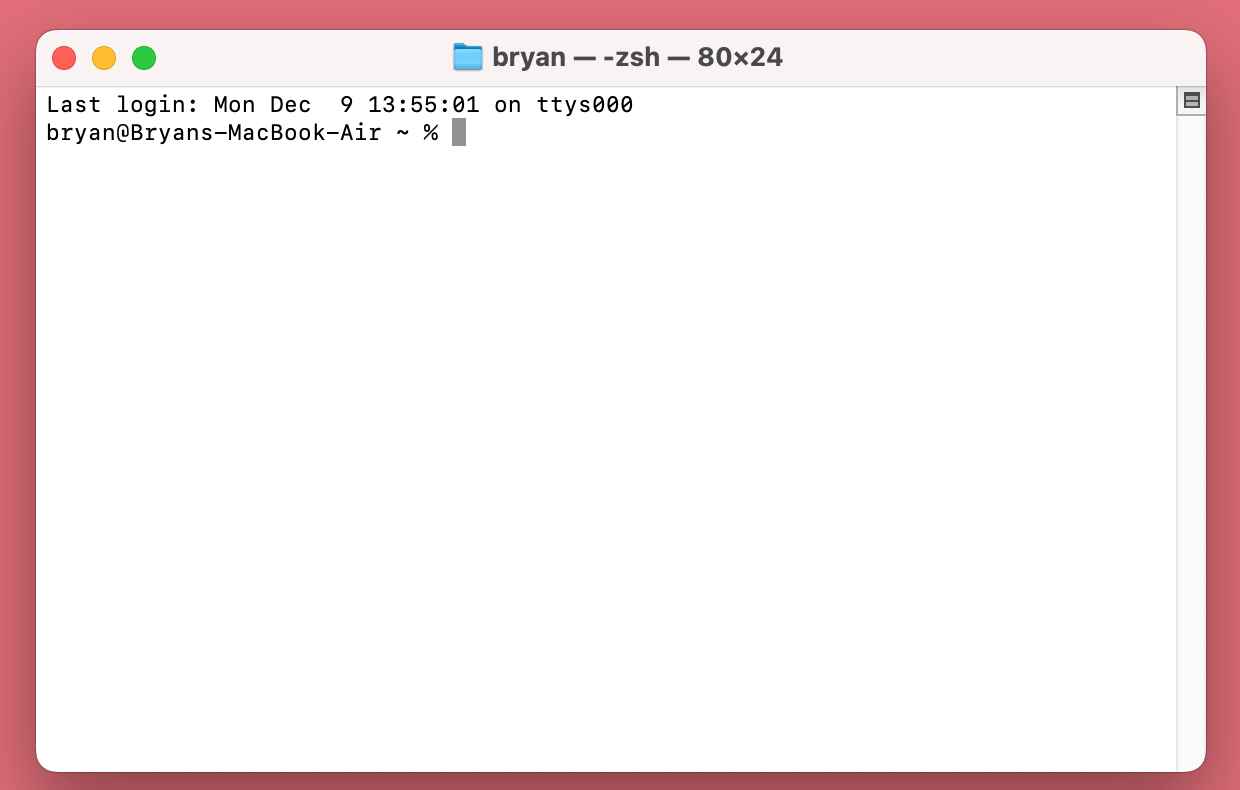
Terminal is pre-installed on macOS and can be accessed in several ways:
- Use Spotlight Search: Press Command + Space, type "Terminal," and press Enter.
- Navigate through Finder: Go to Applications > Utilities > Terminal.
- Use Launchpad: Open Launchpad, type "Terminal," and click the icon.
Once Terminal is open, you'll see a command-line interface ready for input.

Step 2: Identify the Drive to Erase
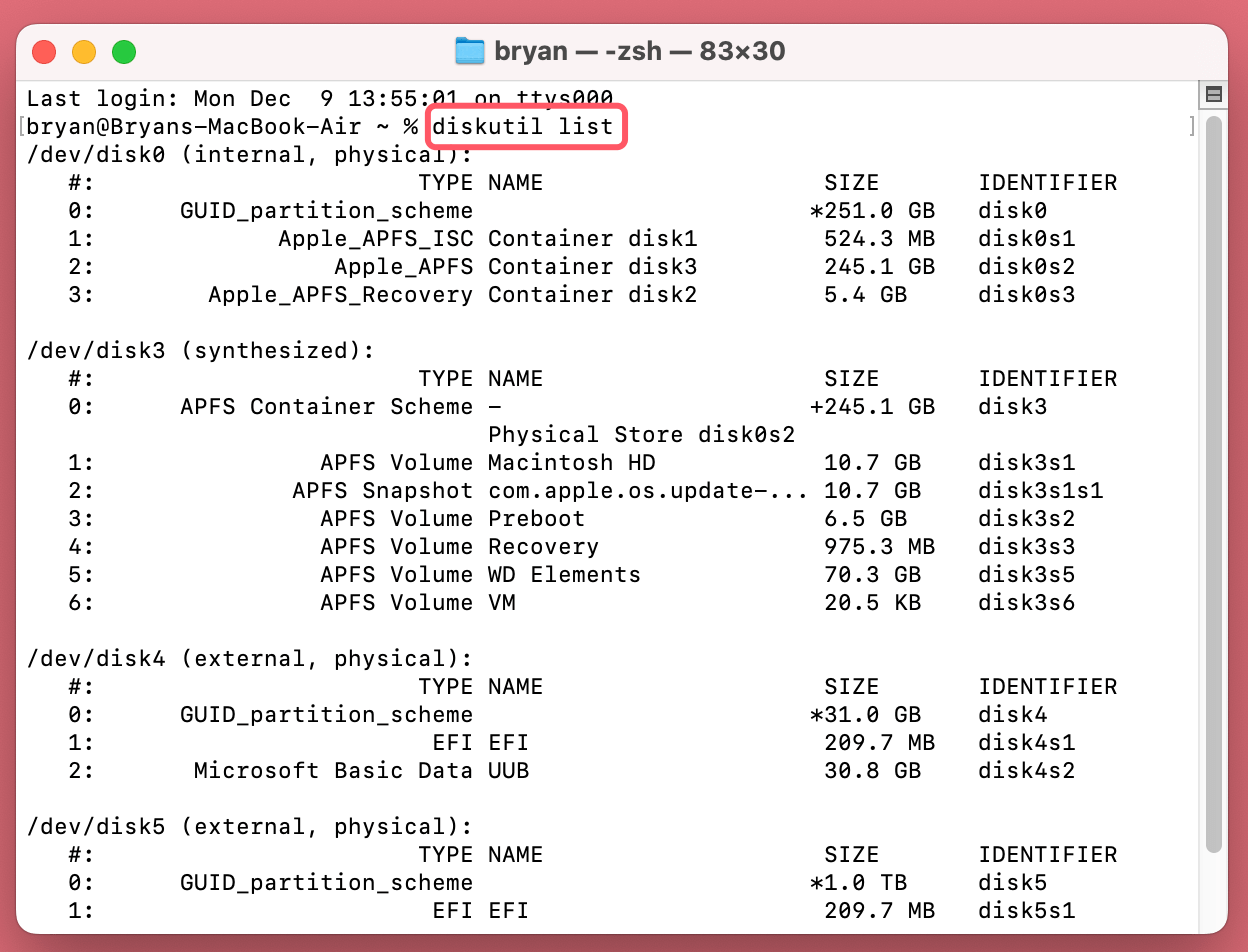
The first task is to determine which drive you intend to erase. Use the following command to list all connected drives:
diskutil list

This command displays detailed information about every connected disk, including internal drives, external USB drives, and any partitions. The output will look something like this:

In this example, disk4 represents the external drive. The IDENTIFIER column (e.g., disk4) is crucial, as you'll use it to target the drive.
Step 3: Erase the Drive
Erasing a drive using Terminal involves more than just executing a command - it requires understanding the process, being mindful of the file system format, and handling unexpected scenarios that might arise. Let's dive deeper into this critical step.
Understanding the Command Syntax:
The command to erase a disk in Terminal is straightforward yet powerful. Here's a closer look at the syntax:
diskutil eraseDisk <format> <name> <identifier>
- eraseDisk: This subcommand instructs macOS to wipe the entire disk, including all its partitions, and prepare it with a new file system.
- <format>: Defines the type of file system to be used. Examples include:
- APFS: Recommended for macOS users who want the latest features and efficiency on SSDs.
- HFS+ or Mac OS Extended: Suitable for compatibility with older macOS versions or spinning hard drives.
- ExFAT or FAT32: Ideal for cross-platform compatibility with Windows and Linux.
- <name>: The label you want to assign to the drive after formatting. Enclose it in quotes if it contains spaces. For example: "NEWDRIVE".
- <identifier>: Refers to the drive’s identifier (e.g., disk4), obtained from the output of the diskutil list command.
Practical Examples:
Let's explore a few practical use cases:
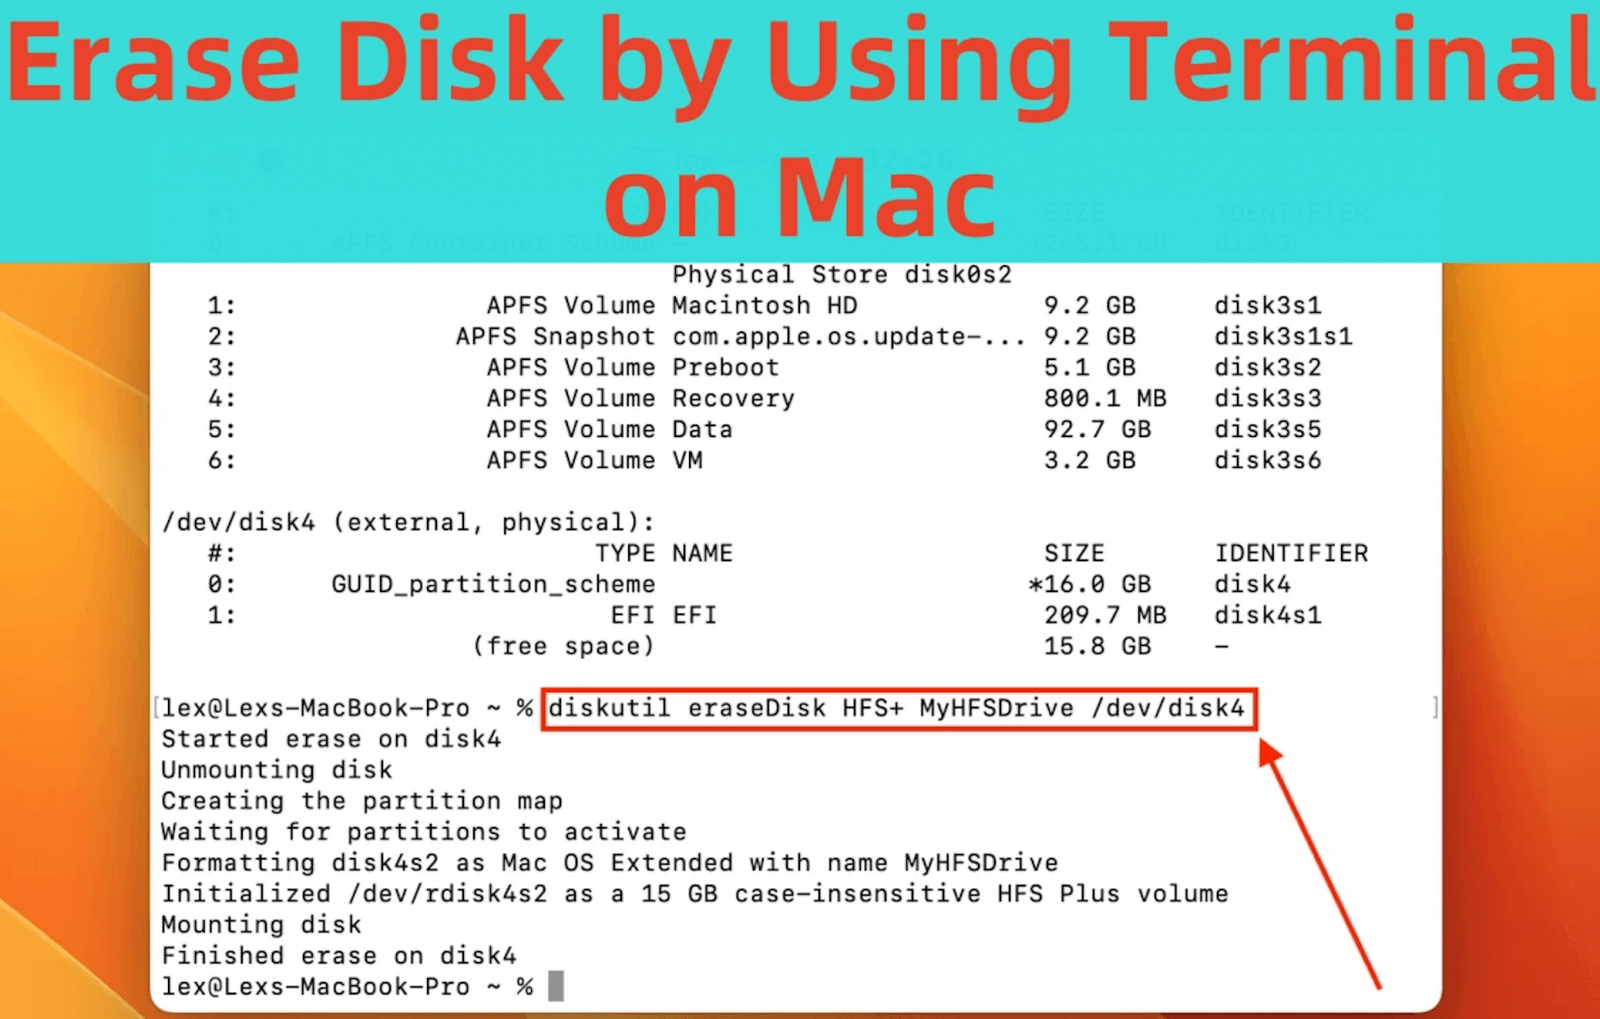
- Erasing an External Drive for macOS Use: If you have an external SSD that you intend to use exclusively with macOS, you might use the following command:
diskutil eraseDisk APFS NEWDRIVE disk4
This command reformats the drive as APFS, assigns it the name "NEWDRIVE," and targets the external disk with the identifier disk4.
![erase a drive using Terminal]()
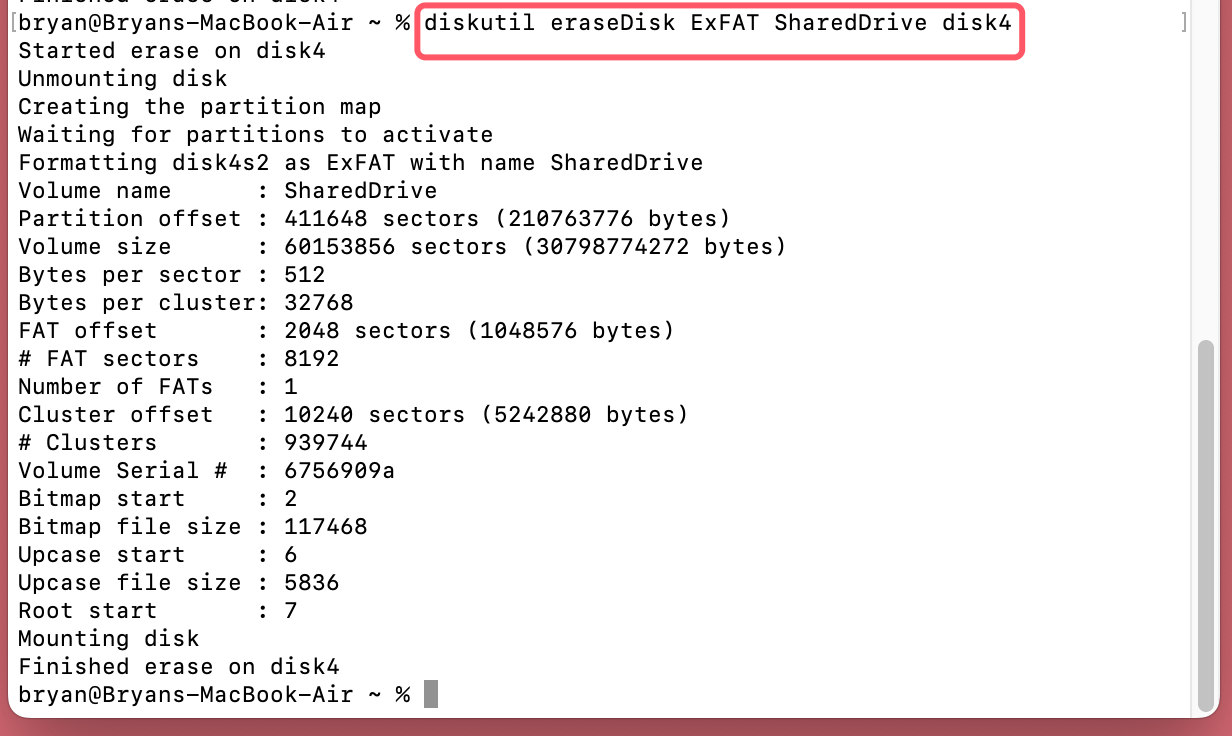
- Preparing a Drive for Cross-Platform Use: To make an external drive usable on both macOS and Windows, format it as ExFAT:
diskutil eraseDisk ExFAT SharedDrive disk4
This creates a versatile drive that avoids the file size limitations of FAT32 and can be read and written to by both operating systems.
![erase a drive using Terminal]()
- Resetting a Corrupted Drive: If a drive has become unresponsive due to file system errors, erasing it with the GUID Partition Scheme (a common partition map for macOS) might help:
diskutil eraseDisk HFS+ RescueDrive disk4
This reformats the drive with the HFS+ file system, often resolving issues related to corrupt partition maps.
![erase a drive using Terminal]()
Tips and FAQs About Erasing or Formatting Drive on Mac via Terminal
1. What Happens During the Process?
When you execute the diskutil eraseDisk command, several things occur:
- Wiping the Partition Table: The partition map (which defines the structure of the drive) is erased. This ensures no residual data or partitions interfere with the new format.
- Creating a New Partition Table: Based on the file system you specify, macOS creates a fresh partition map that matches the drive's intended use.
- Formatting the Drive: The drive is initialized with the new file system, enabling it to store and organize data according to the selected format.
2. Monitoring Progress
Once you enter the command, Terminal provides real-time updates on the process. For example, you might see messages like:
- "Unmounting disk..."
- "Creating partition map..."
- "Formatting as [file system]..."
- "Finished."
These messages confirm each stage of the erasure and formatting process. If the process completes successfully, the drive will be ready to use with the name and file system you specified.
3. Handling Errors
Sometimes, the process doesn't go as planned. Common errors and solutions include:
- Drive Is In Use: If Terminal displays a message like "Unable to unmount disk," it means the drive is currently in use by an application. Close all apps that might be accessing the drive, and retry the command. Alternatively, use the force flag:
diskutil eraseDisk APFS MyDrive disk4 force
- Corrupted Drive: If a drive is too corrupted to erase normally, you can attempt to repair it before erasing:
diskutil repairDisk disk4
After the repair, rerun the eraseDisk command.
- Incorrect Identifier: Double-check the drive identifier using the diskutil list command. Using the wrong identifier might target a different drive or result in an error.
4. Safety Tips During Erasure
- Always ensure the target drive is correct before executing the command. Mistakes cannot be undone once the erasure begins.
- Keep a backup of your data, even if you're confident you're erasing the correct drive.
- If you're unsure about a command, seek clarification before proceeding.
Erasing a drive via Terminal is a fast and efficient way to manage storage devices, but it requires precision and care. By fully understanding the process and the commands involved, you can confidently handle even the most complex storage tasks.
5. Verify the Process
After erasing the drive, it's good practice to verify that the process was successful. Use the diskutil list command again:
diskutil list
Locate the drive and ensure it appears with the correct file system and name. If everything looks correct, the drive is ready for use.
Formatting Options and Use Cases:
Choosing the right file system format depends on how you intend to use the drive. Here's an overview of common formats:
- APFS (Apple File System): Optimized for macOS, this format is ideal for SSDs and modern macOS versions. It supports advanced features like snapshots and encryption.
- HFS+ (Mac OS Extended): A traditional format used by older versions of macOS. Suitable for spinning hard drives or when compatibility with older systems is needed.
- ExFAT: A cross-platform format compatible with both macOS and Windows. Ideal for external drives used to transfer data between operating systems.
- FAT32: Another cross-platform option but with limitations, such as a maximum file size of 4GB. Use only if compatibility with very old systems is required.
6. Troubleshooting and Common Errors
Erasing a drive using Terminal is straightforward when everything goes smoothly. However, you may encounter errors. Here are some common issues and their solutions:
- "Permission Denied" Error: This usually occurs if you lack administrator privileges. Ensure you're logged in as an admin and enter your password when prompted.
- "Disk Not Found" Error: This happens when the drive identifier is incorrect. Double-check the output of diskutil list and verify the identifier.
- Drive is Unresponsive: If Terminal cannot access the drive, it may be physically damaged or corrupted. Use the following command to attempt a repair before erasing:
diskutil repairDisk <identifier>
- Formatting Fails Midway: If the erasure process halts unexpectedly, try re-running the command or restarting your Mac before attempting again.
7. Advantages of Using Terminal Over Disk Utility
Why choose Terminal when macOS provides a graphical alternative in Disk Utility? Here are some compelling reasons:
- Flexibility: Terminal supports advanced operations and precise control over drive management tasks.
- Speed: For users comfortable with command-line interfaces, Terminal is faster than navigating through graphical menus.
- Error Handling: Terminal often provides more detailed error messages, making it easier to troubleshoot issues.
- Scripting and Automation: Terminal commands can be scripted to automate repetitive tasks, saving time in the long run.
How to Recover Lost Data After Erasing a Drive Using Terminal Commands?
If you can't restore the erased files from recycle bin or backups, you can use Mac data recovery software - such as Donemax Data Recovery for Mac to help you securely and completely recover the files which are erased by Terminal commands.
Step 1. Download and install Donemax Data Recovery for Mac. It can help you recover deleted/formatted or lost files from internal drives and external drives.
Step 2. Open Donemax Data Recovery for Mac, select the erased drive to start data recovery.

Step 3. Click on Scan button to deeply scan the erased drive and find all deleted/lost files.

Step 4. When the scan is completed, you can preview all recoverable files. Then select the wanted files, click on Recover button to save them.

Conclusion
Erasing a drive using Terminal on macOS might seem intimidating at first, but with careful preparation and clear instructions, it's a straightforward and highly effective process. By following the steps outlined in this guide, you can safely and efficiently manage your drives, whether you're securely wiping sensitive data, troubleshooting storage issues, or preparing a drive for a specific use case.
Remember, the power of Terminal lies in its precision and flexibility. However, with great power comes great responsibility. Always double-check your commands, back up your data, and proceed cautiously. By mastering these skills, you'll unlock a deeper understanding of macOS and its capabilities, enabling you to tackle advanced tasks with confidence.
💡 Tips:
- Make a backup if you will erase your disk. If you are not good at using Terminal commands, you can use other Mac disk formatting tools such as Disk Utility, Donemax Data Eraser for Mac, DMmenu for Mac to help format or erase your disk.
- If you have lost data due to erasing the drive with Terminal commands, stop using the drive, immediately recover the lost files with Mac data recovery software, such as Donemax Data Recovery for Mac.
- If you want to format a drive to NTFS on Mac, just try third-party NTFS for Mac tool - Donemax NTFS for Mac. It can help you force format an external hard drive/USB drive or SD card to NTFS file system on your Mac and can grant full read-write access to any NTFS drive on your Mac.
- If you will sell or donate your external device, just use Mac disk wipe software - such as Donemax Data Eraser for Mac to securely wipe the device & permanently erase all data so that no data is recoverable.


Donemax Data Eraser for Mac
100% safe and powerful Mac data erasure program. It offers certified data erasure standards including U.S. Army AR380-19, DoD 5220.22-M ECE to help in securely and permanently erase data from Mac HDD/SSD and external storage device, making data recovery be impossible.
Related Articles
- Aug 25, 2023How to Permanently Wipe Old Intel Mac Data before Selling or Donating?
- Oct 21, 2025How to Erase USB Drive Data Permanently on Mac?
- Oct 11, 2025Things You Need to Do Before Selling Your Old Mac
- Oct 23, 2024Empty or Wipe Trash Bin on Mac: A Complete Guide to Cleaning Your Mac's Storage
- Sep 12, 2025How to Factory Reset a MacBook Air?
- Apr 15, 2025How to Wipe APFS Volume on Mac: A Complete Guide

Christina
Christina is the senior editor of Donemax software who has worked in the company for 4+ years. She mainly writes the guides and solutions about data erasure, data transferring, data recovery and disk cloning to help users get the most out of their Windows and Mac. She likes to travel, enjoy country music and play games in her spare time.

Gerhard Chou
In order to effectively solve the problems for our customers, every article and troubleshooting solution published on our website has been strictly tested and practiced. Our editors love researching and using computers and testing software, and are willing to help computer users with their problems


