Written byMariaUpdated on Mar 27, 2025
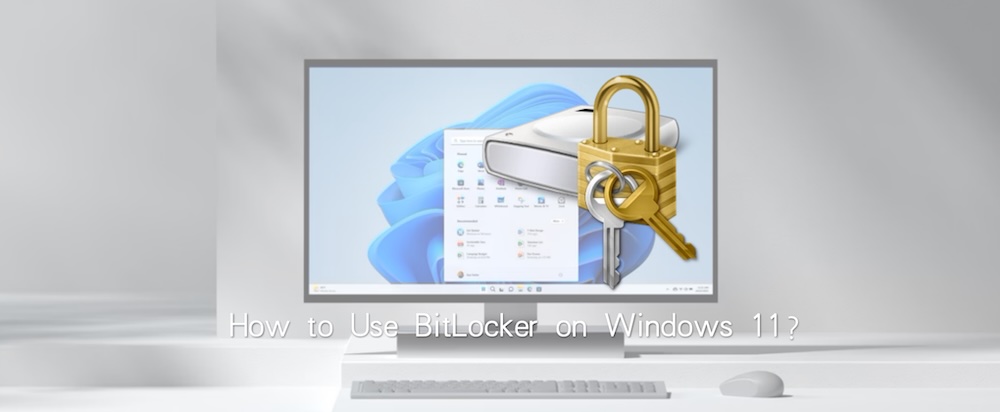
How to Use BitLocker on Windows 11?
Approved byGerhard Chou
PAGE CONTENT:
In this modern era, securing information/data is utmost priority. Whether you are storing personal files, business documents, or sensitive information, protecting your data from unauthorized access is essential. Windows 11 provides a built-in encryption tool called BitLocker, designed to safeguard your files by encrypting your entire drive.
BitLocker makes sure that without the right authentication key, unauthorized individuals cannot access your data, even if your device is lost or stolen. This article will walk you through how to use BitLocker on Windows 11, covering everything from enabling encryption to managing and recovering access.
Checking BitLocker Compatibility
Before enabling BitLocker, it's important to check whether your device supports it.
1. System Requirements for BitLocker
BitLocker is available on:
- Windows 11 Pro, Enterprise, and Education editions.
- TPM (Trusted Platform Module) 2.0 support (though there are workarounds for devices without TPM).
- A device with UEFI firmware for better security.
If you are using Windows 11 Home, BitLocker will not be available, but you can use Device Encryption as an alternative.
2. Checking If Your PC Supports BitLocker
BitLocker typically requires a Trusted Platform Module (TPM) chip, which securely stores encryption keys. To check if your device has TPM enabled:

🔖 Tips: If your device does not have a TPM, you can still enable BitLocker using a password or USB key, but additional steps are required.
- Press Win + R, type tpm.msc, and hit Enter.
![how to use BitLocker on Windows 11]()
- In the Trusted Platform Module (TPM) Management window, check if TPM is enabled.
- "The TPM is ready for use" – Your PC supports BitLocker.
- "Compatible TPM cannot be found" – Your PC may lack TPM or have it disabled in BIOS.
- Alternatively, open Control Panel, then go to System and Security and find BitLocker Drive Encryption to see if BitLocker is listed.

Enabling BitLocker on Windows 11
Enabling BitLocker ensures that your files remain protected even if your device is lost, stolen, or accessed by unauthorized users. Windows 11 makes it easy to set up encryption, but it's important to understand each step properly.
1. Preparing for BitLocker Encryption
Before enabling BitLocker, it's suggested to back up the important data first. While BitLocker is safe to use, encryption changes how data is stored on your drive. To avoid potential data loss, create a full backup of your important files.
How to back up data on Windows 11?
Clone the hard drive to back up Windows 11, along with the system data, programs, settings and all personal files.
2. Turning On BitLocker on a Drive
Once you're ready, follow these steps to enable BitLocker:
1. Open BitLocker Settings
- Click Start and search for "control panel" to open it. Then click System and security.
![how to use BitLocker on Windows 11]()
- Open BitLocker Drive Encryption.
![how to use BitLocker on Windows 11]()
- Click Turn on BitLocker after locating the drive you wish to encrypt (usually C: Drive).
![how to use BitLocker on Windows 11]()


2. Choose an Unlock Method
BitLocker requires an authentication method to decrypt the drive. Windows 11 offers several options:
- Use a Password
- Set a strong password that meets security guidelines.
- Use a combination of letters, numbers, and symbols in your passwords to avoid ones that are simple to figure out.
- Use a USB Drive as a Key
- A USB disk containing the encryption key must be plugged in order to unlock the computer.
- Use TPM with PIN
- You can increase security by requesting a PIN at startup if your device has TPM.
🪄 Recommended: Use a strong password or TPM + PIN for the best balance of security and convenience.

3. Saving Your BitLocker Recovery Key
Windows will ask where you want to save the recovery key once you choose an unlock method. If you ever lose access to your device or forget your password, this key is essential.
Recovery Key Storage Options:
- Save to your MS account (Recommended)
- The recovery key is stored in the cloud, and you can access it by logging into the Microsoft account.
- Save to a USB drive
- Keep the key on a USB device so you can access it when you need to.
- Save to a file
- Store it on another computer or external storage device.
- Print the recovery key
- Keep a hard copy in a secure location.
🔖 Important: Store your recovery key securely and do not share it with anyone.

4. Choosing an Encryption Mode
BitLocker provides two encryption modes, depending on whether you are encrypting a new or existing drive:
- Encrypt used disk space only (Faster)
- This option encrypts only the data currently stored on the drive.
- Recommended for new PCs or freshly installed Windows systems.
- Encrypt the entire drive (More Secure)
- Encrypts all files, including deleted data that could be recovered.
- Recommended for existing PCs that have been in use for a while.

Which option should you choose?
- If this is a new PC, select "Encrypt used disk space only" for faster encryption.
- If this is a used PC, choose "Encrypt the entire drive" to ensure old deleted files are also secured.
Then you need to select the Encryption mode. There are 2 options you can choose:
- New encryption mode. It's best for fixed hard drives on the PC.
- Compatible mode. It's best for the removable hard drives.

5. Starting the Encryption Process
- Click Continue and it will start to encrypt the hard drive.
![how to use BitLocker on Windows 11]()
- It would ask for a restart if you encrypt the system disk.
![how to use BitLocker on Windows 11]()
- After restarting the computer, it will start to encrypt the system disk.
![how to use BitLocker on Windows 11]()
- Wait for the encryption to complete. The time required depends on:
- Drive size – Larger drives take longer.
- Encryption method – Entire drive encryption takes more time.
- System performance – Faster CPUs and SSDs reduce encryption time.


🔖 Tip: You can continue using your PC while BitLocker encrypts the drive in the background.
Managing BitLocker Settings
Once BitLocker is enabled, you may want to manage its settings for security enhancements.
1. Checking BitLocker Status
Once the process is complete, confirm that BitLocker is working correctly.
Check Encryption Status via Control Panel
- Open BitLocker Drive Encryption from Control Panel
- Check the drive status—it should say BitLocker On.

To check if BitLocker is active via command:
- Open Command Prompt as an administrator.
- Type: manage-bde -status
- Press Enter, and you'll see encryption details. Look for Percentage Encrypted: 100%, which confirms the drive is fully encrypted.

2. Changing Unlock Methods
If you need to change the way you unlock your drive:
- Open BitLocker Drive Encryption.
- Click Change how drive is unlocked at startup.
![how to use BitLocker on Windows 11]()
- Choose a new authentication method, like PIN, insert an USB flash drive, or use password.
![how to use BitLocker on Windows 11]()

3. Suspending BitLocker
To temporarily disable BitLocker:
- Open BitLocker Drive Encryption.
- Click Suspend protection (useful when performing system updates).

Unlocking a BitLocker-Protected Drive
Once encrypted, your drive will require authentication to unlock.
1. Unlocking Methods
- Using a Password: Enter your BitLocker password at startup.
- Using a USB Key: Insert the USB drive containing the decryption key.
- Using TPM and PIN: Enter your PIN for added security.
2. Troubleshooting Unlock Issues
If you cannot unlock your drive:
- Ensure Caps Lock is off when entering your password.
- Try using the BitLocker recovery key.
- Restart your PC and attempt again.
Recovering Data with a BitLocker Recovery Key
1. What Is a BitLocker Recovery Key?
A BitLocker recovery key is a 48-digit code that allows you to access your encrypted drive if you forget your password or experience a system failure.
2. Where to Find Your Recovery Key
- Microsoft Account: Log in to Microsoft's recovery page.
![how to use BitLocker on Windows 11]()
- USB Drive: If you saved it on a USB, insert and access the file.
- Printed Copy: Check where you stored a hard copy.
- Another Device: If you saved it as a file, find it on another computer.

3. Using the Recovery Key
- When prompted to enter your BitLocker password, select More options.
- Click Enter recovery key.
- Input the 48-digit code and press Enter.

Disabling or Removing BitLocker Encryption
If you no longer need BitLocker, you can turn it off.
1. How to Turn Off BitLocker
- Go to Control Panel > System and Security > BitLocker Drive Encryption.
- Select the encrypted drive.
- Click Turn off BitLocker.
![how to use BitLocker on Windows 11]()
- Confirm and wait for decryption to finish.
![how to use BitLocker on Windows 11]()


2. When to Disable BitLocker
- If you're selling or giving away your PC.
- If performance issues arise (though rare).
- If your organization requires another encryption method.
Conclusion
BitLocker is a powerful tool for protecting sensitive data on Windows 11. It ensures that even if your device is lost or stolen, unauthorized users cannot access your files.
Key Takeaways:
- Check compatibility before enabling BitLocker.
- Enable BitLocker and choose an authentication method.
- Always save your recovery key in a safe place.
- Manage BitLocker settings to enhance security.
- Know how to unlock and recover your drive if needed.
- Turn off BitLocker only if absolutely necessary.
By following this article, you can keep your data secure and enjoy peace of mind knowing your files are well-protected. To protect important files from data loss, you can also clone your Windows 11 drive to back up the data.
Donemax Disk Clone
Donemax Disk Clone An award-winning disk cloning program to help Windows users and Mac users clone HDD/SSD/external device. It also can create full bootable clone backup for Windows PCs and Macs.
Related Articles
- Mar 25, 2025How to Restart or Force Restart A Windows PC?
- Dec 26, 2024Format a WD External Hard Drive for Both Windows and macOS
- Jan 14, 2025Convert HFS+ (Mac OS Extended) to APFS on Mac
- Jan 05, 2024How to Verify the Mac's Chip: Apple Silicon M Series, T2 or Intel Chip?
- Mar 26, 2025How to Repair a Disk with PowerShell?
- Jan 17, 2025How to Format an SD Card to ExFAT or FAT32 on Mac?

Contributing Writer
Maria
Maria is one of the senior writers & editors of Donemax who lives and works in Sydney, Australia. She loves PC, Mac and Internet Technology. She has 6 years of writing articles about data recovery on PC/Mac, disk cloning solution, data eraser and computer OS optimization, etc. She is also interested in testing various software and digital products.

Editor in chief
Gerhard Chou
In order to effectively solve the problems for our customers, every article and troubleshooting solution published on our website has been strictly tested and practiced. Our editors love researching and using computers and testing software, and are willing to help computer users with their problems