Written byMariaUpdated on Jun 26, 2024
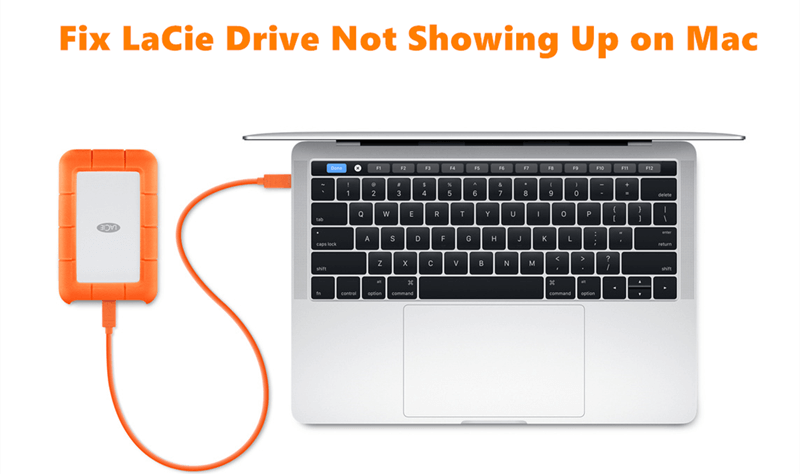
Fix LaCie External Hard Drive Not Showing Up on Mac
Approved byGerhard Chou
PAGE CONTENT:
External hard drives are important for backing up important files and adding more space to your computer. LaCie is a well-known name for these drives. If your LaCie external hard drive doesn't show up on your Mac, it can be annoying and scary, as it could stop you from working and cause you to lose data. Luckily, you can fix this problem by following several fixing steps.
This guide will show you basic troubleshooting steps, system and software fixes, and advanced ways to get your Mac to notice your LaCie external hard drive. That will keep your data safe and accessible.
Basic Troubleshooting: The First Line of Defense
Before we get into more detailed fixes, let's look at common problems that can slow your connection.
- Check the connection: Make sure the cable is tightly connected to both the LaCie drive and the USB port on your Mac. A simple reason could be a link that isn't tight.
- Cable Quandary: There are times when the wires themselves are broken. If that doesn't fix the problem, try a different connection.
- Power Play: For LaCie desktop drives, ensure the power adapter is firmly connected to the drive and an outlet that works.
- Mac Reboot Magic: A simple restart of your Mac can often fix any short-term problems stopping the drive from being seen.
Fix LaCie External Hard Drive Not Showing Up on Mac
1. Use Safe Mode
A safe state is a diagnostic state that only loads the drivers and services your Mac needs to run the operating system when it starts. It's a good idea to start up in Safe Mode so that third-party software or drivers that don't work with the drive don't stop it from talking to itself.
2. Test in another computer
You can connect the drive to a different computer, like a Windows PC, and see if the operating system recognizes it. It will help you determine whether the problem is with your Mac or the drive.
3. Set Up Finder Settings
If everything is okay, you can use Finder to find your LaCie and other linked devices. If your device isn't in Finder, you may need to change how it works.
You can perform this fix in three easy steps:
- Open a Finder, click Finder on Apple menu, choose Settings.
- Open Finder Settings, click General, select External disks.
- Click Sidebar, select External disks.
![Set Up Finder Settings]()

4. Check if the Device Is Mounted
If you have a cable connecting your LaCie external HDD or SSD to your Mac, you can be sure it is mounted properly. But that doesn't always happen.
Before you put your device correctly, ensure you've plugged the cables correctly by checking the physical connections. After that, you should go to your Disk Utility:
- To get to Disk Utility, go to Finder > Applications > Utilities.
- Pick out your LaCie drive.
- Click Mount.
![Check if the Device Is Mounted]()

If your LaCie hard drive wasn't properly mounted, you should be able to find it in Finder after you leave Disk Utility.
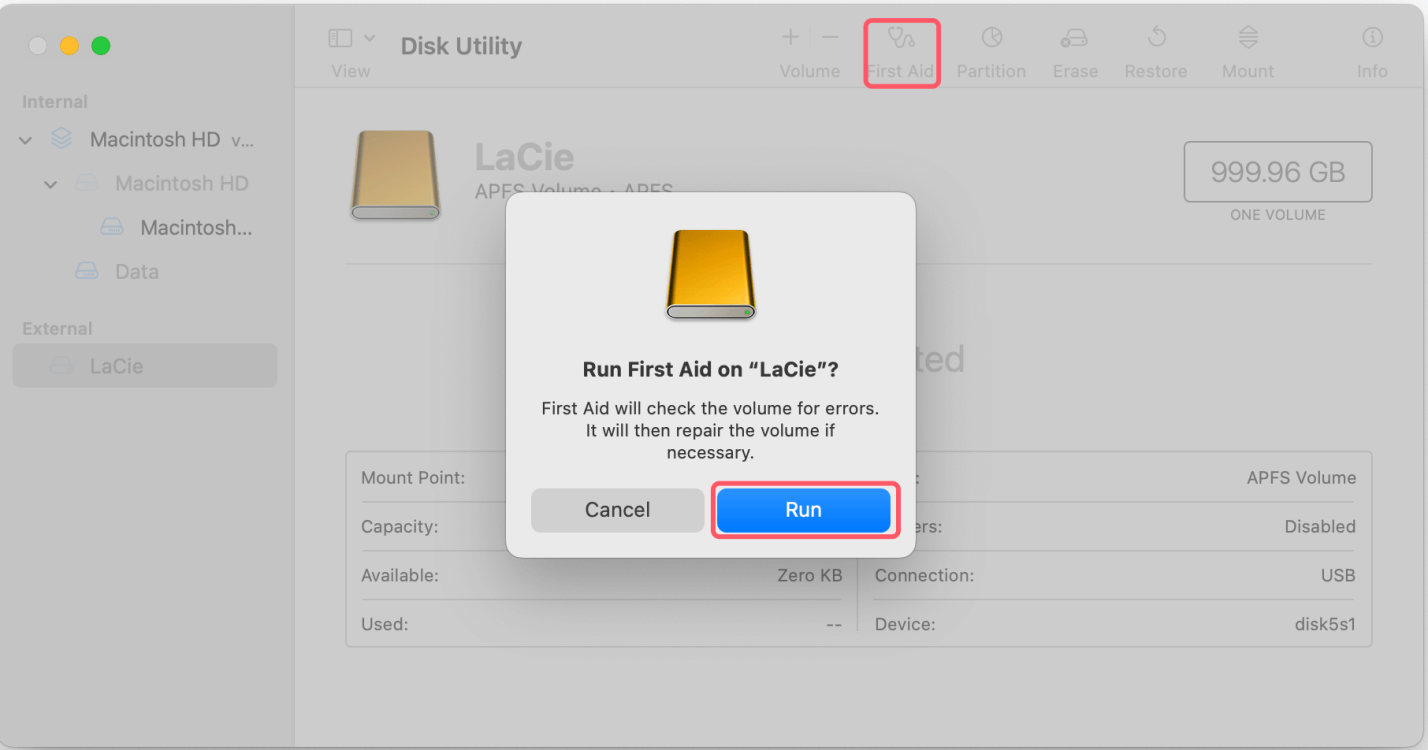
5. Run First Aid to Fix LaCie Drive Not Showing Up
The most common reasons for "LaCie hard drive not recognized on Mac" are poor mounting or incorrect formatting. However, you could also have a disk with corrupted or bad sectors. In this case, running First Aid will help.
- To get to Disk Utility, go to Finder > Applications > Utilities.
- Open up your LaCie and click on the First Aid tab.
- Click Run.
![Run First Aid]()
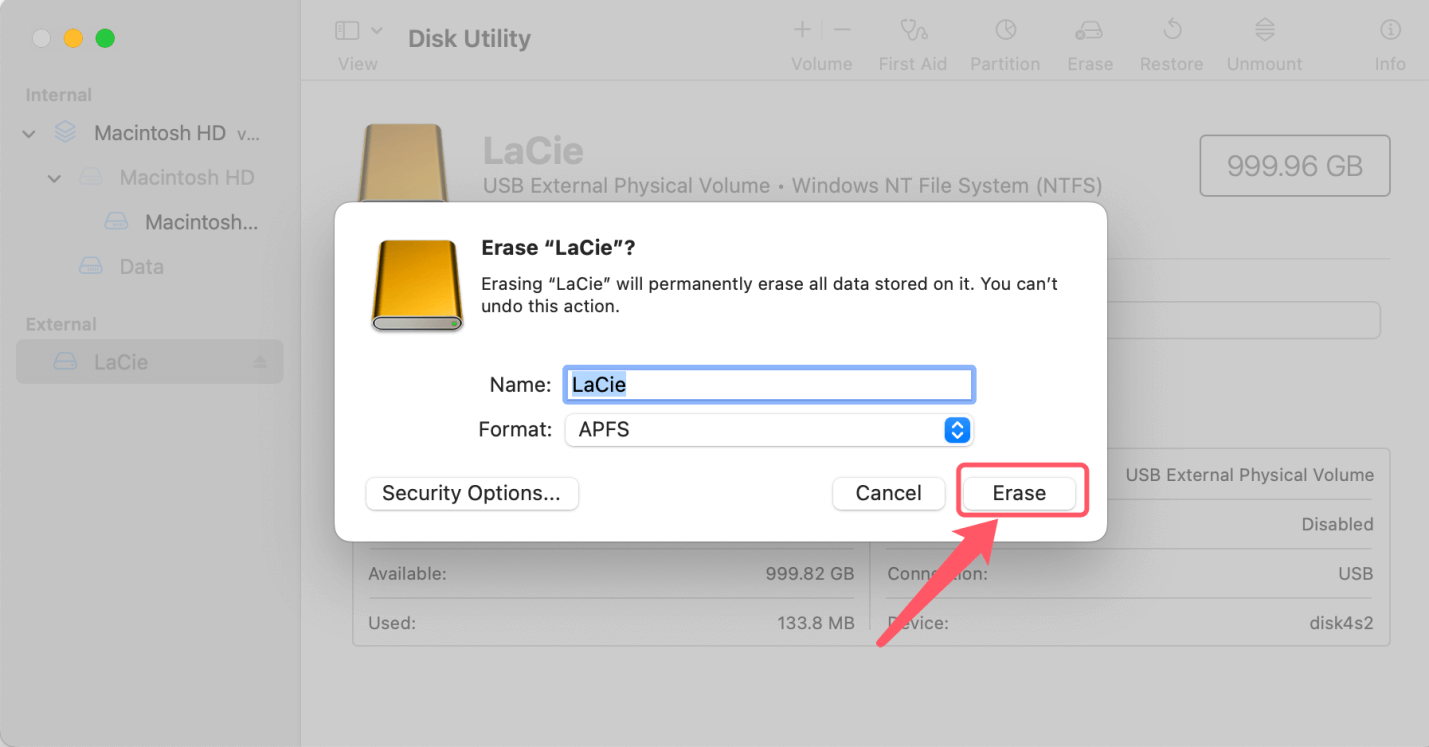
6. Format the Drive to the Right Mac File System
Your device may have the NTFS format, a file system only Windows can use. Macs don't support this file system, so you might have trouble seeing your LaCie portable drive on your Mac.
After making a copy of the info, here's how to format the LaCie hard drive:
- To get to Disk Utility, go to Finder > Applications > Utilities.
- Pick out your LaCie USB drive and click on "Info."
- As you look at the File System, ensure the hard drive has a Windows (NTFS) format.
![Format the Drive to the Right Mac File System]()
- Going back to Disk Utility, click Erase.
- Choose a file that works with Macs, like APFS, HFS+, FAT, or exFAT, and then click "Erase."
![Choose a file that works with Macs]()
- Allow your Mac a few minutes to finish setting up your LaCie hard drive. The LaCie drive should be in a format that your Mac can read during the process.

Note: If you have lost data due to erasing the LaCie external hard drive, you can use data recovery software - such as Donemax Data Recovery for Mac to help you get all lost data back.
Step 1. Download and install Donemax Data Recovery for Mac on your Mac and connect the LaCie external hard drive to the Mac.
Step 2. Select the LaCie external hard drive and click on Scan button.

Step 3. Deeply scan the LaCie external hard drive and find all recoverable files.

Step 4. Once the scan is completed, you can select the wanted files and save them by clicking on Recover button.

7. Reset NVRAM on Your Mac
Restarting your NVRAM might help fix the LaCie hard drive that won't appear on your Mac. NVRAM, "non-volatile random-access memory," keeps data even when the memory chips aren't getting power. That can sometimes lead to bugs.
If you want to clear your NVRAM, you'll need to:
- Shut down your Mac.
- For about 20 seconds, hold down the Option, Command, P, and R keys.
![Reset NVRAM on Your Mac]()
- When you hear the starting chime, let go of the keys.
- By following these steps, you can fix the problem of your LaCie not appearing on your Mac.
- Hardware and software checks and updates.
- Select "About This Mac" from the Apple menu.
- To see if there are any changes, click the "Software Update" button. If any are available, install them by following the steps on the screen.

8. Looking for and Updating LaCie Drive Drivers or Firmware
- Go to the main website for LaCie support.
- Find and download the most up-to-date drivers or firmware for your LaCie drive type.
- To install the new drivers or software, follow LaCie's steps.
If these advanced steps don't work, you can fix the problem and get your LaCie drive to appear on your Mac. But if the problem continues, it might be best to talk to a professional or call LaCie's customer service for more help.
Fix NTFS LaCie External Hard Drive Not Showing Up on Mac without Formatting
NTFS is not compatible with macOS so NTFS drive may not mount on your Mac. If you want to use a NTFS LaCie external hard drive on your Mac, you can use NTFS for Mac tool.
Step 1. Download and install the best NTFS for Mac - Donemax NTFS for Mac.
Step 2. Connect LaCie external hard drive to the Mac, then open Donemax NTFS for Mac, select the LaCie external hard drive and click on Mount button.

Step 3. Click on Enable Writable button to allow your Mac to read-write NTFS drives without any limitation.

Conclusion:
It can be frustrating when your LaCie portable hard drive doesn't appear on your Mac, but most problems can be fixed by following the steps. Check the link first with simple methods, then look into the macOS settings and software updates, and if that doesn't work, use more advanced methods.
By backing up your data regularly and ejecting the drive correctly, you can avoid problems in the future. By doing these steps, you can get back into your LaCie drive and ensure your data stays safe and easy to access. That will keep you productive and cut down on downtime.
Related Articles
- Mar 13, 2025How to Fix Seagate Backup Plus Not Showing Up on Windows? [9 Fixes]
- Mar 01, 2025How to Format an External Hard Drive Using CMD (Command Prompt)?
- Aug 06, 2024Fix External Hard Drive Not Working on Mac Without Losing Data
- Jul 04, 2024Cannot Format Seagate External Hard Drive on Mac? Fix It Now
- Mar 25, 2024(Solved) Hard Drive Shows As Untitled on Mac and Not Showing Up
- Mar 05, 2024How to Format Samsung Portable SSD X5 on Windows or Mac?

Contributing Writer
Maria
Maria is one of the senior writers & editors of Donemax who lives and works in Sydney, Australia. She loves PC, Mac and Internet Technology. She has 6 years of writing articles about data recovery on PC/Mac, disk cloning solution, data eraser and computer OS optimization, etc. She is also interested in testing various software and digital products.

Editor in chief
Gerhard Chou
In order to effectively solve the problems for our customers, every article and troubleshooting solution published on our website has been strictly tested and practiced. Our editors love researching and using computers and testing software, and are willing to help computer users with their problems