Written byCharlesUpdated on Mar 31, 2025
How to Fix The Disk Macintosh HD Can't Be Unlocked?
Approved byGerhard Chou
PAGE CONTENT:
If you're a Mac user and encounter the message "The disk Macintosh HD can't be unlocked," you might be unable to access your files, boot into macOS, or perform essential disk operations. This issue often arises in scenarios like trying to reinstall macOS, using macOS Recovery Mode, or attempting to repair disk errors.
Understanding why this happens and how to fix it can save you from data loss or a complete system failure. In this guide, we’ll explore why the Macintosh HD disk may not unlock and step-by-step solutions to resolve the issue.
Understand Why Macintosh HD Can't Be Unlocked
The Macintosh HD disk is the primary storage volume on a Mac. It contains the operating system and user files. If it cannot be unlocked, the system cannot access the drive properly. Several reasons can cause this issue:
1. FileVault Encryption
FileVault is a macOS feature that encrypts the entire disk for security. If FileVault is enabled, the disk requires authentication before it can be unlocked.
Signs of FileVault-related unlocking issues:
- You forgot the password or recovery key.
- macOS fails to authenticate your login credentials.
2. Disk Corruption or File System Errors
A damaged APFS or HFS+ file system can prevent the disk from unlocking. This may happen due to:
- Improper shutdowns.
- macOS system crashes.
- Bad sectors or hardware issues.
3. Incorrect Permissions or User Account Issues
The system might not unlock the disk if the user account lacks the required rights.
Symptoms of a permissions-related issue:
- The disk appears as "Read-Only" in Disk Utility.
- The system asks for administrator credentials but fails to unlock.
4. macOS Recovery Mode Issues
Some users encounter the unlocking issue when trying to access the macOS Recovery Mode. This can occur due to:
- Corrupt recovery partition.
- System integrity protection (SIP) restrictions.
Basic Fixes to Unlock Macintosh HD
Before moving to advanced solutions, try these simple fixes.
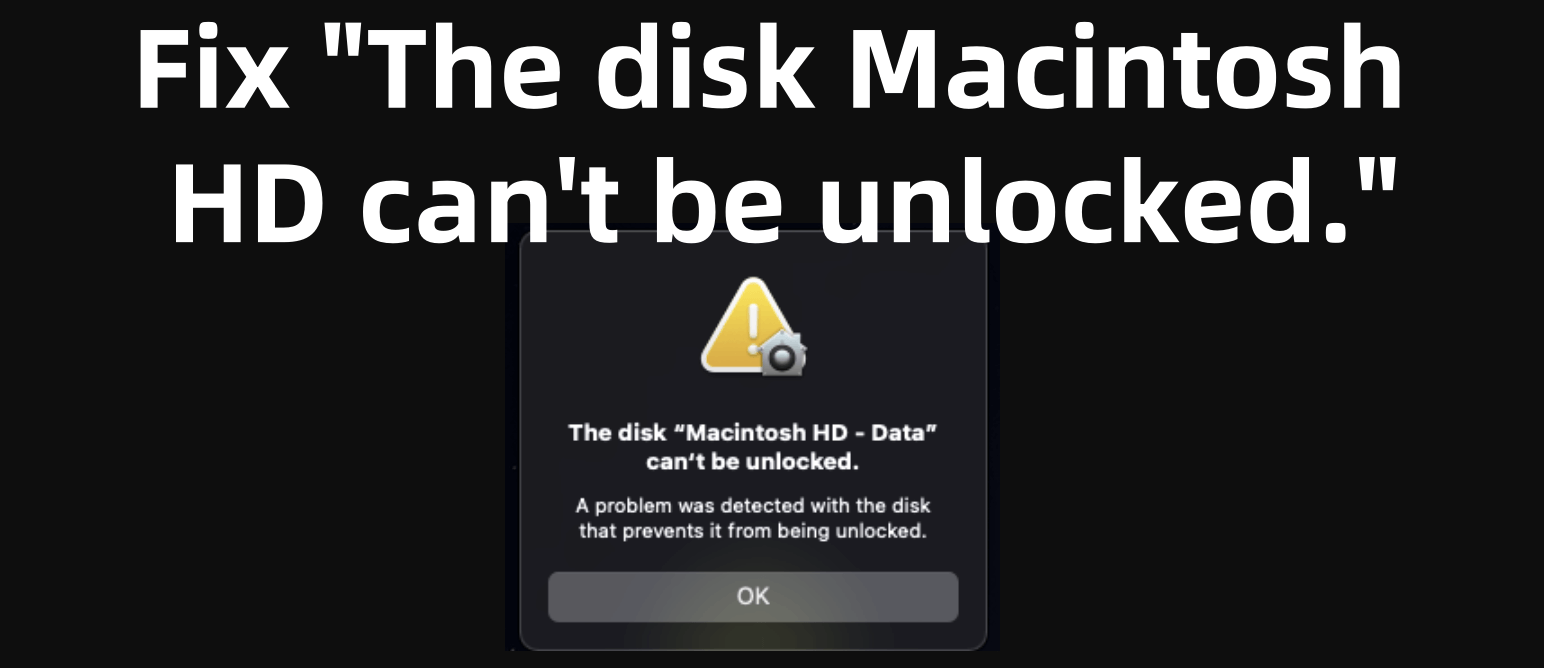
1. Restart Your Mac and Try Again
A simple restart may resolve minor glitches preventing the disk from unlocking.
Steps:
- Choose Restart from the Apple menu.
![Fix The Disk Macintosh HD Can not Be Unlocked]()
- Try logging in and accessing the disk.
If the problem persists, proceed with the next steps.
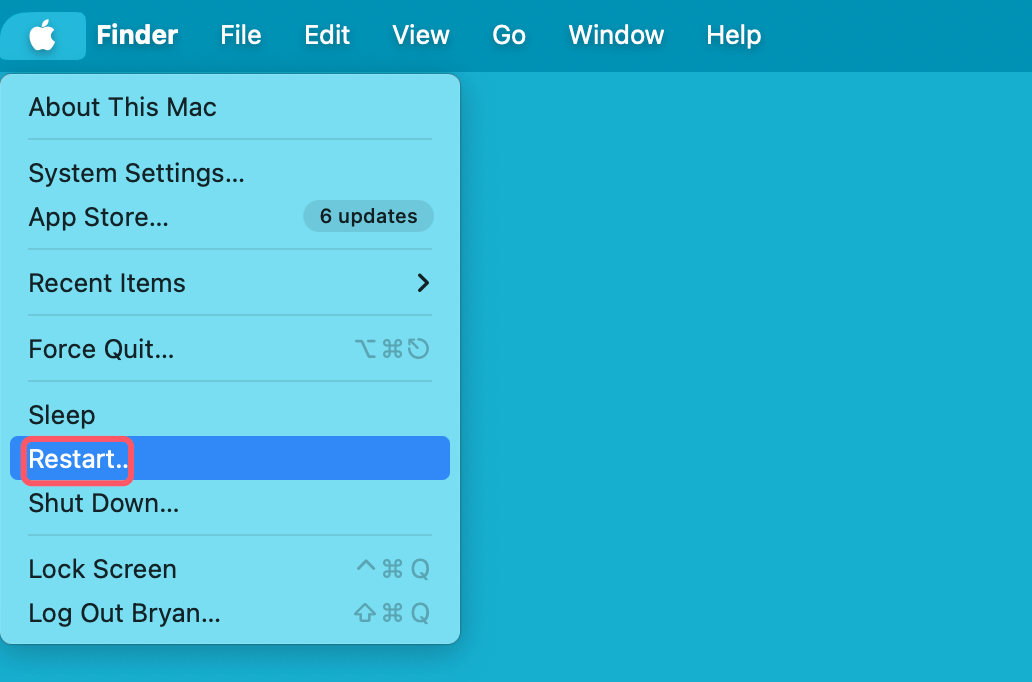
2. Check FileVault Encryption
If FileVault is enabled, you need to log in with the correct credentials.
Steps to Check FileVault Status:
- Go to System Settings > Privacy & Security > FileVault.
![Fix The Disk Macintosh HD Can not Be Unlocked]()
- If FileVault is enabled, enter your password to unlock the disk.
- If you forgot the password, use the FileVault recovery key.
If FileVault is disabled, but you still can't unlock the disk, proceed to the next step.
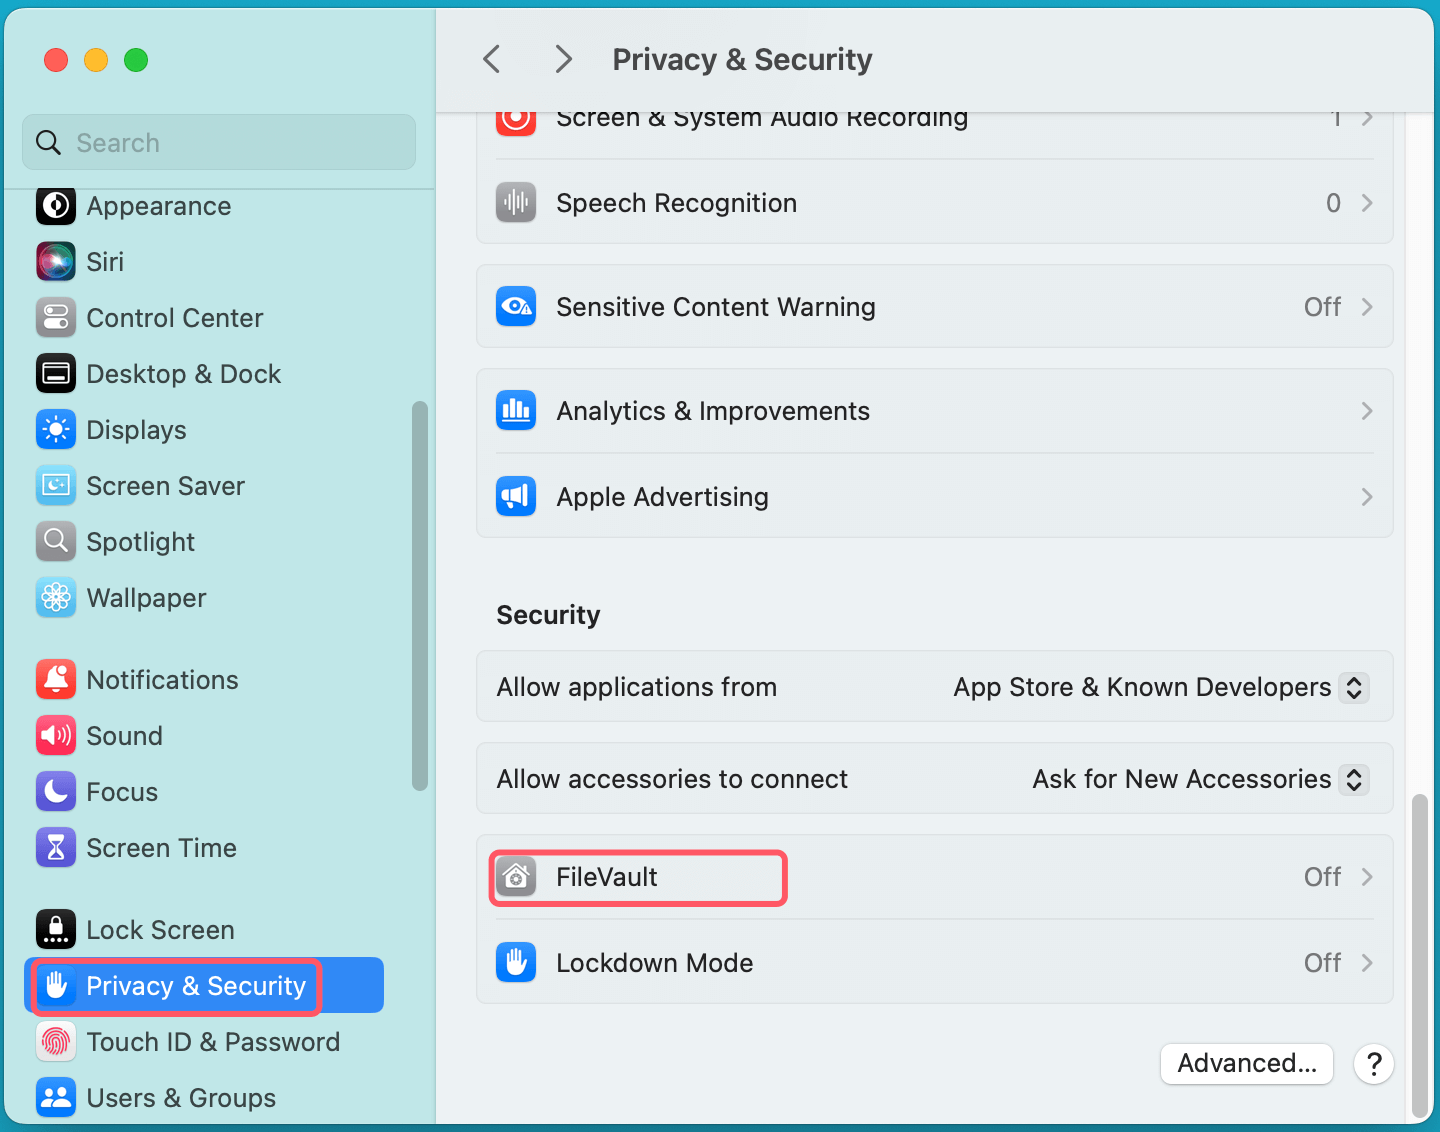
3. Try Unlocking via Disk Utility
Disk Utility is a built-in macOS tool that allows you to unlock, repair, and manage disks.
Steps to Unlock the Disk:
- Boot into macOS Recovery Mode:
- o For Intel-based Mac: Hold down Command + R after restarting your Mac until the Apple logo shows.
- o For Apple silicon Mac: Restart the Mac, press and hold Power button until it boots into macOS Recovery mode. Select Options, click Continue.
- Click Disk Utility and select Macintosh HD.
- Click Mount and enter your password if prompted.
![Fix The Disk Macintosh HD Can not Be Unlocked]()
If the disk remains locked, proceed with advanced fixes.
Advanced Solutions to Fix the Issue "The disk Macintosh HD can't be unlocked"
If basic troubleshooting doesn't work, try these advanced methods.
Solution 1. Use Terminal to Unlock the Macintosh HD Disk
If Disk Utility fails to unlock Macintosh HD, you can use Terminal to force the disk to unlock manually. Terminal provides more control over the disk and allows you to bypass some graphical interface limitations.
Why Use Terminal?
- Disk Utility may fail due to file system corruption or authentication issues.
- Terminal allows you to manually unlock encrypted disks (FileVault-protected).
- You can run detailed disk diagnostics and execute powerful commands to fix the issue.
1. Unlock the Disk with diskutil
Step 1: Boot into macOS Recovery Mode
- After restarting your Mac, hit Command + R right away to bring up the Apple logo. For Apple silicon Mac, press and hold Power button until you see Loading startup options, choose Options, click Continue.
- Select Disk Utility from the macOS Utilities menu.
- If Macintosh HD is listed as "locked" or "unmounted," close Disk Utility and open Terminal from the Utilities menu.
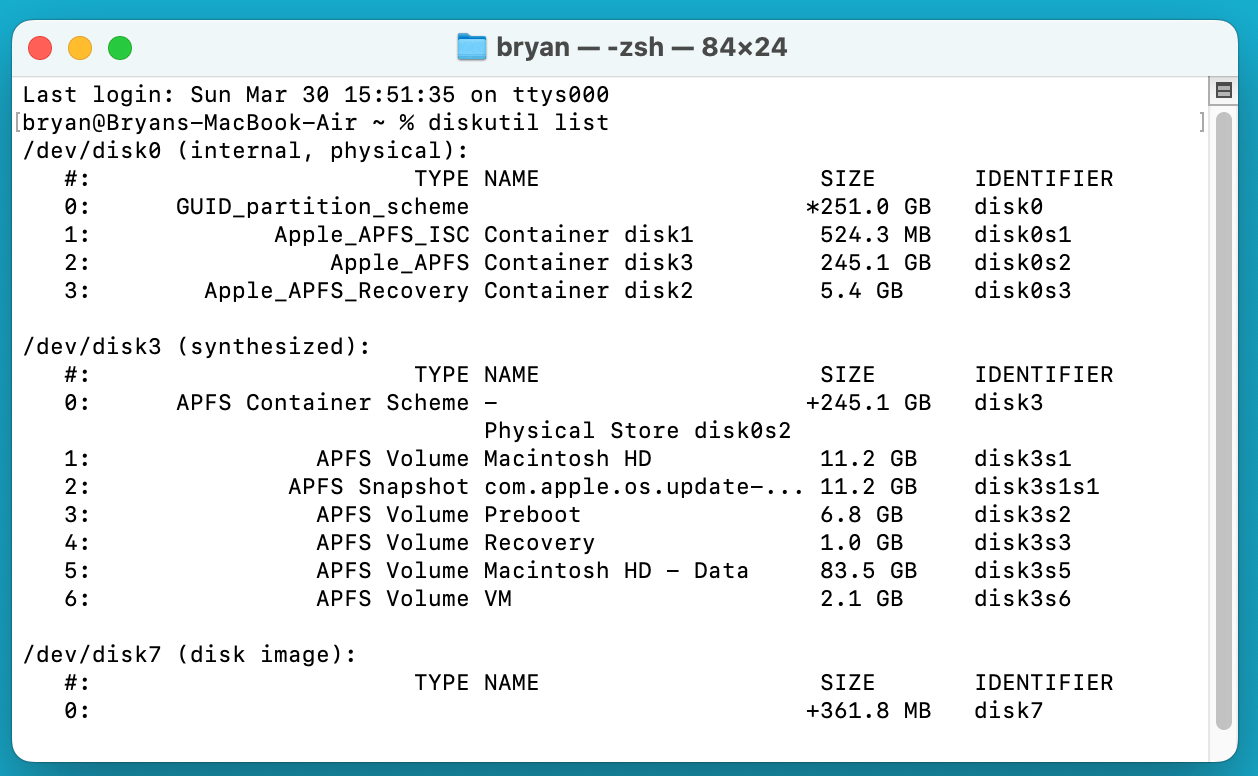
Step 2: Identify the Disk
- Type the below command and hit Enter:
diskutil list
![Fix The Disk Macintosh HD Can not Be Unlocked]()
- Look for Macintosh HD (or Macintosh HD - Data) and note its disk identifier (e.g., /dev/disk0s2).
Step 3: Attempt to Unlock the Disk
If the disk is encrypted with FileVault, use this command:
diskutil apfs unlockVolume /dev/diskXsY -user YOUR_USERNAME
Replace /dev/diskXsY with your actual disk identifier.
If prompted, enter your password or FileVault recovery key to unlock the disk.
2. Mount the Disk Manually
If the disk is still locked, it may not be mounted properly. You can try mounting it manually using Terminal.
Step 1: Run the Mount Command
- Type:
diskutil mountDisk /dev/diskXsY
- If the disk mounts successfully, check if you can access your files.
Alternative Command (For APFS Disks)
For APFS disks, use this command:
diskutil apfs list
Look for the APFS volume group and use:
diskutil apfs unlockVolume "Macintosh HD" -user YOUR_USERNAME
3. Use fsck to Repair the Disk
If unlocking fails due to corruption, try using fsck (File System Consistency Check).
Step 1: Restart in Single User Mode
For Intel Macs:
- After restarting your Mac, press and hold Command (⌘) + S until a black screen with white writing appears.
For Apple Silicon (M-chip) Macs:
- Boot into macOS Recovery Mode.
- Open Terminal from the Utilities menu.
Step 2: Run fsck to Repair the Disk
- Type the following and press Enter:
/sbin/fsck -fy
- If it says “File system was modified”, run the command again until you see "The volume appears to be OK."
- Restart your Mac using:
reboot
What to Do If Terminal Commands Fail?
If none of these Terminal methods work, try the following:
Check FileVault Status
Run:
fdesetup status
If it says "FileVault is On", you need the recovery key or password to unlock it.
Try Safe Mode
- Hold Shift while your Mac boots up after restarting.
- Try unlocking the disk via System Settings > Privacy & Security.
Reformat the Disk (Last Resort)
If the disk is completely corrupted and cannot be unlocked, you may need to erase it using:
diskutil eraseDisk APFS "Macintosh HD" /dev/diskX
💡 Warning: This erases all data.
Solution 2. Repair the Disk Using First Aid
First Aid scans and repairs disk errors.
Steps:
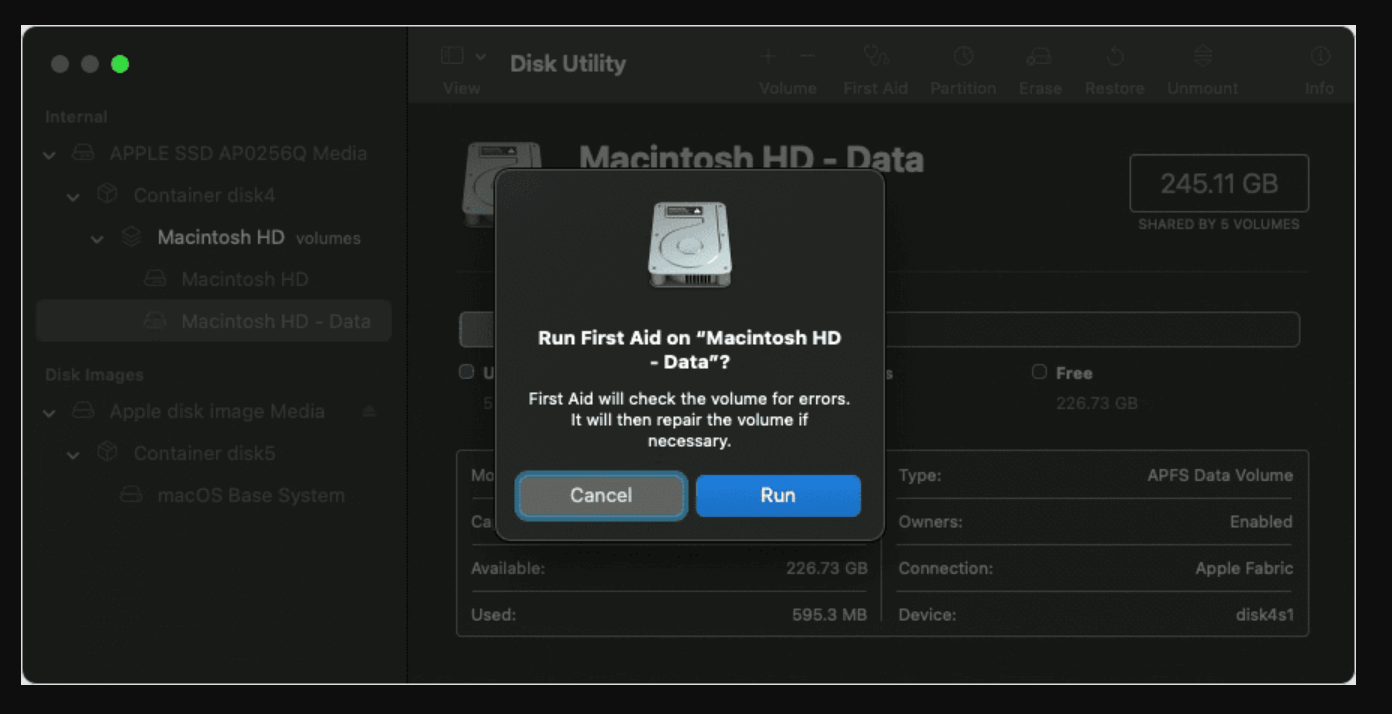
- Boot into macOS Recovery Mode.
- Open Disk Utility and select Macintosh HD.
- Click First Aid > Run.
![Fix The Disk Macintosh HD Can not Be Unlocked]()
- Wait for the scan to complete and follow any suggested fixes.
If the disk is severely damaged, reinstalling macOS may be necessary.
Solution 3. Reset NVRAM and SMC
Resetting NVRAM and SMC can fix system-related disk issues.
Reset NVRAM:
- Turn off your Mac.
- After turning it back on, press Option + Command + P + R for 20 seconds right away.
Reset SMC (for Intel-based Macs):
- Turn Off your Mac.
- Hold Shift + Control + Option + Power button for 10 seconds.
- Release all keys and turn on your Mac.
For Apple silicon Macs, restart your Mac to reset the SMC automatically.
Solution 4. Reinstall macOS (Without Data Loss)
If the disk is inaccessible, reinstall macOS while keeping your data.
Steps:
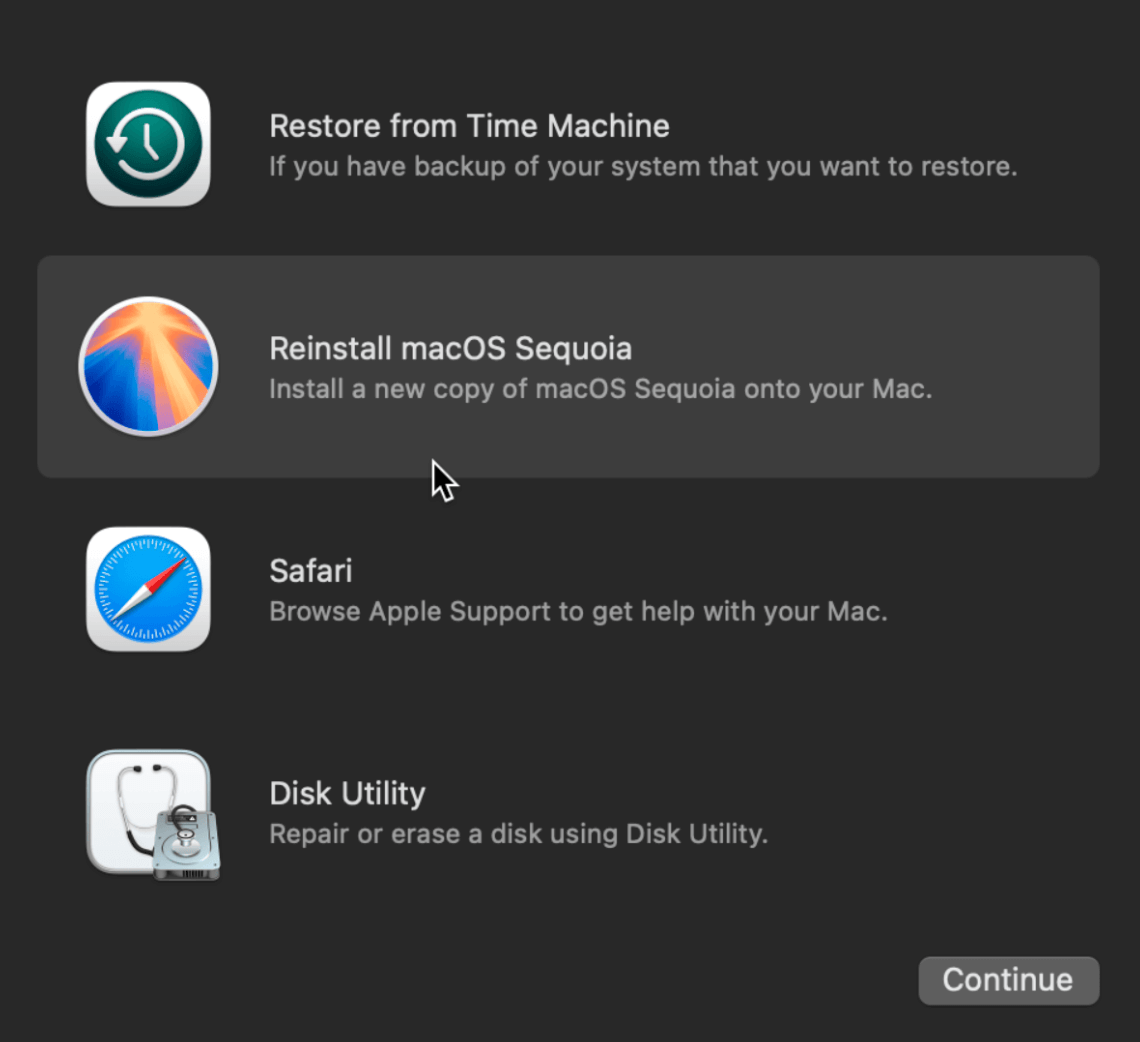
- Boot into macOS Recovery Mode.
- Choose Reinstall macOS and adhere to the prompts displayed on the screen.
![Fix The Disk Macintosh HD Can not Be Unlocked]()
- Choose Macintosh HD as the installation destination.
If reinstalling macOS does not work, you may need to erase and restore the disk.
Solution 5. Erase and Restore Macintosh HD (Last Resort)
If all else fails, erase the disk and reinstall macOS. This deletes all data, so backup important files if possible.
1. Backup Your Data (If Accessible)
- Connect an external drive.
- Open Disk Utility and create a disk image of Macintosh HD.
- Copy essential files manually if the disk is partially accessible.
2. Erase the Disk Using Disk Utility
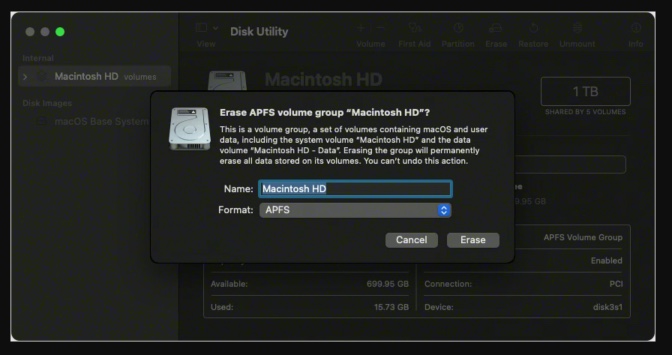
- Boot into macOS Recovery Mode.
- Open Disk Utility and select Macintosh HD.
- Click Erase, choose APFS or Mac OS Extended (Journaled) as the format, and confirm.
![Fix The Disk Macintosh HD Can not Be Unlocked]()
3. Reinstall macOS
- In macOS Recovery Mode, select Reinstall macOS.
- Follow the installation steps and select Macintosh HD as the installation disk.
After reinstalling macOS, restore files from your backup.
Recover Lost Data After Fixing The disk Macintosh HD can't be unlocked
If you have lost data due to fixing "The disk Macintosh HD can't be unlocked" issue on Mac, you can use Mac data recovery software to recover lost data.
Step 1. Download and install Donemax Data Recovery for Mac and run it from Launchpad.
Step 2. Open Donemax Data Recovery for Mac, then select the Macintosh HD to start data recovery.

Step 3. Click on Scan button to deeply scan the selected drive and find all recoverable files.

Step 4. Once the scan is completed, you can preview all recoverable files. Then select the wanted files, click on Recover button to save them.

Conclusion
Fixing the "The disk Macintosh HD can't be unlocked" issue requires understanding the root cause and applying the appropriate solution. Start with basic troubleshooting like restarting, checking FileVault, or using Disk Utility. If the problem persists, try Terminal commands, First Aid, NVRAM reset, or reinstall macOS.
If nothing works, erasing and restoring the disk is the last resort. Always backup important files to avoid data loss. If you continue facing issues, contact Apple Support for professional assistance.
Donemax Data Recovery for Mac
Donemax Data Recovery for Mac is one of the best Mac data recovery software. It is easy-to-use and can help in recovering deleted, formatted, inaccessible or lost data from Mac HDD/SSD, external disk, USB drive, SD card, camera or other storage devices.
Related Articles
- May 19, 2025External Hard Drive Not Mounting on macOS Big Sur, Fix It Now
- Dec 24, 2024Seagate External Hard Drive Shows Wrong Capacity: How to Fix It
- May 23, 2025Fix a Corrupted Hard Drive Using CMD
- Mar 17, 20256 Methods to Fix Couldn't Open Device 69877 Error on Mac
- Mar 11, 2025How to Repair a Corrupted SD Card with Command Prompt?
- Nov 12, 2024Fix 'Your iCloud Storage is Almost Full' on Mac

Contributing Writer
Charles
Charles, who lives in Sydney, Australia, is an editor & writer of Donemax Team. He is good at writing articles related with Apple Mac computers, Windows operating systems, data recovery, data erasure, disk clone and data backup, etc. He loves reading and playing tennis in his spare time and is interested in testing new digital devices such as mobile phones, Macs, HDDs, SSDs, digital cameras, etc.

Editor in chief
Gerhard Chou
In order to effectively solve the problems for our customers, every article and troubleshooting solution published on our website has been strictly tested and practiced. Our editors love researching and using computers and testing software, and are willing to help computer users with their problems
Hot Donemax Products

Clone hard drive with advanced clone technology or create bootable clone for Windows/Mac OS.

Completely and easily recover deleted, formatted, hidden or lost files from hard drive and external storage device.
Certified data erasure software - permanently erase data before selling or donating your disk or any digital device.