PAGE CONTENT:
Imagine this: you've spent hours cleaning up your Mac, deleting unnecessary files, hoping to free up some much-needed disk space. Yet, when you check your available storage, nothing changes! This common issue can be frustrating, especially when you're running low on disk space and need your Mac to perform efficiently. But don't worry; there are several reasons why deleted files may not be freeing up space, and, fortunately, there are ways to fix this problem.
In this article, we'll explore the causes behind this issue and provide a step-by-step guide on how to resolve it. Whether it's hidden files, system caches, or even disk corruption, we'll cover all the bases to help you reclaim that precious storage space on your Mac.
10 Steps to Fix Deleting Files Doesn't Free Up Space on Mac
1. Check and Empty the Trash
Let's start with the simplest and most common reason: files in the Trash still take up space on your hard drive until they are permanently deleted. Many users move files to the Trash but forget to empty it, which can cause a misleading sense of deletion.
Steps to Empty the Trash:
- Click on the Trash icon in your Dock.
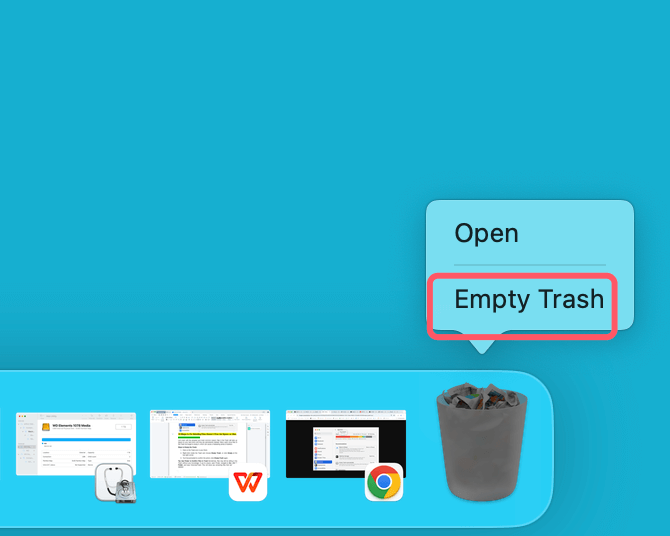
- Right-click the Trash and choose Empty Trash.
![Delete Many Files on Mac]()
- You'll be prompted to confirm the action; click Empty Trash again.
![Delete Many Files on Mac]()
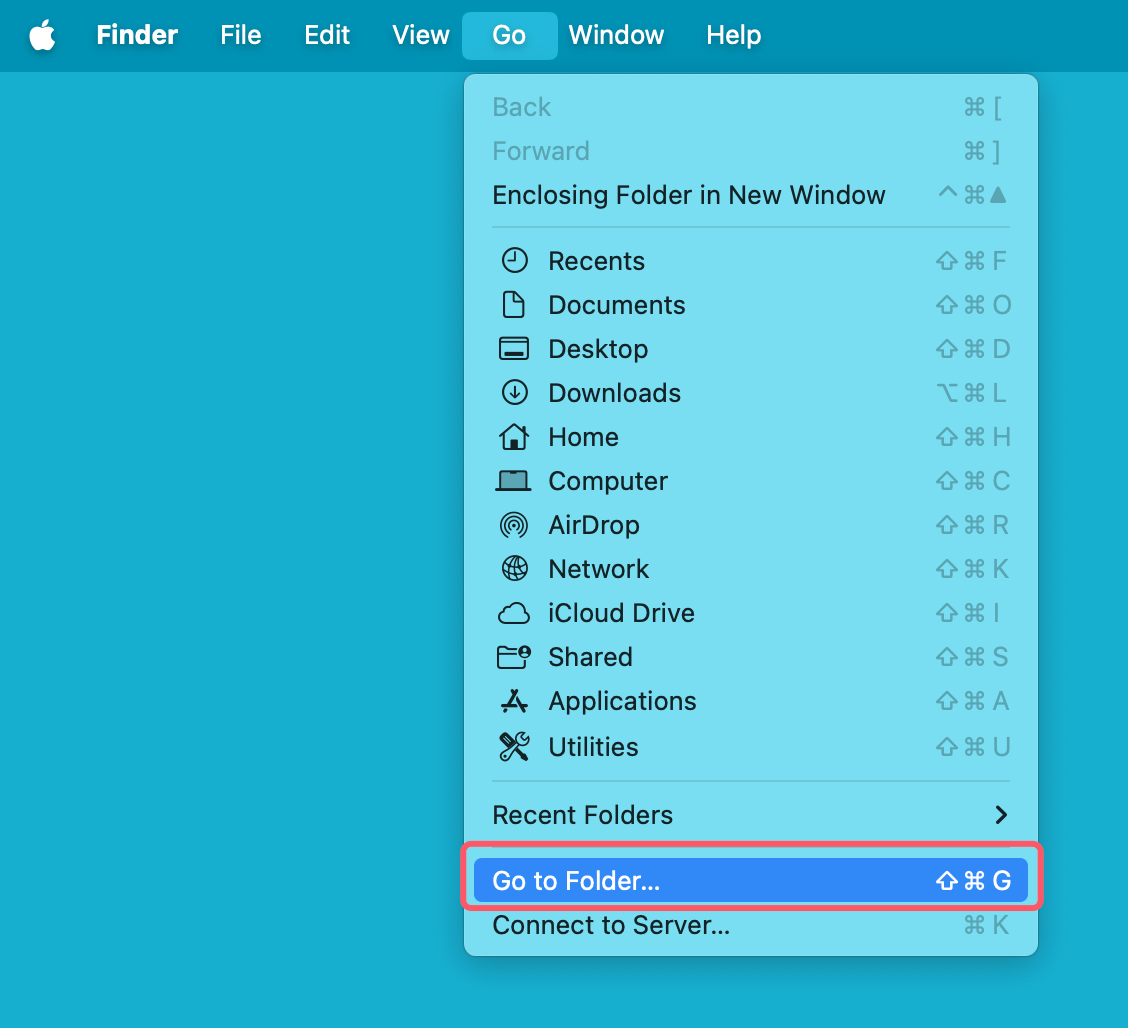
💡 Tip: Use Finder to Confirm Files in Trash Sometimes, files may still be sitting in the Trash without your knowledge. If you're unsure, open Finder, navigate to Go > Go to Folder, and type /Volumes/Trash. This will show any remaining files that need to be deleted.
2. Inspect the Storage Settings
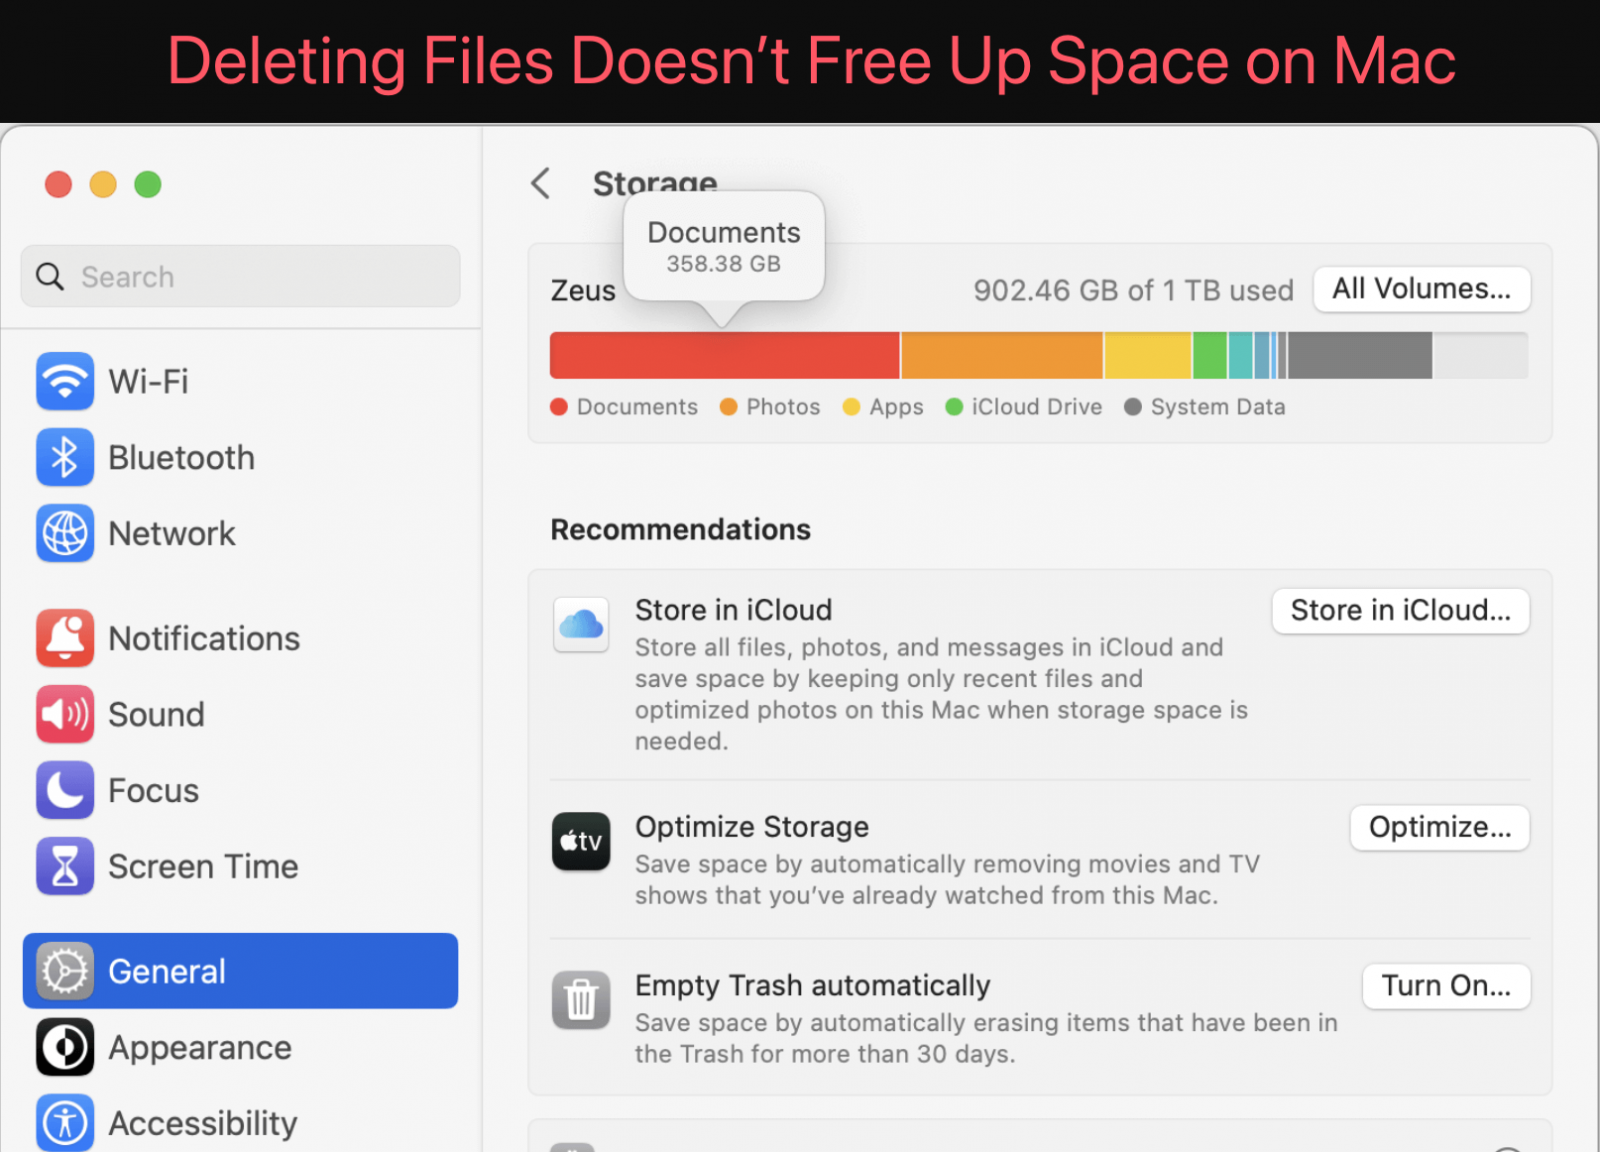
If you've emptied your Trash and still don't see any difference in available storage, your next step should be to check your storage settings. macOS provides a built-in tool that helps you understand what’s consuming your disk space.
Steps to Check Storage:
- Click the Apple icon in the top-left corner of your screen.
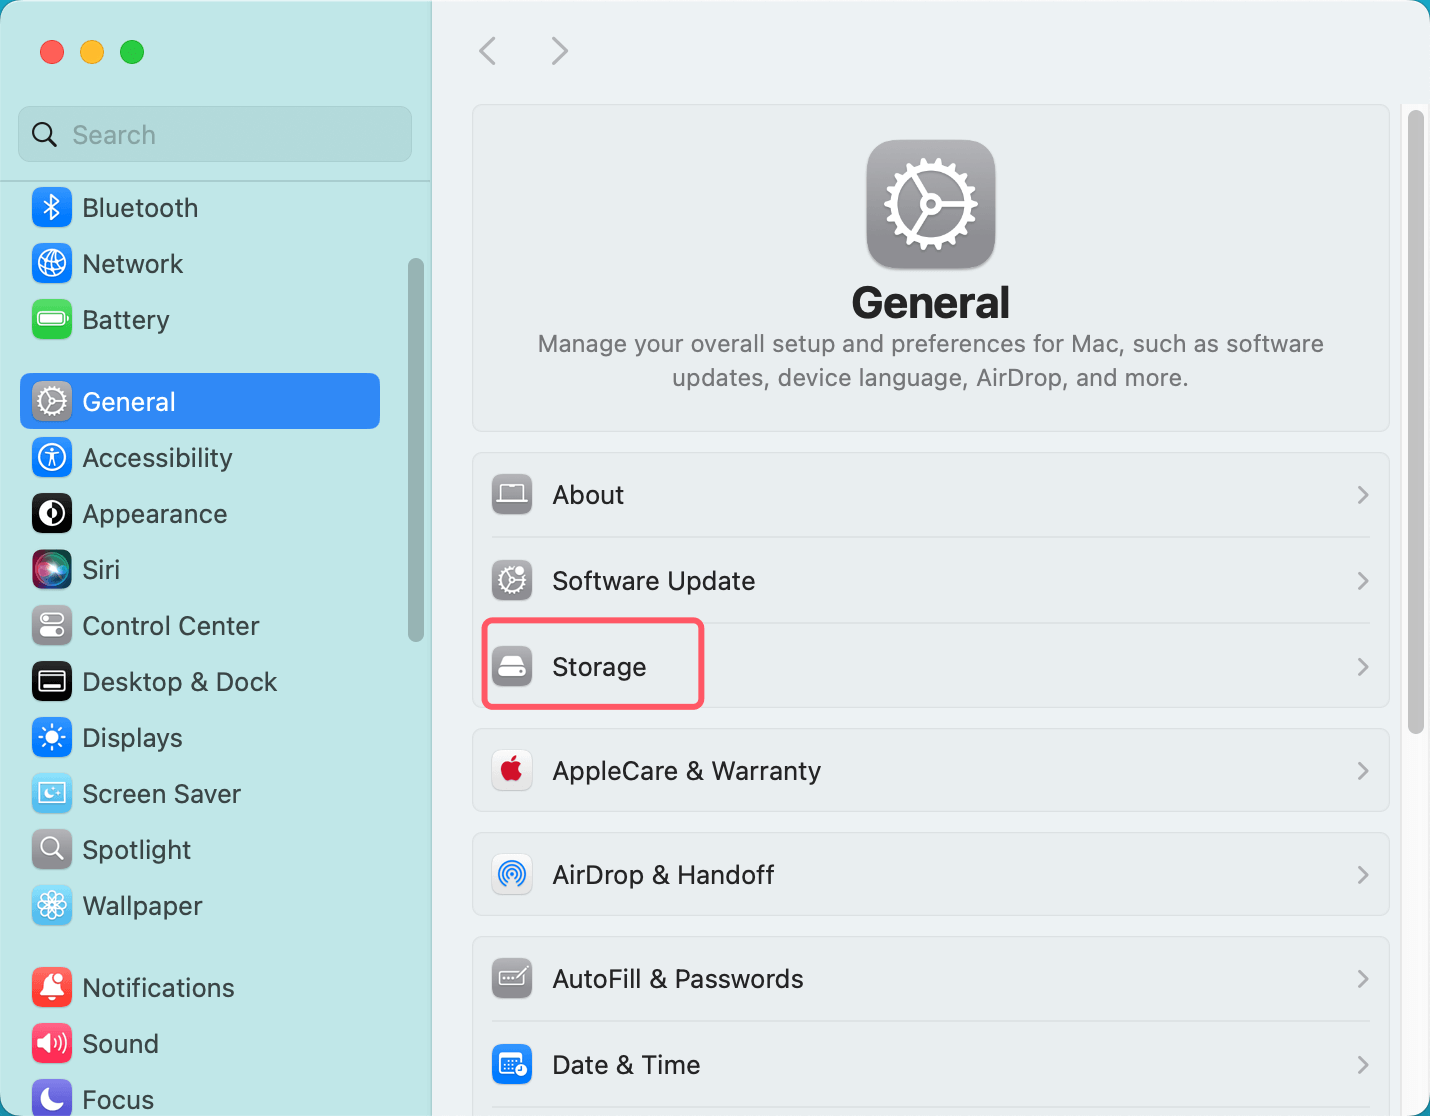
- Select System Settings > Storage.
![Delete Many Files on Mac]()
- In the window that appears, click Storage.
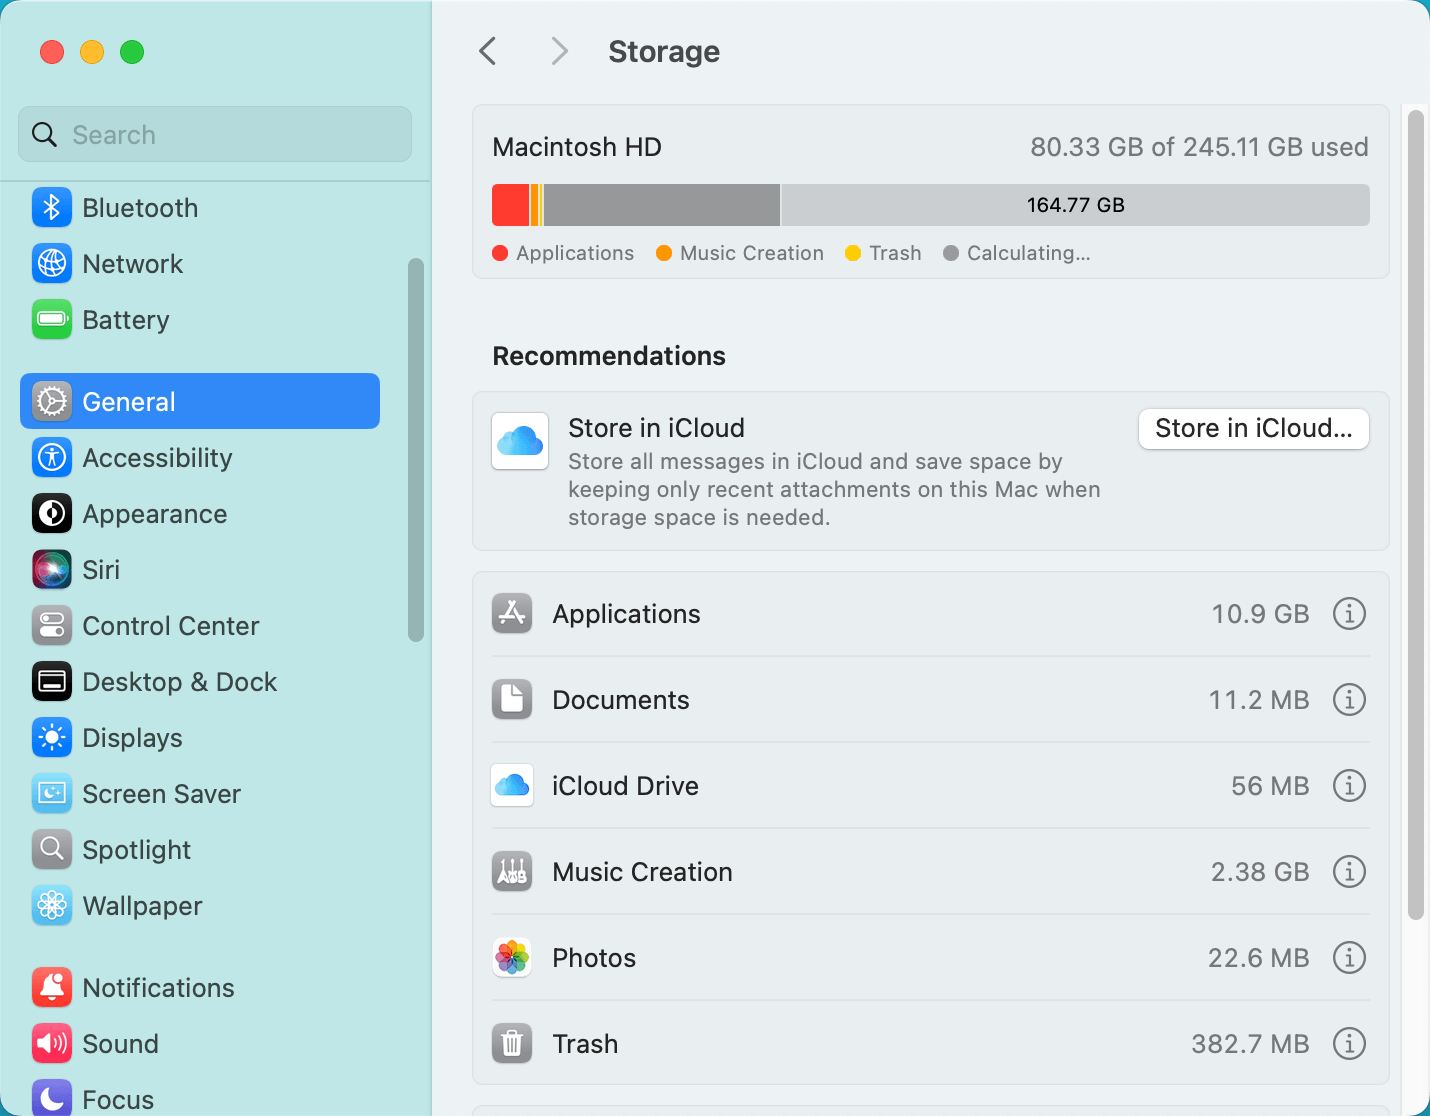
![Delete Many Files on Mac]()
Here, you'll see a breakdown of what's using your storage, such as apps, documents, system files, and other categories. You might notice that certain categories, like System Data or Applications, are taking up significant space without any clear indication of what these files are.
This breakdown will give you clues as to where the storage issue might lie. System files, temporary files, and cached data could be the cause, which brings us to the next step.
3. Clear System Caches and Temporary Files
System caches and temporary files can build up over time, often leading to unexpected storage usage. These files are meant to speed up processes, but they can linger on your Mac long after they’ve served their purpose. If left unchecked, they can accumulate and occupy several gigabytes of storage.
Steps to Clear Caches and Temporary Files:
- Using Finder:
- Open Finder and click Go in the menu bar.
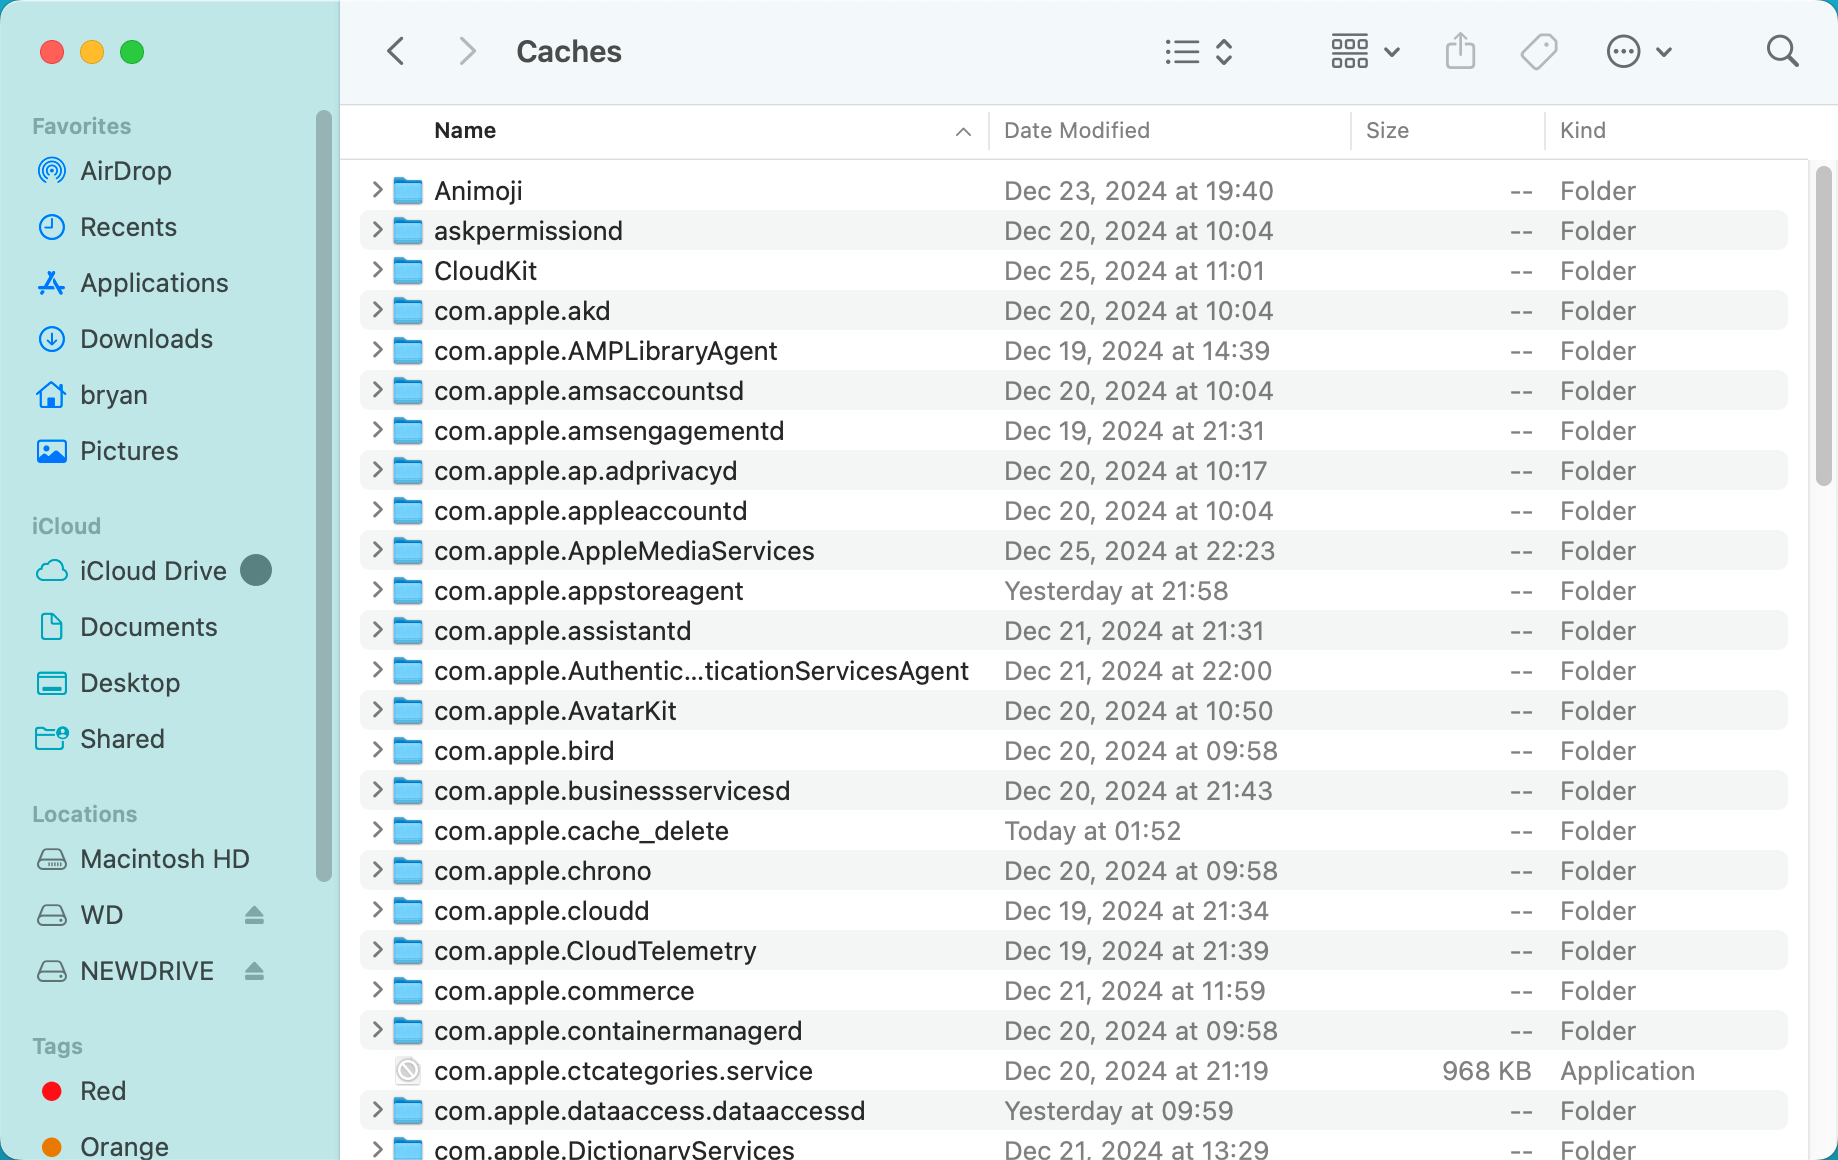
- Select Go to Folder, then type ~/Library/Caches.
![Delete Many Files on Mac]()
- A list of folders containing cached files will appear. You can manually delete the contents of these folders. Be cautious not to delete the folders themselves.
![Delete Many Files on Mac]()
- Using Disk Utility:
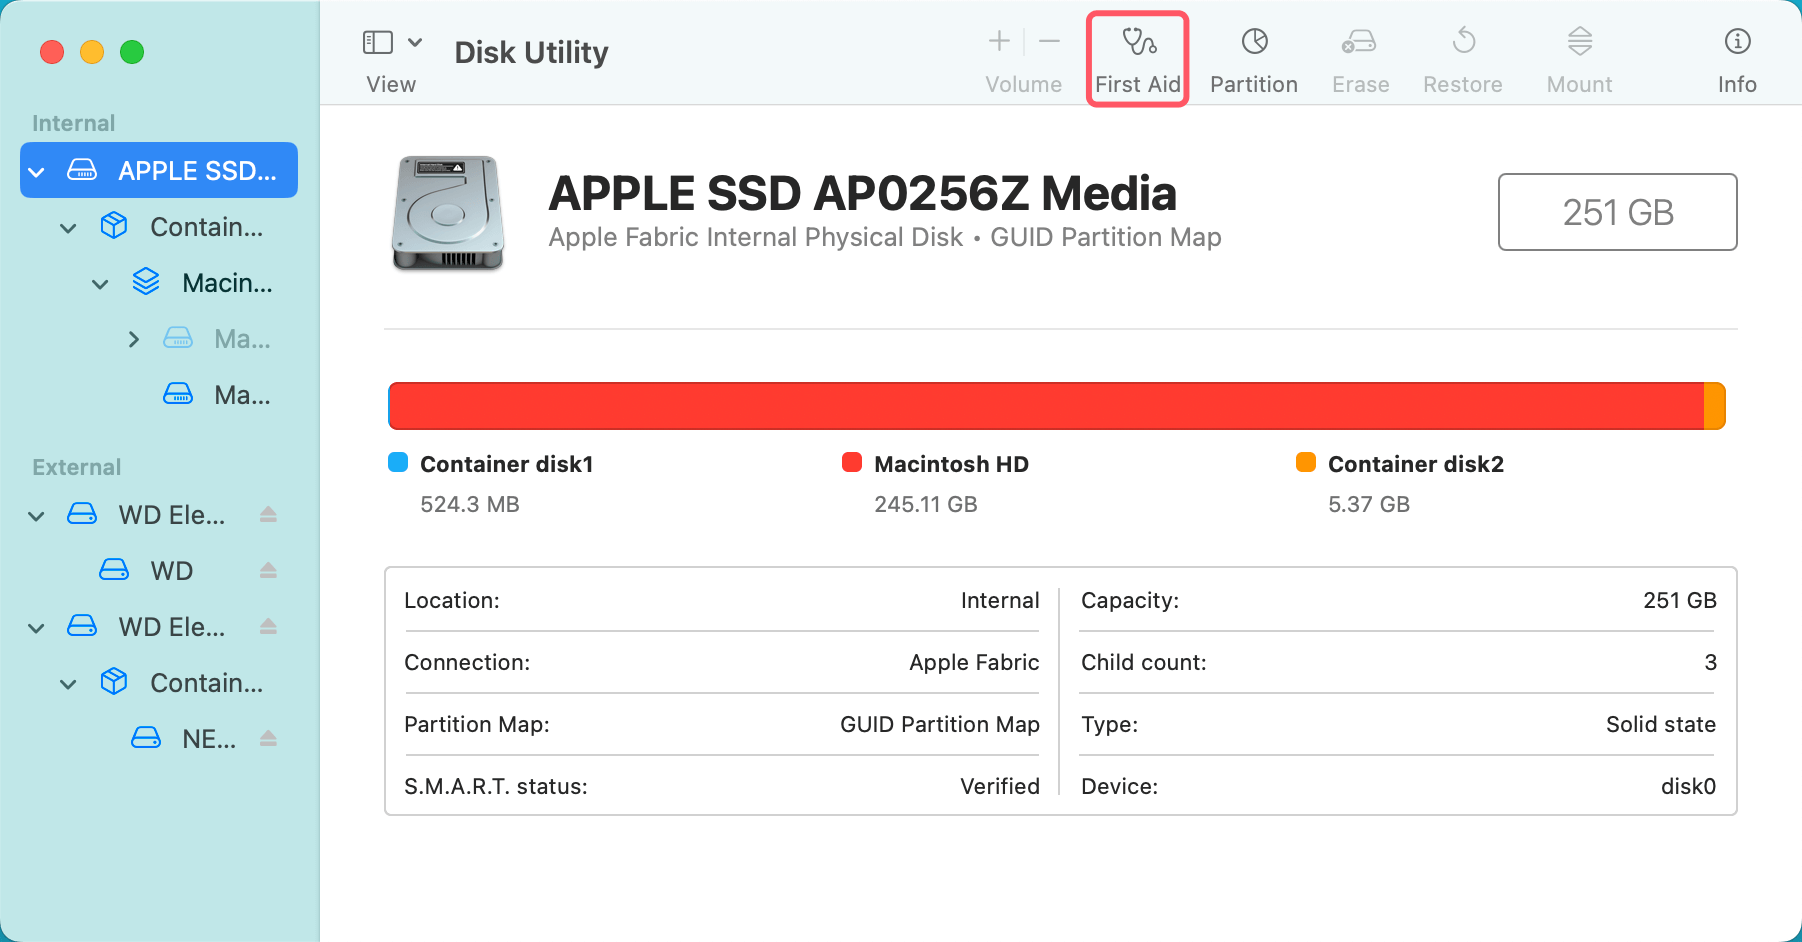
- Open Disk Utility by searching for it in Spotlight.
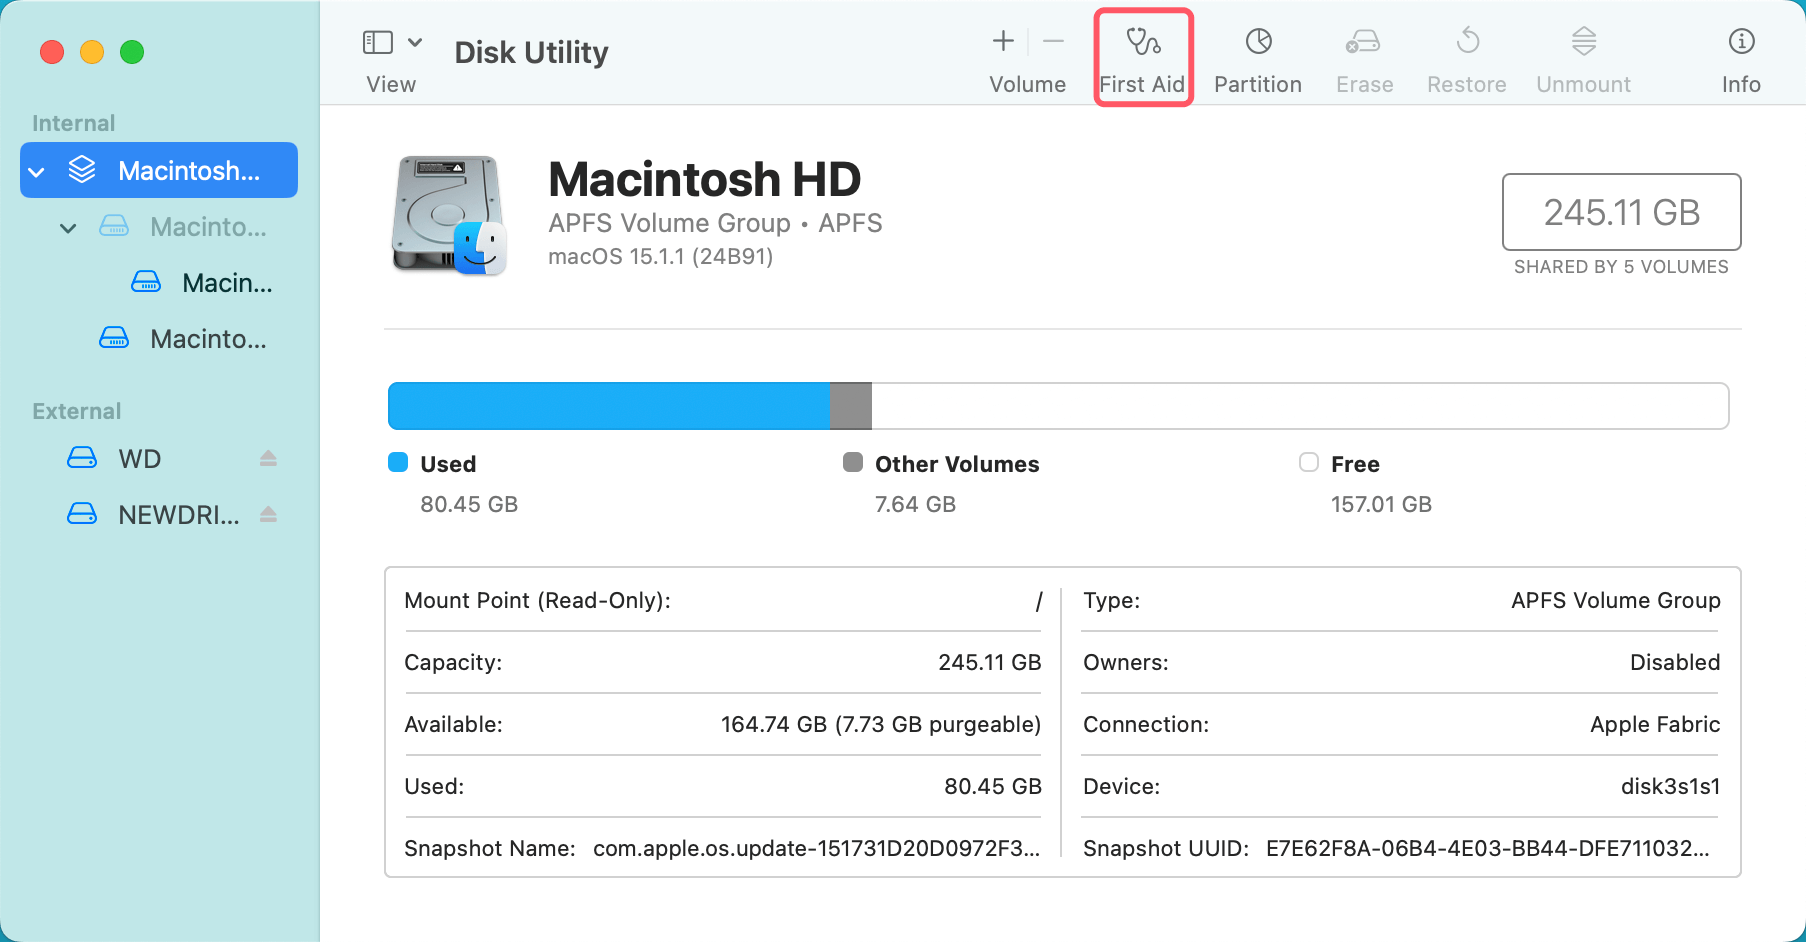
- Select your startup disk and click First Aid.
![Delete Many Files on Mac]()
- This will scan and repair any issues with the file system, potentially freeing up space by removing unnecessary caches.
- Third-Party Apps: There are also third-party apps, like Donemax Cleaner for Mac, or CCleaner, which can automate the process of clearing caches and temporary files. These tools can help you remove these files more efficiently, but be sure to choose trusted software.
💡 Important Note: While clearing caches and temporary files can free up space, be careful not to delete any critical system files. Always verify the contents of the files before deletion.
4. Check for Large Hidden Files and Folders
Another possible reason you're not seeing more available storage could be hidden files or folders that are taking up space. macOS can sometimes hide large system files that you wouldn't normally notice in your day-to-day usage. These can include log files, old backups, and other temporary data that aren’t automatically removed.
How to Find Hidden Files and Folders:
- Open Finder and press Command + Shift + Period. This will reveal hidden files on your Mac.
- Navigate through your directories to check for unusually large files. Common culprits include:
- Log files in ~/Library/Logs
- Temporary downloads in ~/Library/Caches
- Unwanted files in /private/var/folders
Using Terminal to Find Large Files: If you're comfortable using Terminal, you can also run commands to identify large hidden files:
- Open Terminal and type: sudo du -sh /* (this command will show a summary of disk usage for each folder).
- Review the output for any abnormally large directories. You can navigate into these directories and delete unnecessary files.
By revealing and removing hidden files, you could potentially reclaim a significant amount of disk space.
5. Manage System Snapshots
macOS, especially when used with Time Machine, creates system snapshots that allow you to restore your system to a previous state. While this feature is helpful, snapshots can consume a lot of disk space, particularly if they aren’t deleted after their usefulness expires.
How to Check and Remove System Snapshots:
- Open Terminal.
- To view existing snapshots, type: tmutil listlocalsnapshots /
![Delete Many Files on Mac]()
- This will display a list of all local snapshots on your Mac.
- To delete a specific snapshot, type: sudo tmutil deletelocalsnapshots <date>. Replace <date> with the snapshot’s date in the format shown.
By removing outdated or unnecessary snapshots, you can recover disk space and reduce the burden on your storage.
6. Clear Out Old iOS Backups
If you've backed up your iPhone or iPad on your Mac using Finder or iTunes, those backups can take up a large amount of space. Even if you've deleted the device from Finder, the backups might still be stored locally on your Mac.
How to Delete iOS Backups:
- Open Finder.
- Click on your iPhone or iPad in the sidebar when connected.
- Under the General tab, click Manage Backups.
- Select the old backups you no longer need and click Delete Backup.
Alternatively, iOS backups are stored in:
- ~/Library/Application Support/MobileSync/Backup. You can manually navigate to this folder and delete older backups if needed.
Freeing up space from old iOS backups can quickly release a significant chunk of storage.
7. Uninstall Unused Applications Properly
Sometimes, deleting an app from your Mac by dragging it to the Trash isn’t enough. Many apps leave behind associated files that can still occupy space, including preferences, logs, caches, and other system files.
How to Completely Remove Applications:
- Use Finder to search for the app’s name.
- Delete any remaining files in:
- ~/Library/Application Support
- ~/Library/Preferences
- ~/Library/Caches
- Use a third-party app like Donemax AppRemover for Mac, which can help you remove all associated files when uninstalling an app.
![Donemax AppRemover for Mac]()
Make sure to only delete the files related to the apps you're uninstalling, as you don't want to inadvertently remove critical system files.
8. Check for Disk Corruption
In some cases, disk corruption may cause your Mac to display incorrect storage values. This means that even after deleting files, the space doesn’t get marked as free because of an issue with the disk’s file system.
How to Fix Disk Corruption:
- Open Disk Utility from Spotlight or Finder.
- Select your disk and click First Aid.
![Delete Many Files on Mac]()
- Let Disk Utility scan and repair any issues with your disk. This process may take some time, but it can resolve hidden issues that prevent proper space calculation.
If Disk Utility detects and repairs disk corruption, you may notice an immediate improvement in your available storage.
9. Use a Disk Space Analyzer
If you're still unsure of what's consuming your storage, a disk space analyzer can help you get a visual overview of the largest files and folders on your Mac. Tools like DaisyDisk, GrandPerspective, or OmniDiskSweeper can map out your disk usage, making it easier to identify and delete large files.
How to Use DaisyDisk:
- Download and install DaisyDisk.
- Launch the app and scan your hard drive.
- DaisyDisk will display an interactive map of your disk usage, showing you the largest files and folders.
- You can directly delete files from within the app or navigate to them in Finder.
By using a disk space analyzer, you can quickly find and remove files that you may not have noticed otherwise.
10. Final Steps: Reboot and Recheck
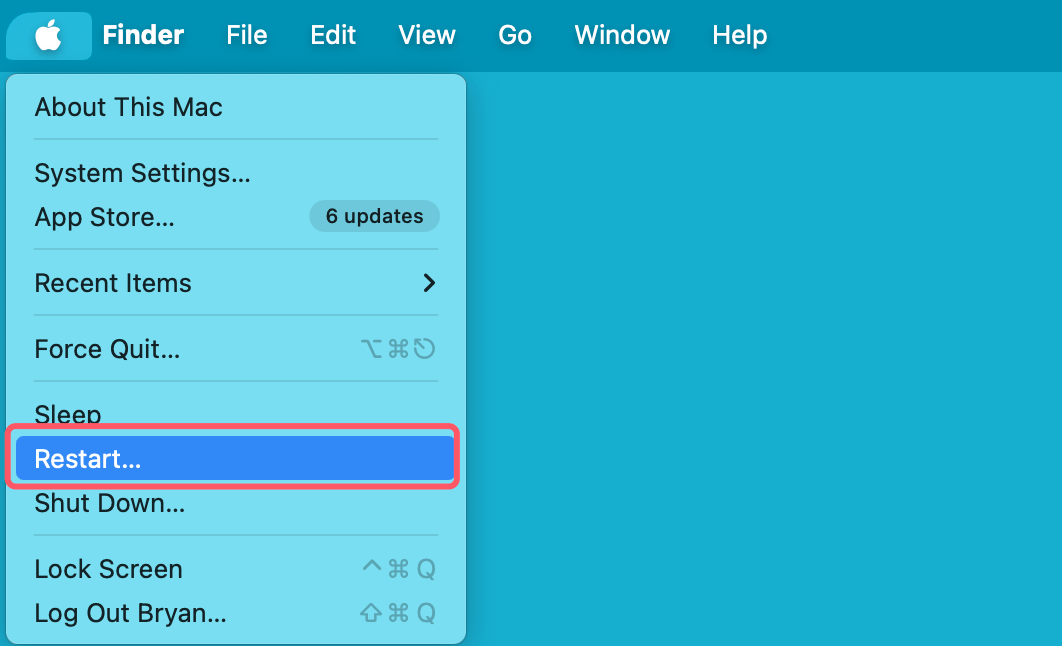
After performing all the above steps, a simple reboot can often resolve lingering issues with storage calculations. macOS may still have temporary files or processes running that aren't released until the system is restarted. Once you've rebooted, check your available disk space again to see if the issue is resolved.
Conclusion
Running out of disk space on your Mac despite deleting files can be incredibly frustrating. However, by following the steps outlined in this article - emptying the Trash, clearing system caches, managing hidden files and system snapshots, removing old backups, and checking for disk corruption - you can identify and resolve the issue effectively.
To avoid facing similar storage problems in the future, it's a good idea to regularly check your Mac's storage usage, clean out system caches, and uninstall unused applications. By maintaining a healthy disk space routine, you'll keep your Mac running smoothly and prevent the storage headaches from returning.
Related Articles
- Feb 06, 20255 Solutions to Fix Dash Cam Keeps Saying Format SD Card
- May 20, 2024Seagate Backup Plus External Hard Drive Not Showing Up on Mac, Fix It
- Jan 12, 20256 Solutions to Fix Error Code 50 on Mac: A Comprehensive Guide
- Dec 31, 2024How to Fix APFS Container Not Mounting on Mac? [6 Solutions]
- Mar 04, 20257 Solutions to Fix WD My Book Not Showing Up on Windows 11/10/8
- Apr 11, 2025Word Cannot Open the Document: User Does Not Have Access Privileges – How to Fix It on Mac?

Charles
Charles, who lives in Sydney, Australia, is an editor & writer of Donemax Team. He is good at writing articles related with Apple Mac computers, Windows operating systems, data recovery, data erasure, disk clone and data backup, etc. He loves reading and playing tennis in his spare time and is interested in testing new digital devices such as mobile phones, Macs, HDDs, SSDs, digital cameras, etc.

Gerhard Chou
In order to effectively solve the problems for our customers, every article and troubleshooting solution published on our website has been strictly tested and practiced. Our editors love researching and using computers and testing software, and are willing to help computer users with their problems
Hot Donemax Products

Clone hard drive with advanced clone technology or create bootable clone for Windows/Mac OS.

Completely and easily recover deleted, formatted, hidden or lost files from hard drive and external storage device.

Certified data erasure software - permanently erase data before selling or donating your disk or any digital device.

