Before we start: Donemax NTFS for Mac is an easy-to-use NTFS for Mac tool. It can grant full read-write access to NTFS drives on Mac. With this tool, you can easily format or force format an SD card to NTFS on Mac.
PAGE CONTENT:
SD cards are incredibly versatile storage devices, but sometimes their default formatting does not meet specific requirements. Microsoft developed NTFS, a file system that many users widely use for its support of large files and advanced features. However, macOS does not natively allow formatting drives to NTFS, which can pose a challenge for Mac users.
In this guide, we will show you how to format an SD card to NTFS on a Mac. We will cover different methods, including third-party tools and free software. By the end, you will have a properly formatted SD card that works seamlessly with your Windows devices.
Understanding File System Formats
What is NTFS?
NTFS stands for New Technology File System. It was introduced by Microsoft in 1993 and is now the standard file system for Windows operating systems. NTFS offers several advantages over older formats like FAT32, including:
- Support for large files (beyond the 4GB limit of FAT32).
- Journaling, which reduces data loss in case of interruptions.
- File permissions and encryption options, enhancing security.
Because of these features, NTFS is ideal for storing high-capacity files such as HD videos and large databases. However, macOS supports only reading NTFS drives by default - not writing or formatting them.
Why Format an SD Card to NTFS on Mac?
There are several reasons why you might want to format your SD card to NTFS:
- Transferring large files: NTFS allows files larger than 4GB. This is important for professionals working with high-resolution videos or large datasets.
- Cross-compatible with Windows devices: NTFS works well with Windows. This makes it a good choice for systems that use both Windows and other operating systems.
While macOS doesn't natively support NTFS formatting, this article will cover third-party tools that make the process possible.
Alternatives to NTFS
Before proceeding, consider whether NTFS is the best format for your needs. Alternatives include:
- ExFAT: Compatible across both macOS and Windows, with support for large files.
- FAT32: Compatible with most devices but limited to 4GB per file.
- APFS: Optimized for macOS, but not compatible with Windows.
- HFS+ (Mac OS Extended): For macOS 10.12 or earlier.
If you're certain NTFS is the right choice, let's move on.
Preparation Before Formatting Your SD Card to NTFS on Mac
Backup Important Data:
Formatting erases all data on the SD card, so ensure you've backed up any critical files. Copy the contents to an external drive, cloud storage, or your Mac's internal storage. Confirm that the backup is complete before proceeding.
Check Your SD Card:
- Inspect for write protection: Some SD cards have a physical lock switch. If it's in the locked position, you won't be able to format the card. Slide the switch to the unlocked position.
- Test for corruption: Insert the SD card into your Mac and check if it's recognized. If not, use Disk Utility to verify and repair the card.
Install Required Tools:
Because macOS lacks native NTFS formatting capabilities, you'll need third-party software. Here are your options:
- Donemax NTFS for Mac: An easy-to-use & 100% safe NTFS for Mac tool to enable writable for NTFS drives by 1 click.
- Paragon NTFS for Mac: A paid tool offering seamless NTFS read-write support and formatting capabilities.
- Tuxera NTFS for Mac: Another paid option with similar features.
- NTFS-3G with macFUSE: A free, open-source solution, though it requires more technical expertise.
Methods to Format an SD Card to NTFS on Mac
First of all, you can try Disk Utility to format the SD card to NTFS on Mac. If Disk Utility can't do the job, just try third-party NTFS for Mac tool.
Method 1. Try Disk Utility (Low success rate)
Disk Utility is a built-in disk management tool. If the SD card has a default NTFS file system, you can format it to NTFS on your Mac.
- Open Disk Utility and connect the SD card to your Mac.
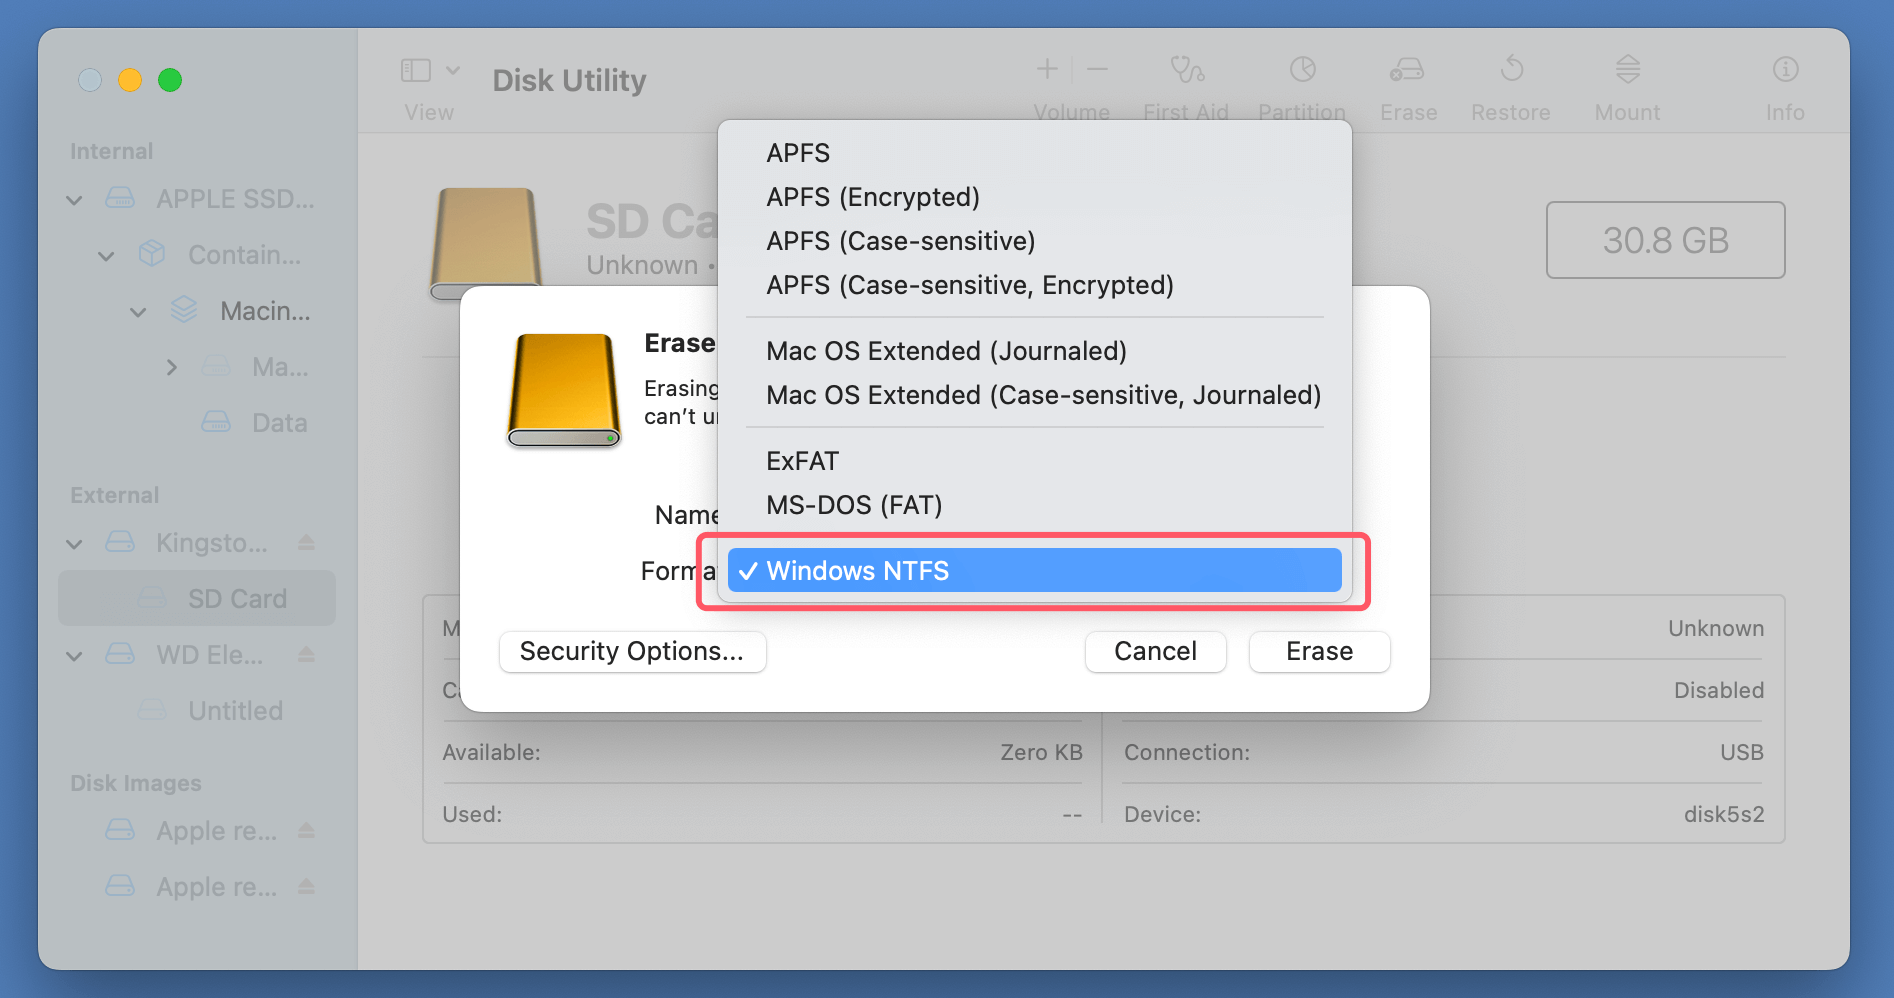
- Select the SD card, click Erase.
- Select a file system: If NTFS is listed in the file systems, just select NTFS (Windows NTFS).
![formatting an SD card to NTFS on a Mac]()
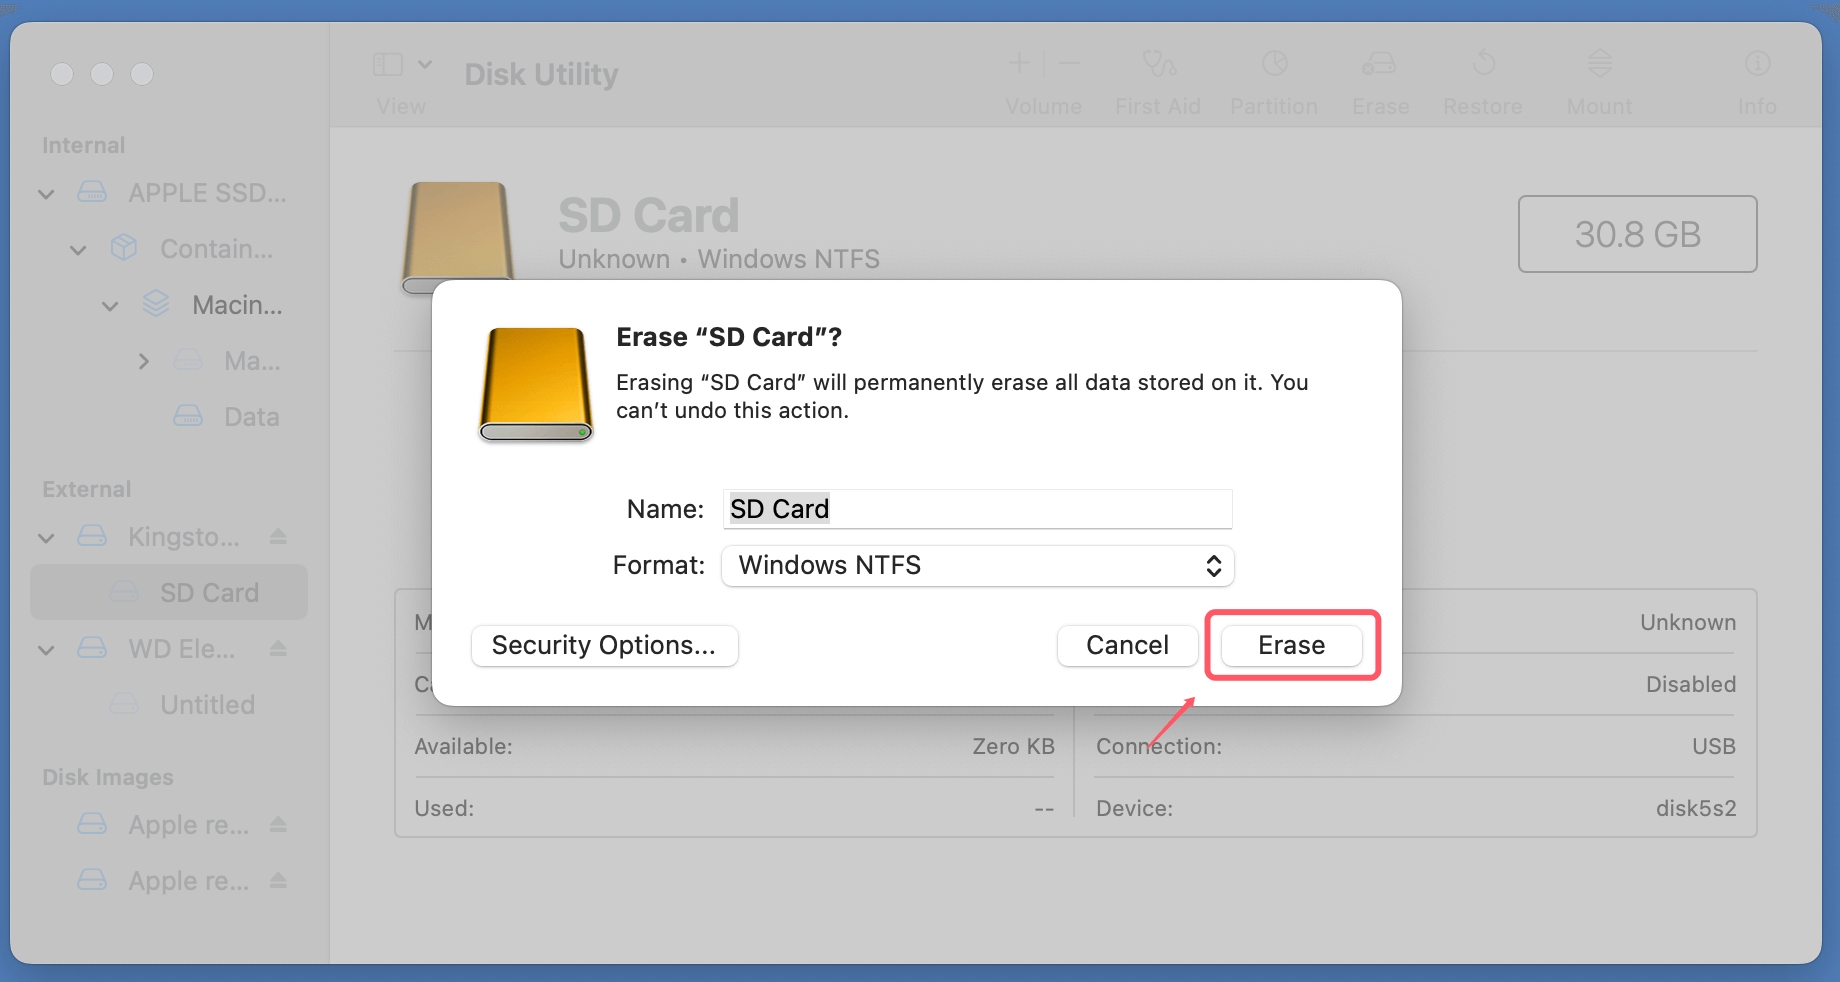
- Click Erase again to format the SD card to NTFS.
![formatting an SD card to NTFS on a Mac]()
Method 2. Use NTFS for Mac Tool (100% success)
NTFS for Mac can help you format or force format an SD card to NTFS on Mac.
1. Download and install the most reliable NTFS for Mac tool - Donemax NTFS for Mac on your Mac, open it from Launchpad.
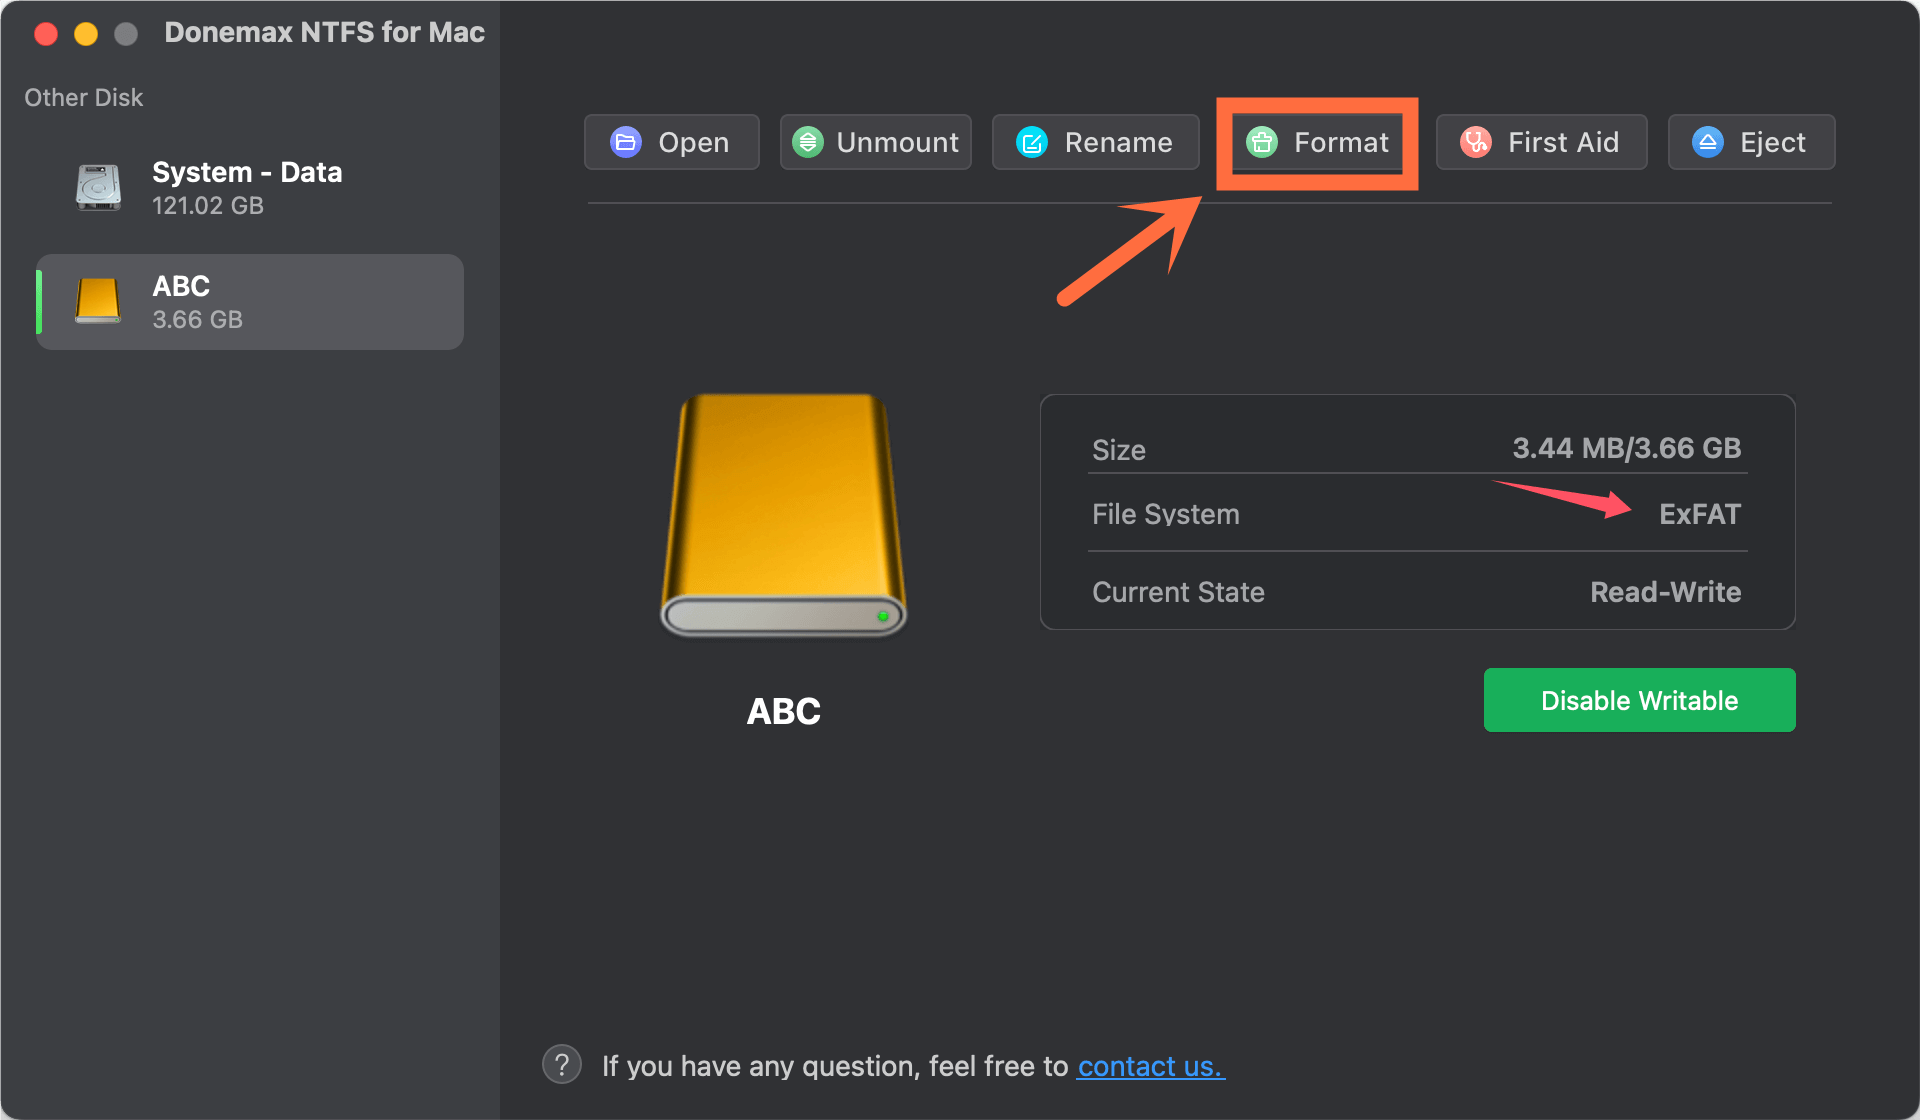
2. Open Donemax NTFS for Mac, select the SD card, click on Format button.
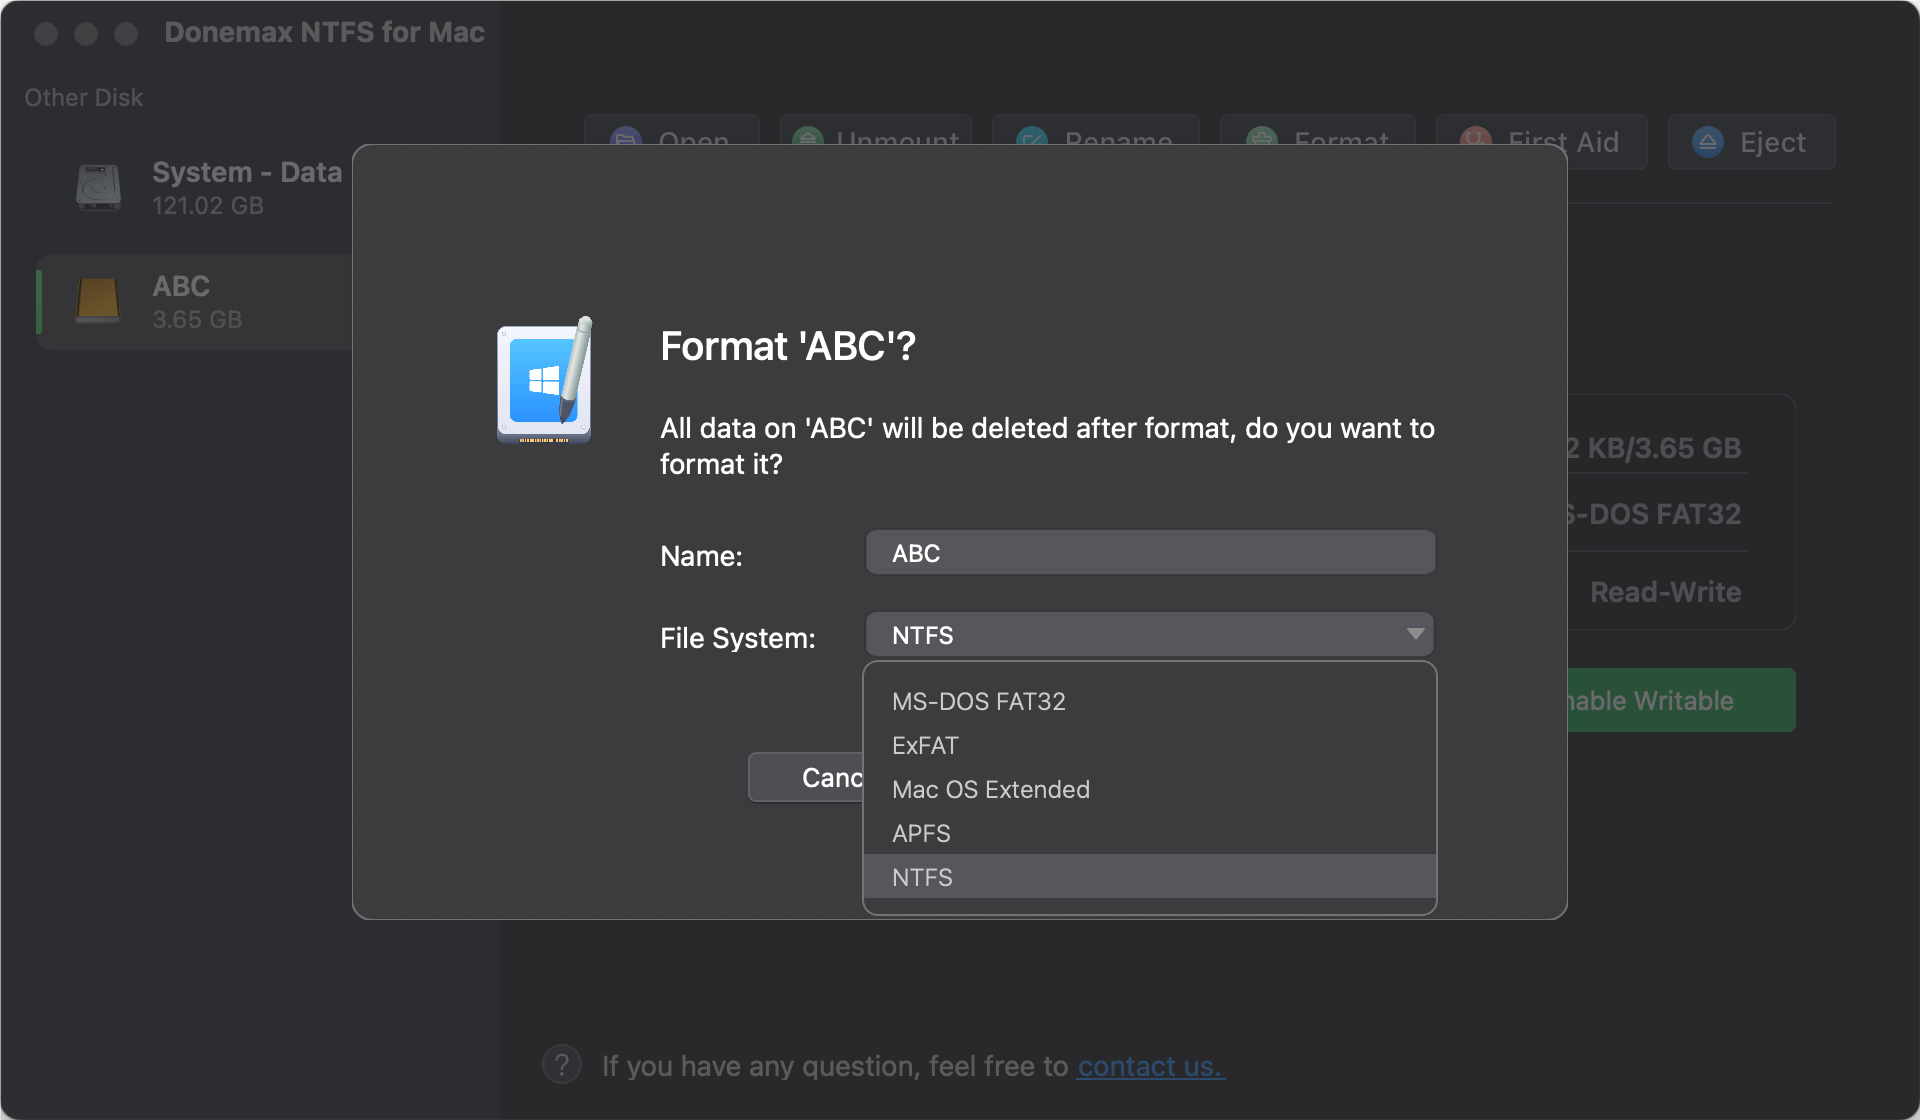
3. Select NTFS as the file system format, click on Continue button.
4. Format the SD card to NTFS.
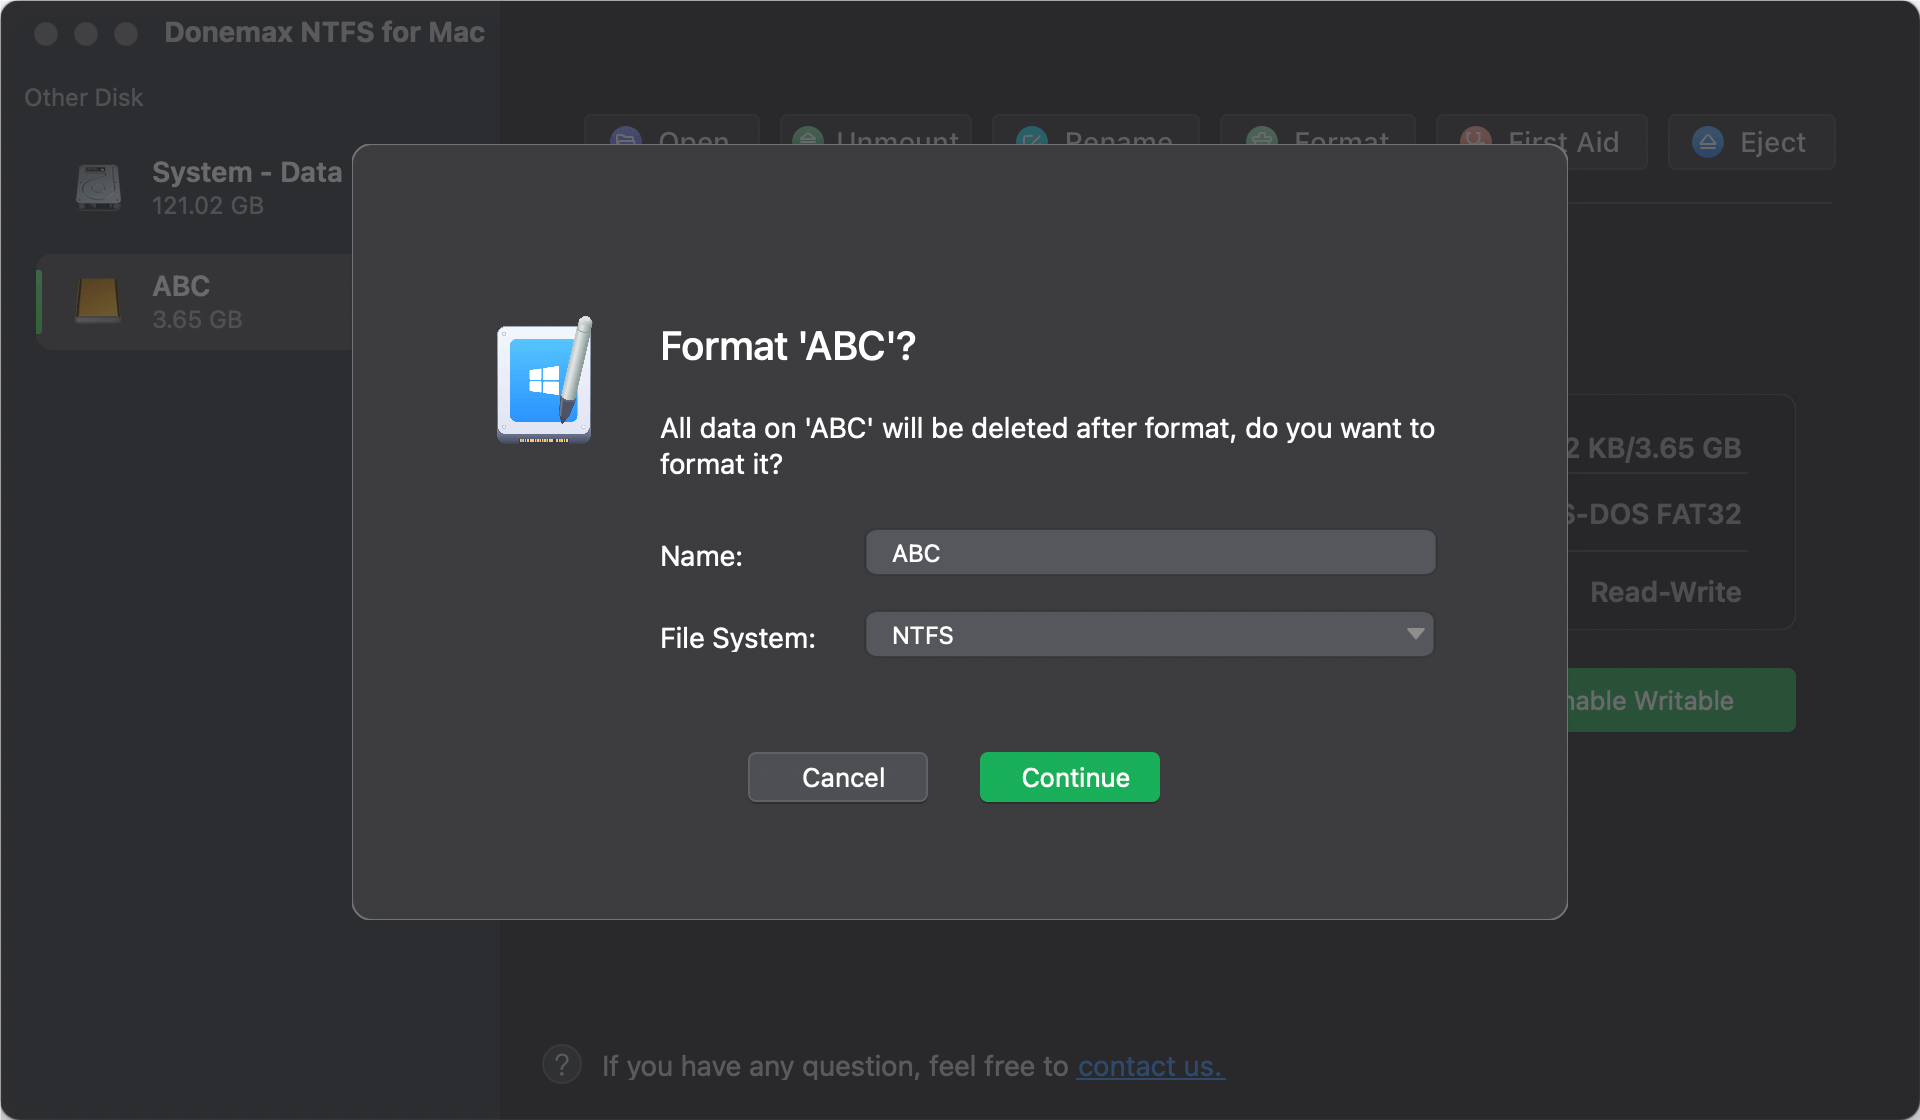
If you want to write data to the NTFS SD card, just click on Enable Writable button.

More NTFS for Mac tools:
Paragon NTFS for Mac
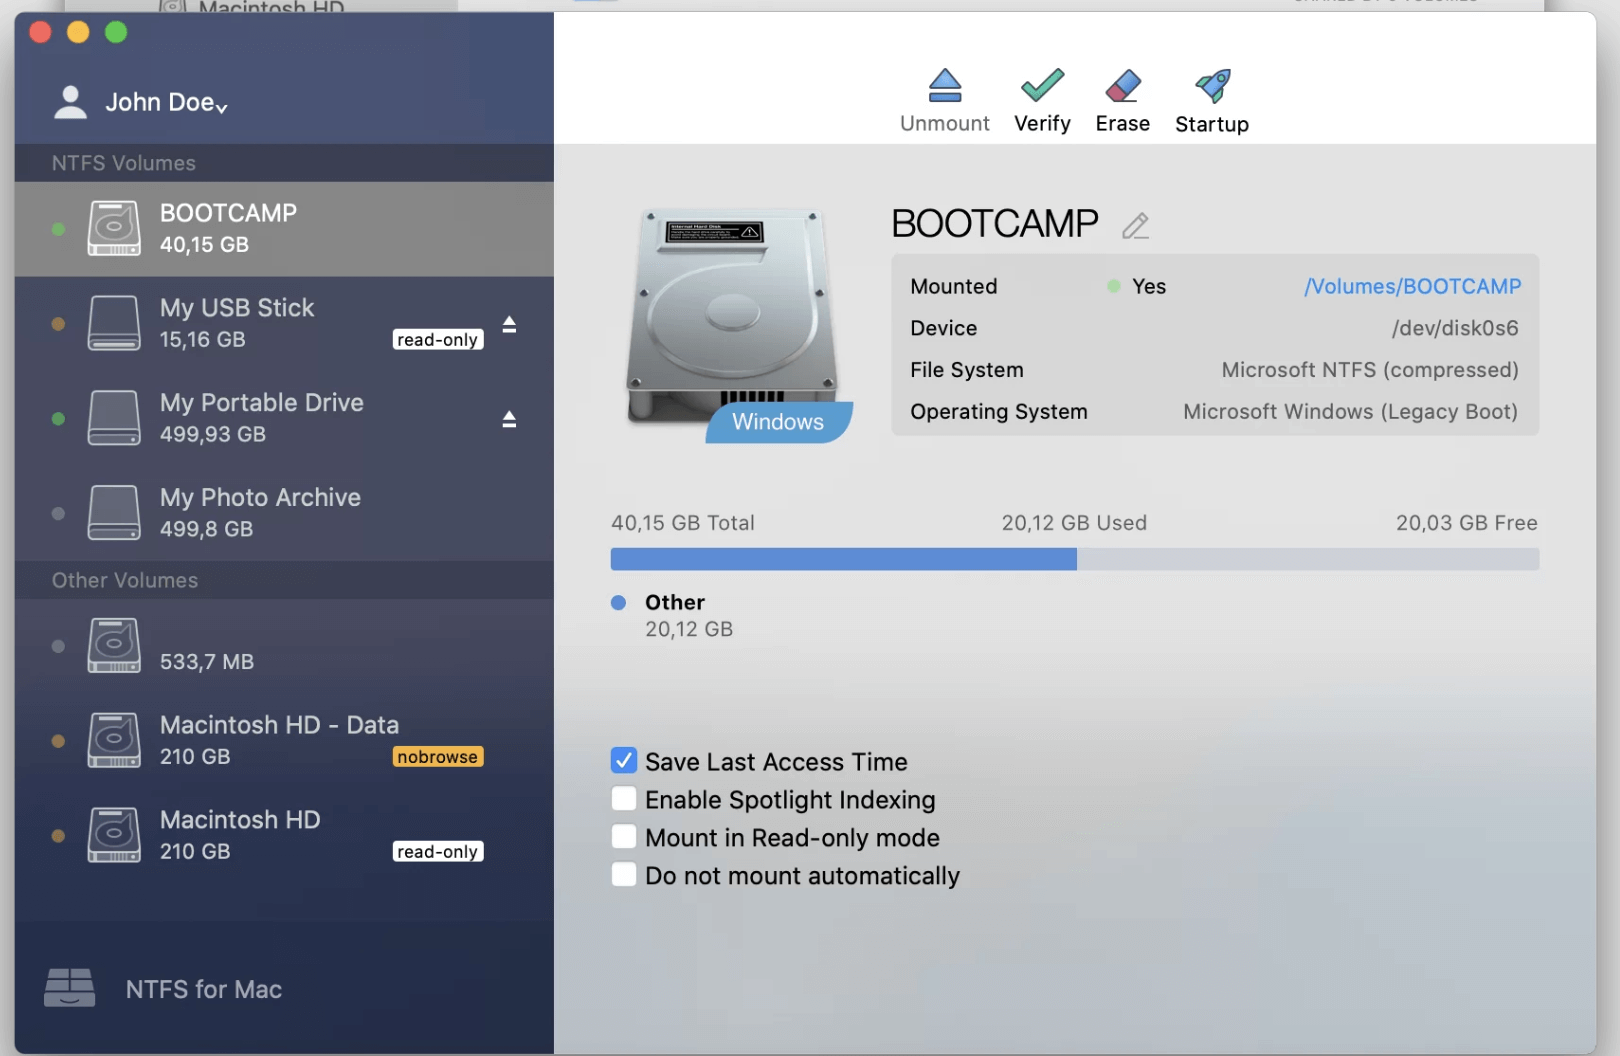
Paragon NTFS for Mac is user-friendly and reliable. Follow these steps:
- Download and install Paragon NTFS for Mac from the official website.
- Use a card reader or put the SD card into the SD card slot on your Mac.
- Open Paragon NTFS for Mac.
- Select your SD card from the list of drives.
- Click Format and choose NTFS as the file system.
- Confirm your selection and wait for the process to complete.
The tool automatically formats the SD card to NTFS, ensuring compatible with Windows devices.
Tuxera NTFS for Mac
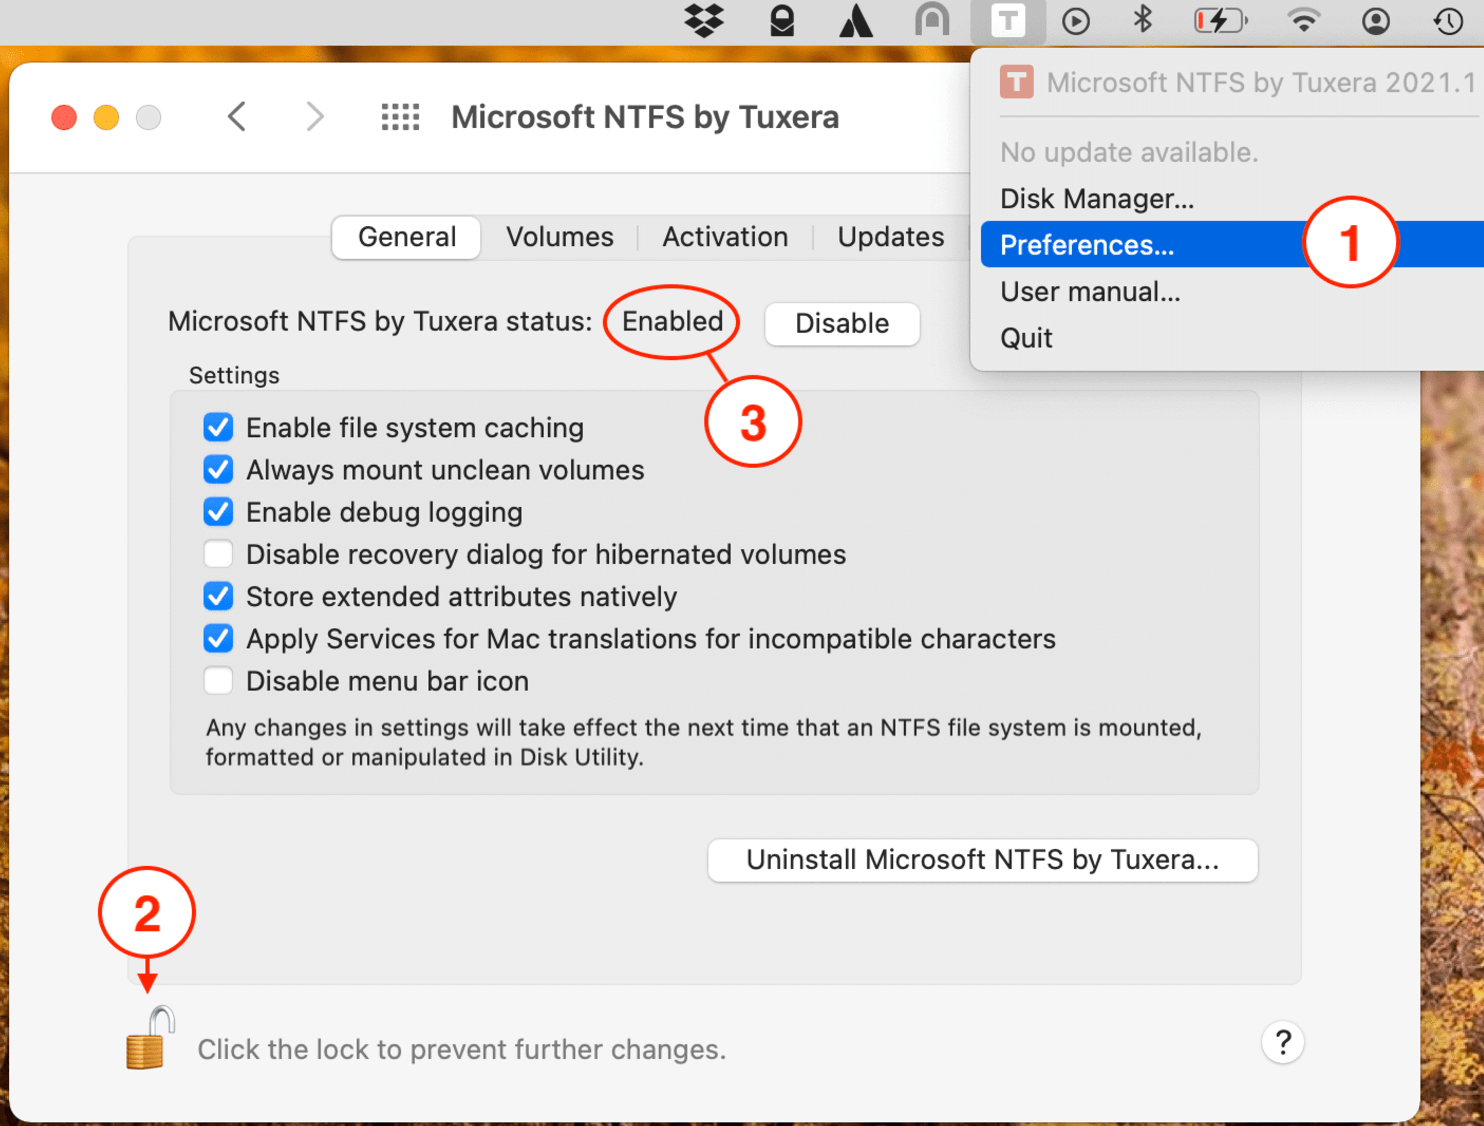
Tuxera NTFS for Mac is another excellent paid solution. Here’s how to use it:
- Download and install Tuxera NTFS for Mac.
- Launch the application and connect your SD card.
- Select your SD card from the list of devices.
- Choose NTFS as the desired file system and click Format.
- Confirm the action and wait for the process to finish.
Tuxera provides similar functionality to Paragon, with added reliability for heavy-duty tasks.
NTFS-3G and macFUSE (Free)
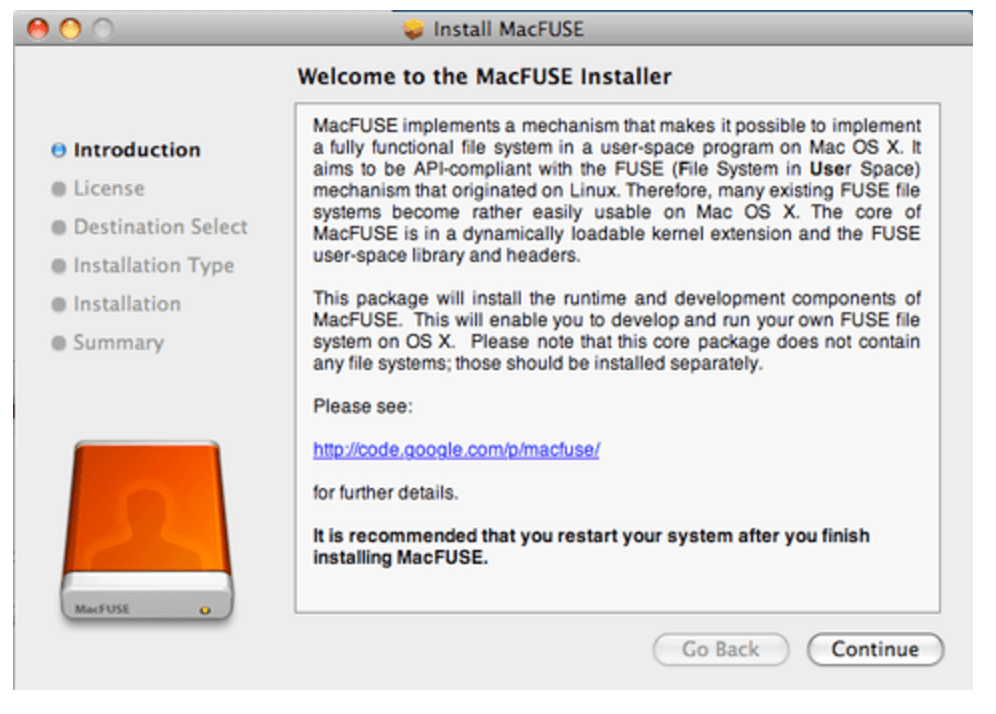
For users who prefer free solutions, NTFS-3G paired with macFUSE is a great option. This method relies on open-source tools but requires some technical understanding and command-line usage. While it’s not as straightforward as paid solutions, it gets the job done without any cost. Below is a step-by-step guide to using this method.
Step 1: Install Homebrew (Optional but Recommended)
Homebrew is a popular macOS package manager that simplifies the installation of tools like macFUSE and NTFS-3G.
- Open Terminal. There are 2 ways for it. Search it in a Spotlight or go to Applications via Utilities.
- Install Homebrew by entering the following command:
/bin/bash -c "$(curl -fsSL https://raw.githubusercontent.com/Homebrew/install/HEAD/install.sh)"
- Follow the on-screen instructions to complete the installation.
Step 2: Install macFUSE
macFUSE is essential for enabling NTFS writable access on macOS.
- Download macFUSE from the official macFUSE website.
- Install the package by double-clicking the downloaded .dmg file and following the installer prompts.
- Restart your Mac to ensure the software integrates properly with the system.
Step 3: Install NTFS-3G
NTFS-3G is the core tool for creating and managing NTFS file systems. With Homebrew, installation is simple:
- Run the following command in Terminal:
brew install ntfs-3g
- Wait for the installation to complete. Homebrew will automatically handle dependencies.
Step 4: Format the SD Card
This step involves unmounting the SD card and using NTFS-3G to format it.
- Connect the SD card to the Mac.
- Identify the card’s disk identifier by running:
diskutil list
- Look for the entry corresponding to your SD card (e.g., /dev/disk2).
- Unmount the SD card to ensure no system processes interfere with formatting:
diskutil unmountDisk /dev/disk2
- Format the card using NTFS-3G:
sudo /usr/local/bin/mkntfs /dev/disk2
Replace /dev/disk2 with your actual disk identifier.
Step 5: Verify Formatting
After the process completes, confirm that the SD card is formatted to NTFS:
- Reinsert the card and open Disk Utility.
- Verify that the file system is listed as NTFS.
Additional Notes on NTFS-3G and macFUSE
- This method is slower compared to paid tools but offers a robust, cost-effective solution.
- NTFS-3G doesn’t integrate seamlessly into macOS GUI tools like Finder or Disk Utility. Operations are primarily command-line-based.
- If you encounter issues during formatting, double-check the disk identifier and ensure the SD card is properly unmounted.
By complying this process, you can format your SD card to NTFS for free, albeit with a little more effort than the paid alternatives.
Method 3. Use a Windows PC (Alternative)
If the above methods seem complex, you can use a Windows PC to format the SD card:
- Connect the SD card to a PC running Windows.
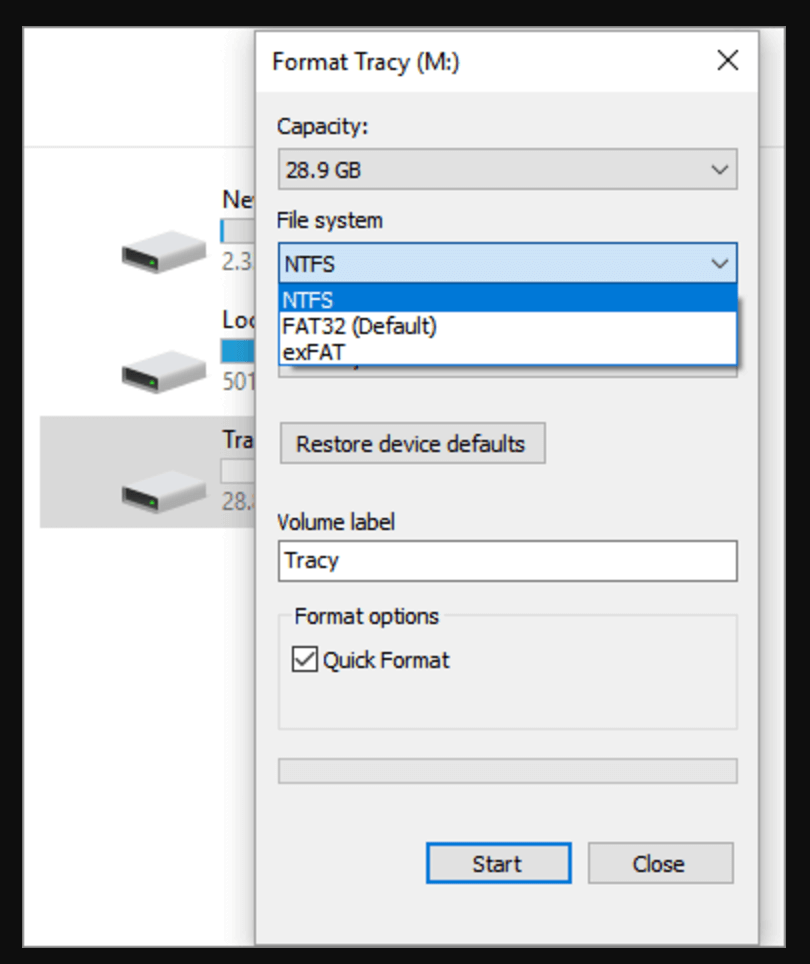
- Right-click the SD card in File Explorer, then choose Format.
- Click Start after selecting NTFS as the file system.
![formatting an SD card to NTFS on a Mac]()
- Eject the card safely once formatting is complete.
This alternative is quick and easy if you have access to a Windows device.
Verify the Formatting
After formatting, confirm that your SD card is correctly formatted to NTFS:
- Insert the SD card into your Mac.
- Open Disk Utility (search in Spotlight or find it in Applications > Utilities).
- Select the SD card and check the file system listed. It should say NTFS.
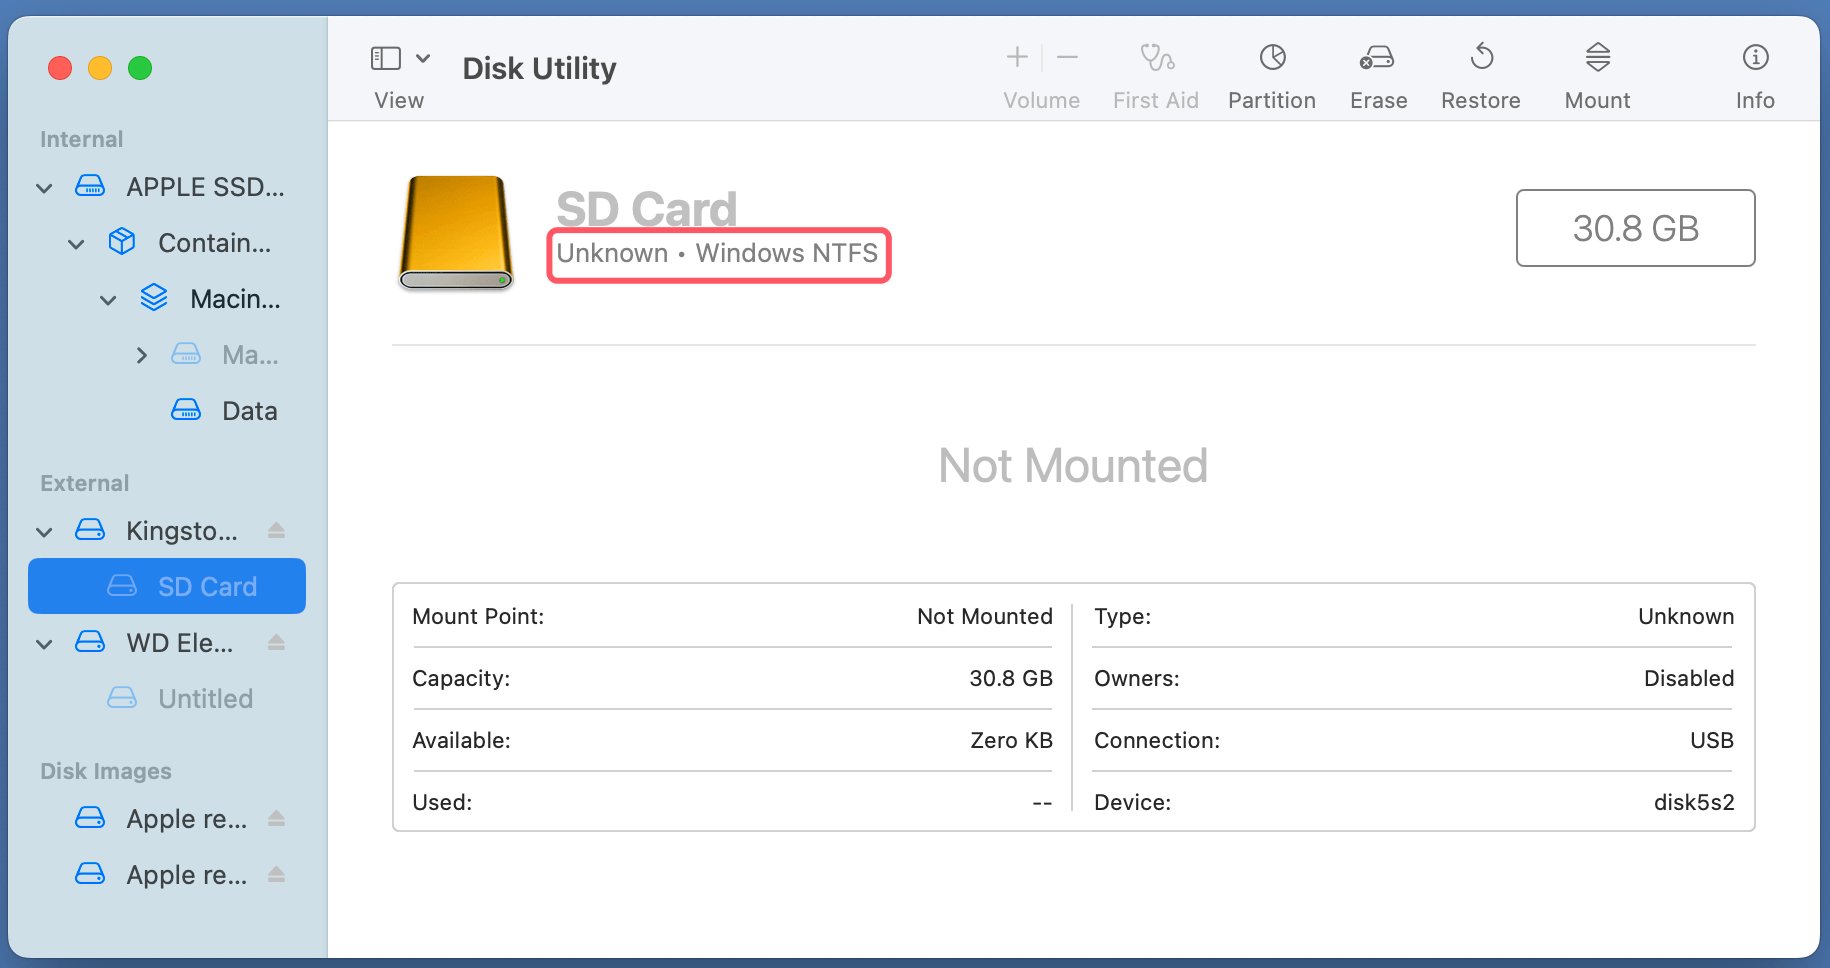
To further test functionality, transfer a large file to the card. If the file moves without error, the formatting was successful.
Format SD Card to NTFS on Mac Tips and Troubleshooting
Common Errors and Fixes:
- SD card is write-protected:
- Check the lock switch on the card.
- If software-based protection is enabled, use Terminal commands to disable it.
- Disk not recognized:
- Use Disk Utility's First Aid tool to repair the SD card.
- Ensure the card reader is functioning correctly.
Maintaining SD Card Health:
- Safely eject the card: Always eject the SD card properly before removing it from your Mac to prevent corruption.
- Avoid extreme conditions: Store the card in a cool, dry place and avoid exposing it to water or physical stress.
- Use reputable software: When using third-party tools, stick to well-reviewed options to avoid malware risks.
Data Loss:
If you lost data by formatting your SD card to NTFS on a Mac, you can use recovery software. This software can help you unformat the SD card and recover your lost data.
Step 1. Download and install the reliable Mac data recovery software - Donemax Data Recovery for Mac.
Step 2. Open Donemax Data Recovery for Mac, then select the SD card to start data recovery.

Step 3. Click on Scan button to deeply scan the NTFS SD card and find all deleted/erased files.

Step 4. Once the scan is completed, you can preview all recoverable files. Then select the wanted files, click on Recover button to save them.

Conclusion
Convert exfat/fat32 sd card to ntfs on mac may seem challenging, but with the right tools and guidance, it's a straightforward process. You can use Donemax NTFS for Mac, Paragon NTFS for Mac, Tuxera, NTFS-3G, or a Windows PC. Each method works well with Windows devices and supports large files.
Remember to back up your data. Choose the best method for your skill level. Check the formatting before using the card. Follow this guide to equip yourself to handle NTFS formatting on macOS like a pro.
Related Articles
- Jan 30, 2024How to Fix Toshiba External Hard Drive Read-Only on Mac?
- Jun 28, 20252025 Paragon NTFS for Mac Review and Better Alternative
- Dec 13, 2024How to Use NTFS Drive on macOS Sonoma: A Comprehensive Guide
- Dec 05, 2024Kingshiper NTFS for Mac Review, How to Use It, Best Alternative
- Nov 20, 2024Fix NTFS Drive is Read-Only on macOS Big Sur
- May 22, 20257 Solutions to Fix Files Not Copying from Mac to External Drive or USB Drive

Christina
Christina is the senior editor of Donemax software who has worked in the company for 4+ years. She mainly writes the guides and solutions about data erasure, data transferring, data recovery and disk cloning to help users get the most out of their Windows and Mac. She likes to travel, enjoy country music and play games in her spare time.

Gerhard Chou
In order to effectively solve the problems for our customers, every article and troubleshooting solution published on our website has been strictly tested and practiced. Our editors love researching and using computers and testing software, and are willing to help computer users with their problems
