Before we start: Donemax NTFS for Mac is a reliable NTFS for Mac tool. It can help you quickly mount or force mount a NTFS volume on your Mac. It also allows your Mac to write data to the NTFS volume, fixes corrupted NTFS volume, etc.
PAGE CONTENT:
If you've ever encountered problems mounting an NTFS volume on your Mac, you're not alone. NTFS (New Technology File System), developed by Microsoft, is one of the most common file systems used on external drives and Windows systems. However, macOS has limited support for NTFS, often causing headaches for users who need to access their files. While macOS can read NTFS drives, it cannot write to them without additional software or workarounds.
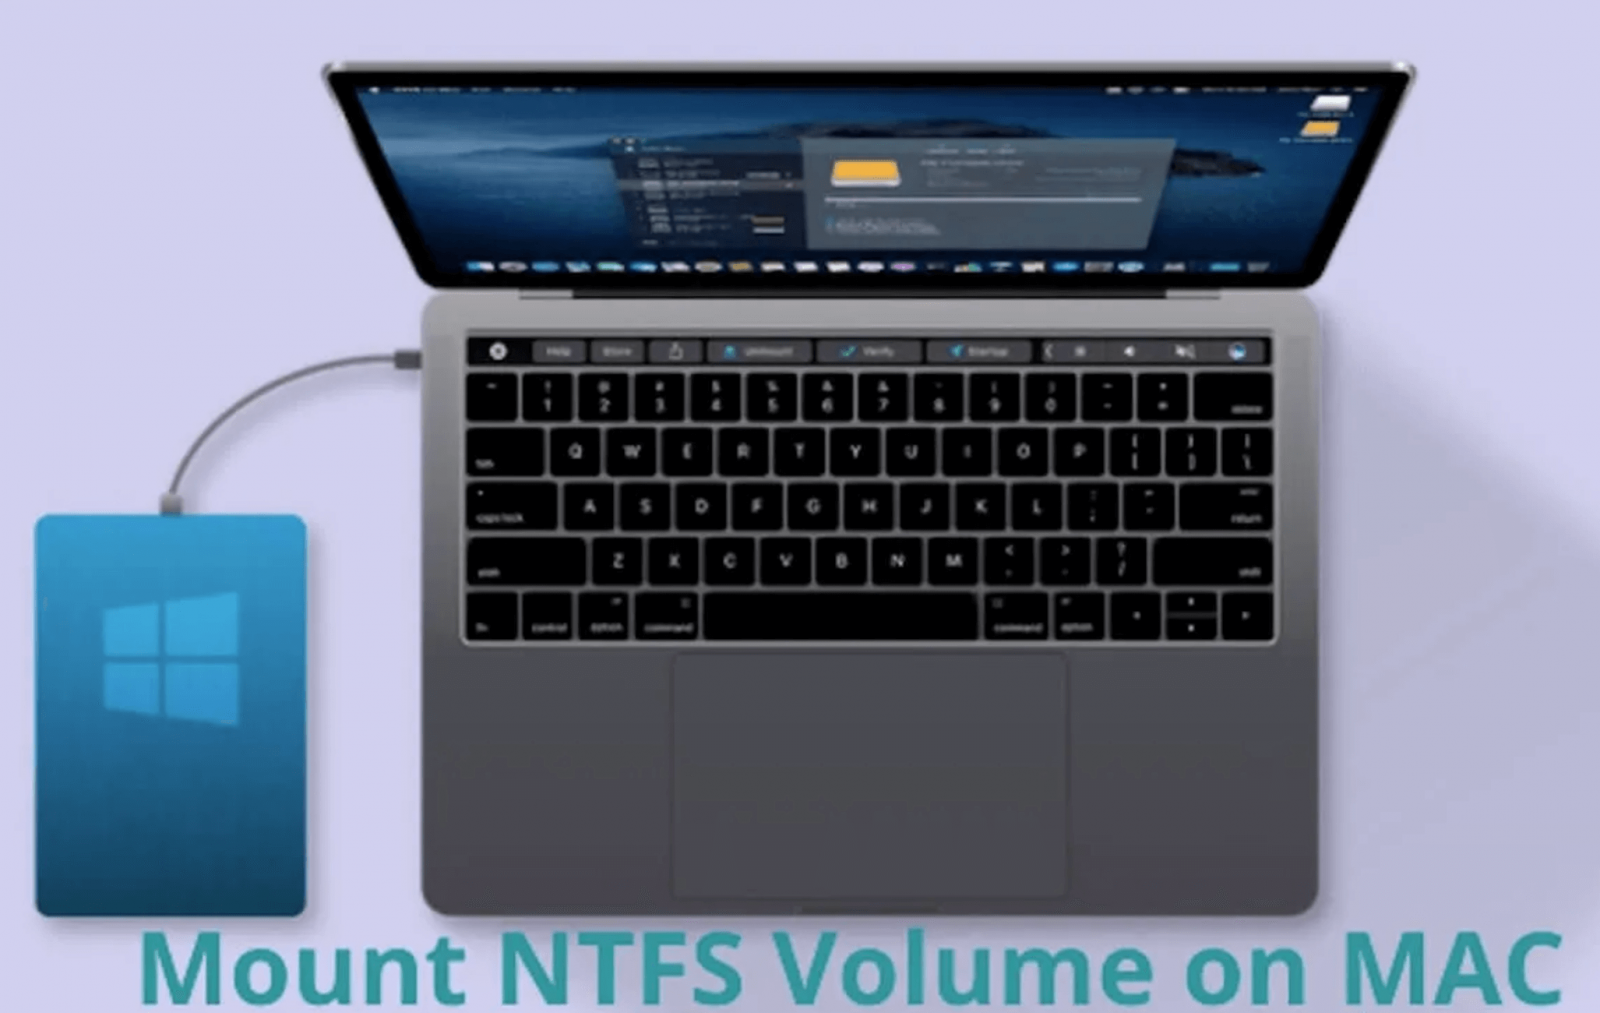
This guide will explore why this issue occurs, outline common causes, and provide step-by-step solutions to help you access and manage your NTFS volumes seamlessly.
Why Can't macOS Natively Write to NTFS? Why Can't Mount a NTFS Volume on Mac?
macOS's inability to write to NTFS volumes often surprises users who are accustomed to seamless compatibility across modern devices. To understand this limitation, it's important to delve into the history and technical aspects of NTFS and macOS.
A Proprietary File System
NTFS (New Technology File System) was introduced by Microsoft in 1993 as part of the Windows NT operating system. Designed to be robust and secure, it offers features like file encryption, journaling, and large volume support. These features have made it the default file system for Windows systems, especially for internal hard drives and external storage devices.
However, NTFS is proprietary. Microsoft controls its implementation, and licensing the technology for full read-and-write compatibility on other operating systems involves significant technical and financial hurdles. While Linux-based systems and third-party developers have reverse-engineered NTFS support, Apple has chosen to provide only basic, read-only functionality within macOS.
Why Read-Only Support?
The read-only support macOS provides is sufficient for viewing and copying files from NTFS drives. This feature is built into macOS, enabling users to access NTFS-formatted drives without additional software. However, enabling write support involves deeper integration with NTFS, which Apple has opted not to pursue. The reasons for this include:
- Focus on Native Systems: Apple prioritizes its proprietary file systems, such as APFS (Apple File System) and Mac OS Extended (HFS+). These file systems are optimized for macOS, offering advanced features like seamless encryption, improved performance, and better disk management.
- Complexity of NTFS: Writing to NTFS requires accurate implementation of its features, such as journaling and access control lists (ACLs). Errors in these implementations can lead to data corruption.
- Licensing and Costs: Licensing NTFS write support from Microsoft could be expensive and might not align with Apple's business strategy, given its emphasis on closed ecosystems.
Challenges for Users
This design choice can be inconvenient for users who work in cross-platform environments. For example, someone using an NTFS-formatted external drive on a Windows PC may face limitations when switching to a Mac. Common tasks, like editing documents or transferring files, become frustratingly complex without the ability to write directly to the drive.
The lack of native NTFS write support is not necessarily a flaw in macOS but rather a reflection of its focus on simplicity and security within its ecosystem. Nevertheless, this limitation leaves users needing alternative solutions to enable full functionality for their NTFS drives.
The Broader Implication
For users frequently toggling between macOS and Windows, this limitation underlines the importance of choosing the right file system when formatting external drives. File systems like exFAT and FAT32, while less advanced than NTFS, provide universal compatibility across operating systems. However, for those committed to using NTFS due to its features or pre-existing formatting, additional tools or configurations are necessary to bridge the gap.
In the following sections, we will explore how to work around these limitations effectively, enabling you to make the most of your NTFS volumes on macOS.
Common Symptoms and Causes: NTFS Volume Won't Mount on Mac
When you plug an NTFS-formatted drive into your Mac, you might encounter the following symptoms:
- The drive mounts but is accessible in read-only mode.
- The drive doesn't appear in Finder or Disk Utility.
- Error messages such as "The disk you inserted was not readable by this computer" appear.
- You can't transfer files to the drive, even though it’s recognized.
- Mount button is greyed out when selecting the NTFS volume in Disk Utility.
Potential Causes:
- File System Compatibility: NTFS is not natively writable on macOS.
- Corrupted NTFS File System: The drive's file system might be damaged.
- Outdated macOS or Driver Issues: Compatibility problems can arise with older macOS versions.
- Hardware Problems: Faulty cables, ports, or the drive itself can cause issues.
How to Fix NTFS Volume Mounting Issues on macOS?
The following solutions address common NTFS mounting problems. Follow these steps in order to troubleshoot and resolve the issue effectively.
#1 Check Hardware and Cable Connections
Before diving into software fixes, ensure that the issue isn't hardware-related.
- Inspect the Cable and Ports: Check the USB cable and port for any physical damage. Try using a different cable or port.
- Test on Another Device: Plug the drive into another computer to confirm it works correctly. If the drive doesn't work on other systems, it may be faulty.
#2 Update macOS and Drivers
Keeping your system updated can resolve many compatibility issues.
- Check for macOS Updates:
- Open System Preferences > Software Update or System Settings > General > Software Update (for macOS Ventura or later).
- Install any available updates.
- Update Drivers for External Drives: Some NTFS drives come with drivers or software that can enable write access. Check the manufacturer's website for updates.
#3 Use Native macOS Features
While macOS doesn't support writing to NTFS natively, it provides tools like Disk Utility to manage external drives.
- Verify and Repair the Disk with Disk Utility:
- Open Disk Utility (Applications > Utilities > Disk Utility).
- Select your NTFS drive from the sidebar.
- Click First Aid to check for and repair errors.
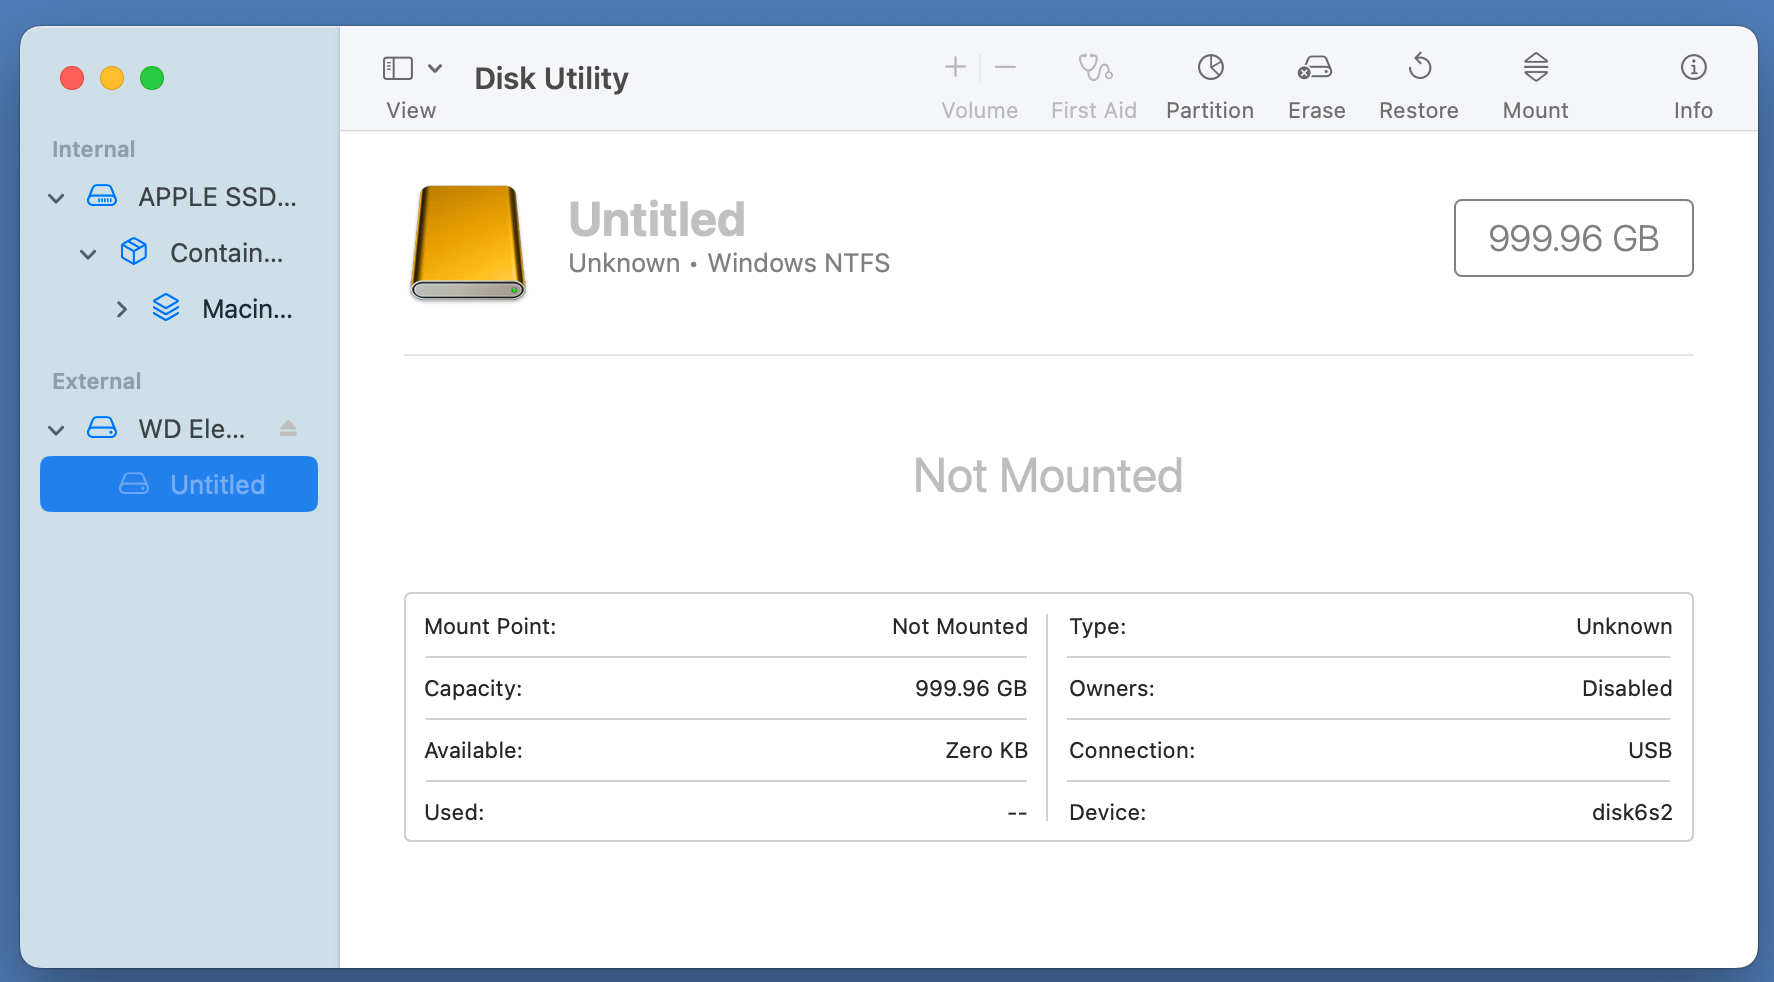
- Mount the Drive Manually: If the drive isn't mounting automatically, you can try mounting it manually using Disk Utility.
![mounting an NTFS volume on your Mac]()
- Access Files in Read-Only Mode: Use Finder to copy files from the drive to your Mac if you only need read access.
#4 Install Third-Party NTFS Drivers
For full read-and-write support, third-party NTFS drivers are the most reliable solution.
- Recommended NTFS Drivers:
- Donemax NTFS for Mac: A robust, user-friendly solution with excellent performance.
- Tuxera NTFS for Mac: A popular alternative with a free trial option.
- Mounty for NTFS: A lightweight, free tool that uses Apple’s built-in NTFS write capabilities (with some limitations).
- How to Install and Use Donemax NTFS for Mac:
- Download and install Donemax NTFS for Mac.
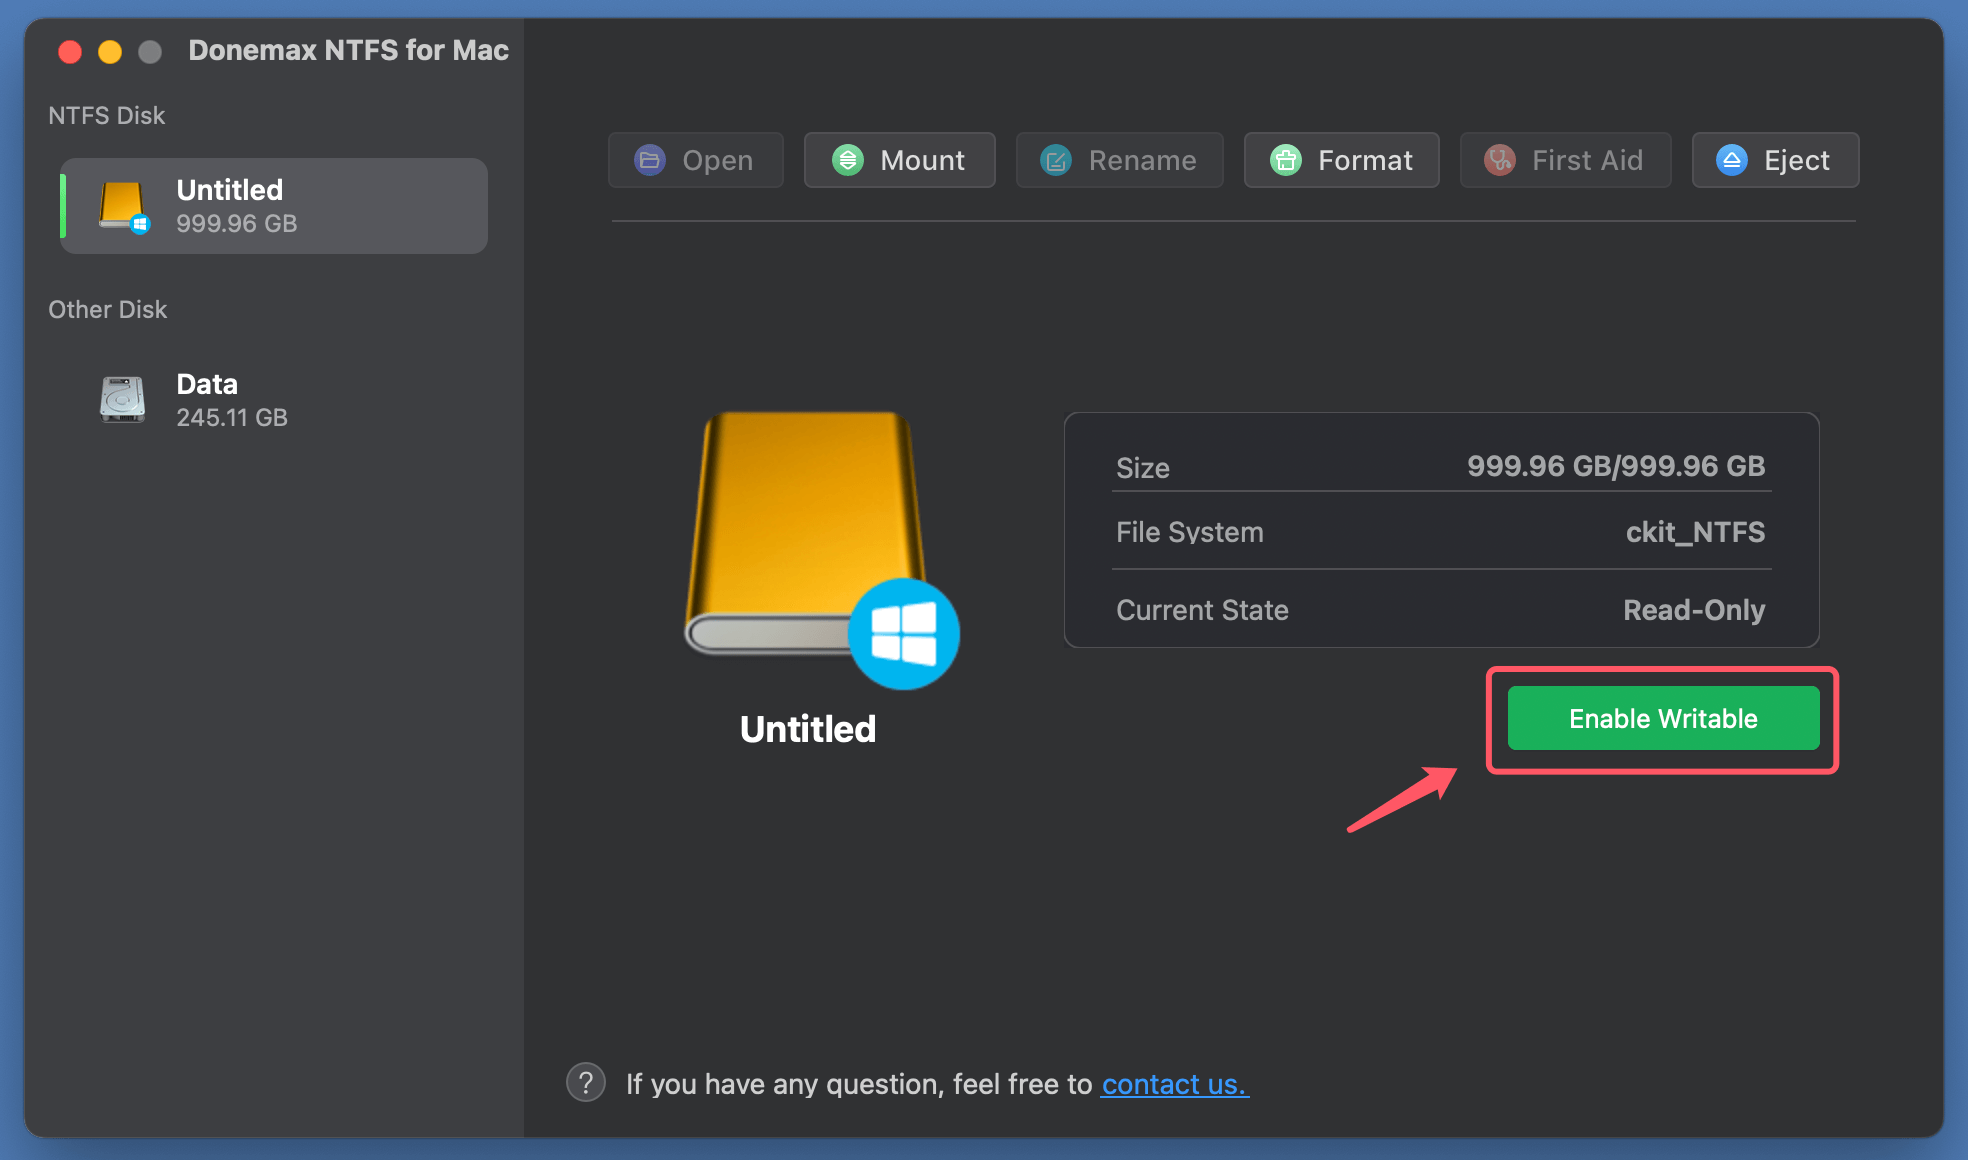
- Open Donemax NTFS for Mac, select the NTFS volume, click on Enable Writable button so that you can write data to the NTFS volume.
![Donemax NTFS for Mac]()
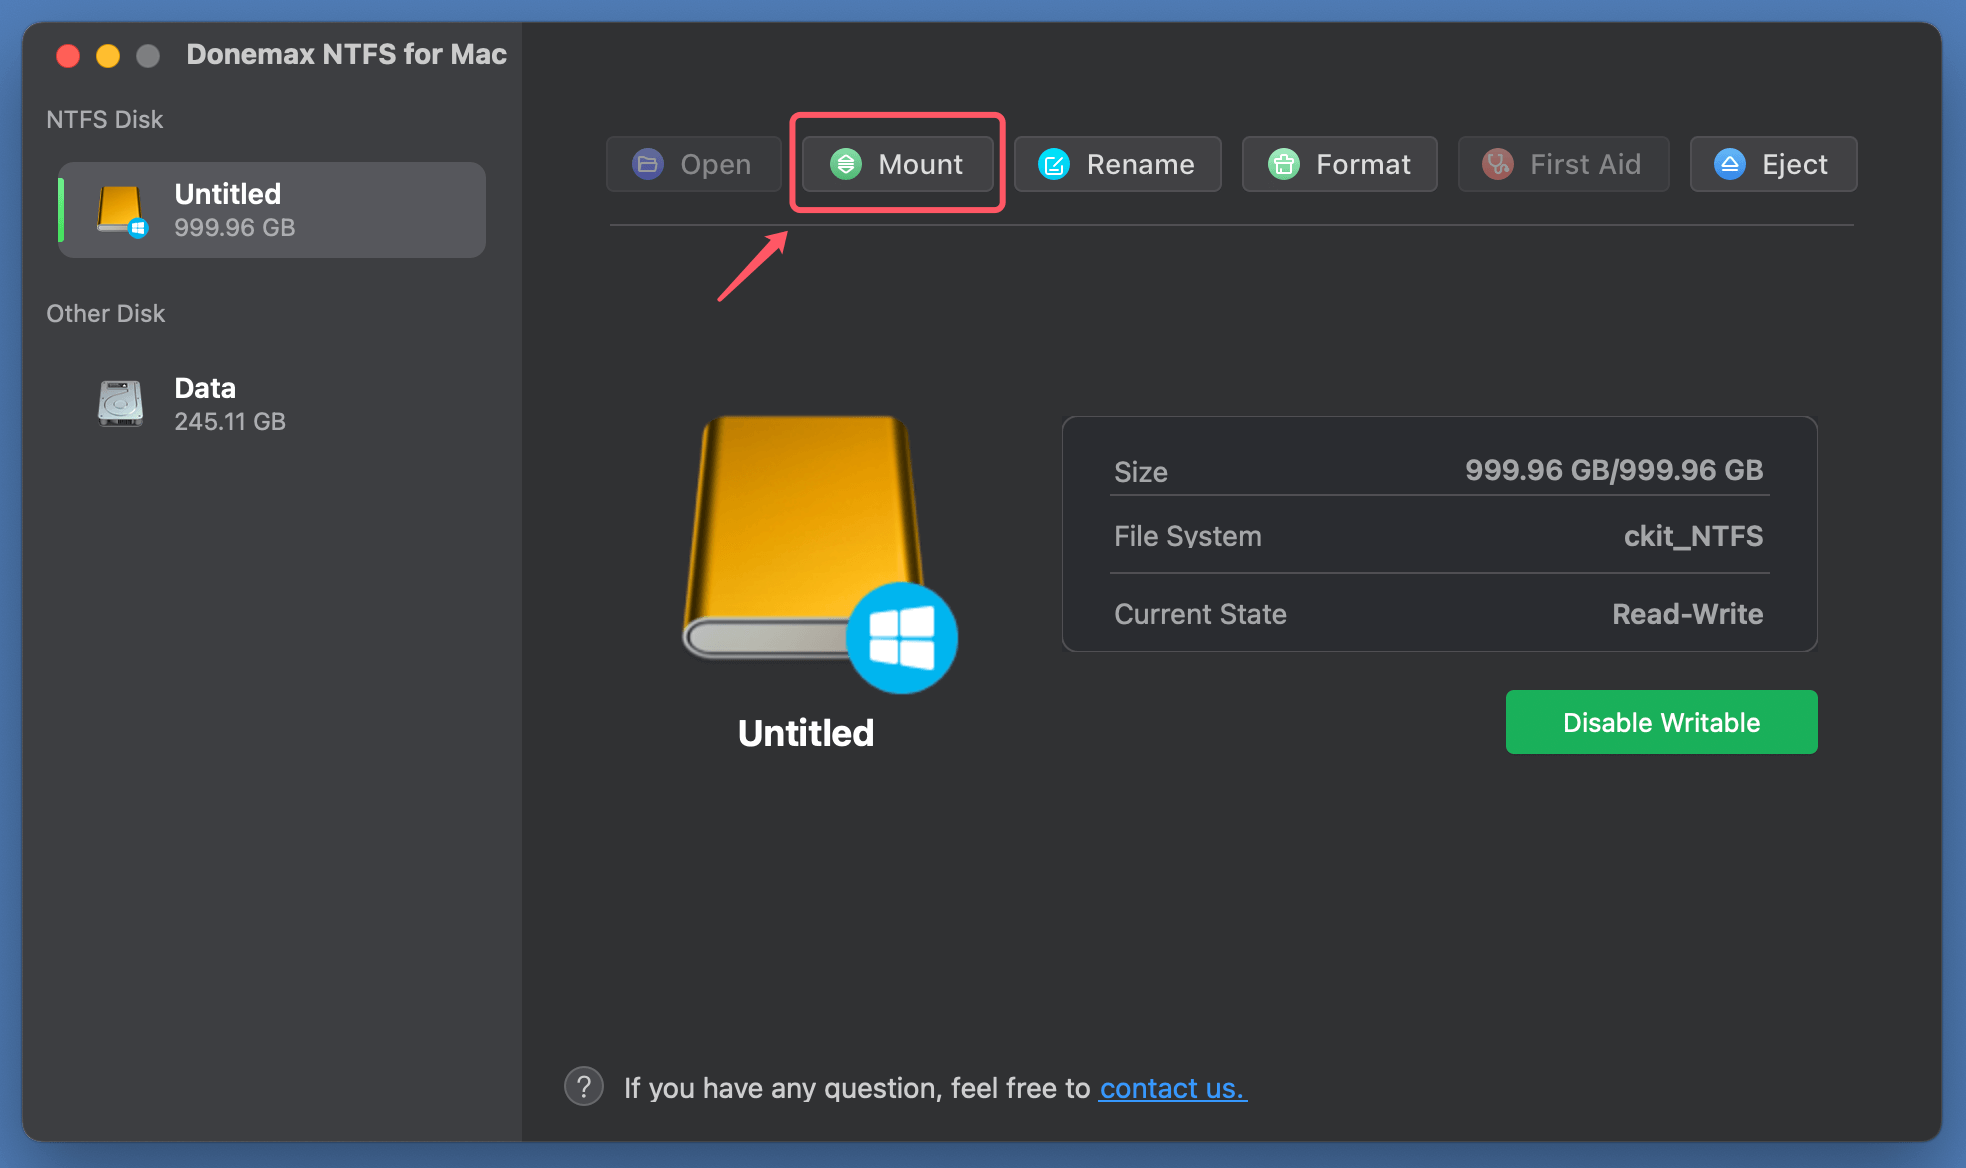
- If the NTFS volume is not mounted, just click on Mount button.
![Donemax NTFS for Mac]()
#5 Use Command Line for Temporary NTFS Write Access [Low Success Rate]
If you prefer not to use third-party software, you can enable NTFS write support through macOS's Terminal. This method is not officially supported by Apple and may lead to data corruption, so proceed with caution.
- Steps to Enable NTFS Write Support:
- Connect the NTFS drive to your Mac.
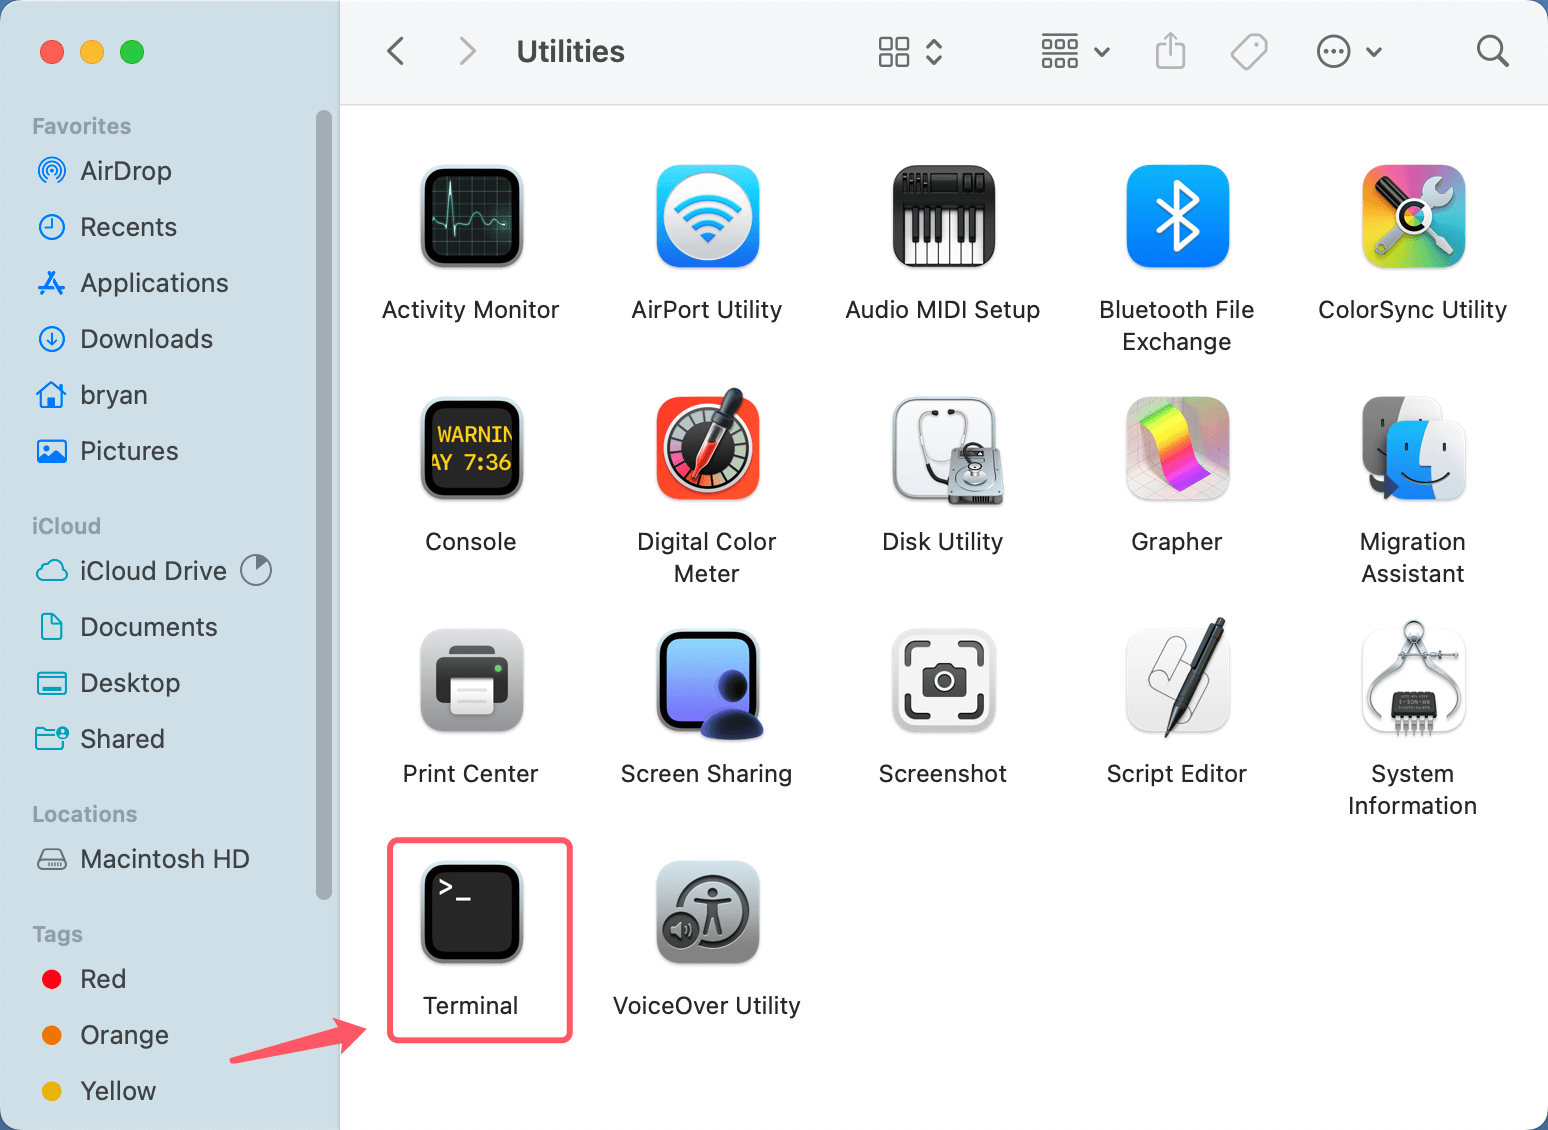
- Open Terminal (Applications > Utilities > Terminal).
![Donemax NTFS for Mac]()
- Type the following command to list all drives:
diskutil list
- Identify the NTFS drive’s identifier (e.g., disk2s1).
- Create a mount point by typing:
sudo mkdir /Volumes/NTFS
- Mount the drive with write access:
sudo mount -t ntfs -o rw,auto,nobrowse /dev/disk2s1 /Volumes/NTFS
- Access the drive in Finder under /Volumes/NTFS.
- Limitations: This method provides temporary write access, and any changes might not persist after the drive is unplugged.
#5 Reformat the Drive (if necessary)
If none of the above solutions work or if you no longer need the NTFS format, reformatting the drive to a macOS-compatible file system may be the best option.
- Before Reformatting:
- Back up all important data, as reformatting will erase the drive.
- Reformat to a Compatible File System:
- Open Disk Utility.
- Select the NTFS drive from the sidebar.
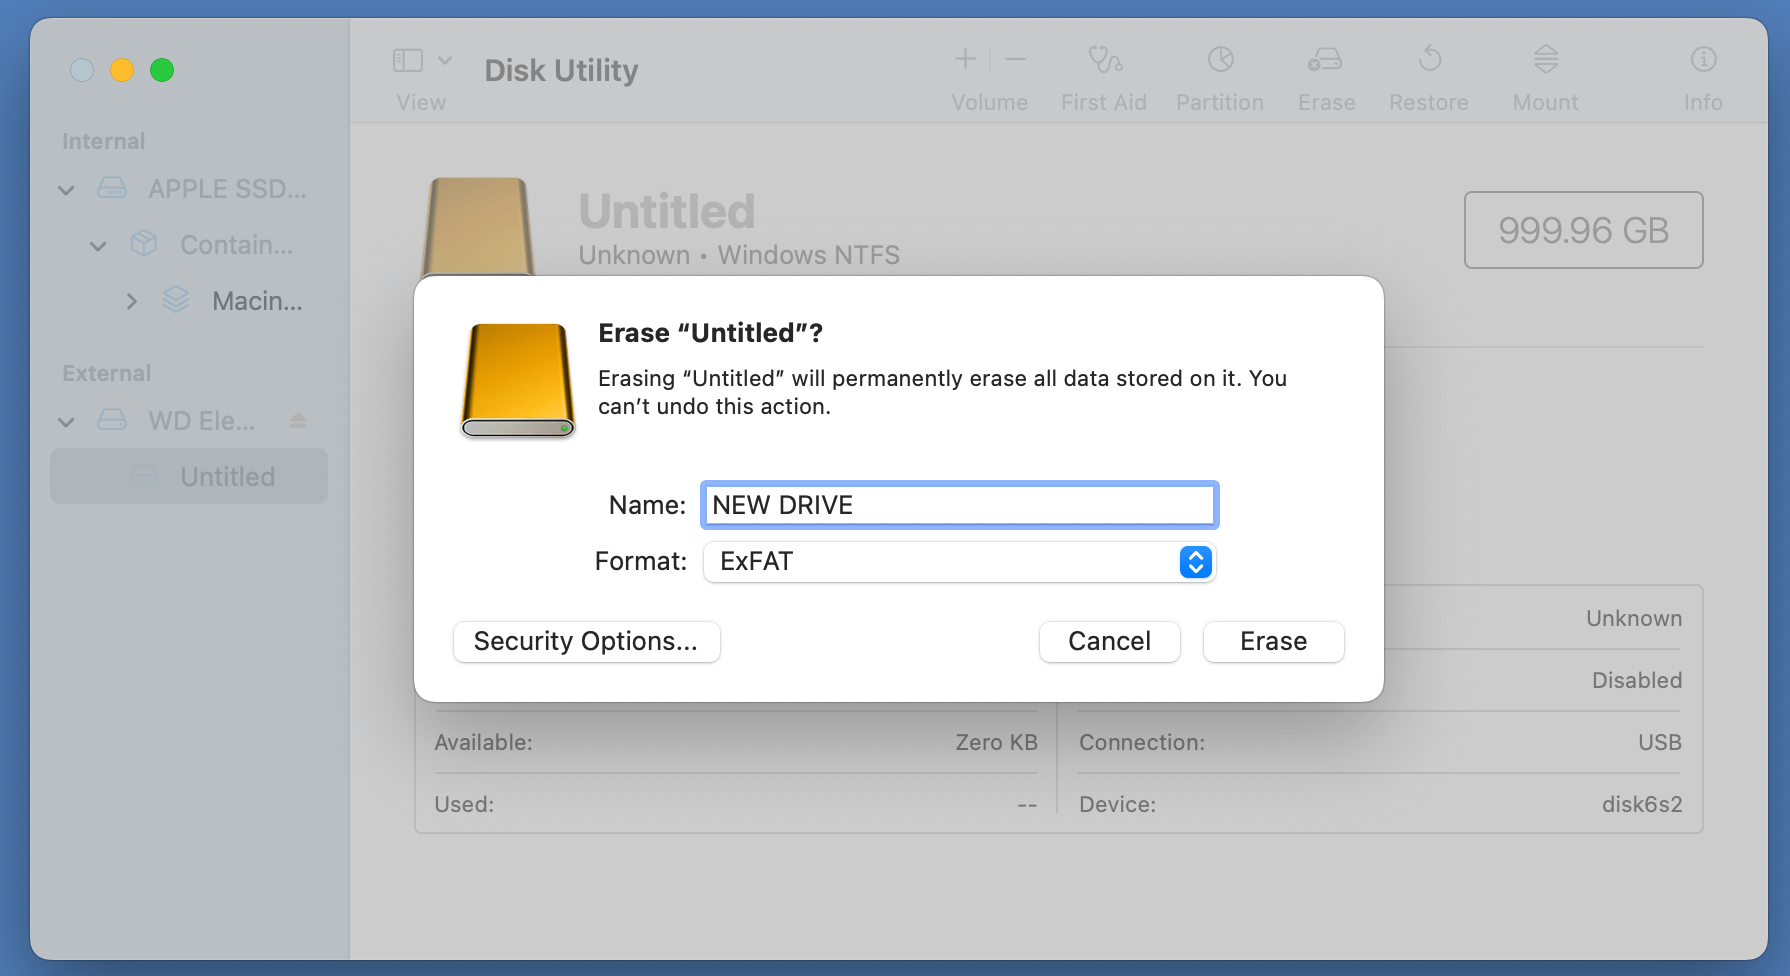
- Click Erase.
- Choose a new file system:
- ExFAT: Compatible with macOS and Windows, ideal for cross-platform use.
- APFS or Mac OS Extended: Best for drives used exclusively on macOS.
- Click Erase to format the drive.
![Donemax NTFS for Mac]()
Note: Erasing the drive will delete everything from the NTFS volume. Make a backup before starting to erase the volume. If you have lost data from the NTFS volume, just use Mac data recovery software to scan the erased volume and get all lost data back.
Preventative Measures for the Future
To avoid NTFS mounting issues in the future, consider the following tips:
- Use Cross-Platform File Systems: When setting up new external drives, format them as ExFAT if you plan to use them on both Windows and macOS.
- Regularly Update macOS and Software: Ensure your operating system and any third-party tools are always up to date for optimal compatibility.
- Use Trusted NTFS Drivers: Invest in reliable NTFS driver software (such as Donemax NTFS for Mac) if you frequently work with NTFS drives on macOS.
By following these preventative measures, you can minimize disruptions and ensure smooth file transfers between macOS and Windows systems.
Conclusion
Dealing with NTFS mounting issues on a Mac can be frustrating, but with the right approach, these problems are manageable. Whether you choose to use third-party drivers, macOS's built-in tools, or a reformatting solution, there are plenty of ways to gain access to your NTFS drives.
For users who frequently switch between macOS and Windows, using a cross-platform file system like ExFAT may be the most practical long-term solution. However, for those who need to work with NTFS volumes regularly, investing in a reliable NTFS driver like Donemax or Tuxera will save time and reduce hassle.
By understanding the limitations and implementing these solutions, you'll be better prepared to handle NTFS volumes on macOS without any interruptions.

Donemax NTFS for Mac
An easy-to-use NTFS for Mac tool to help you enable writable for NTFS drives on Mac so that you can read-write NTFS drives on Mac without any limitation. It also can help you mount, format, repair, rename, open drive on your Mac.
Related Articles
- Oct 11, 2025Format A Hard Drive for Both Windows and Mac
- Dec 14, 2024(Step-by-step Guide) Grant Full Read-Write Access to NTFS Drive on Mac
- Aug 15, 2023Fixed: Can't Delete Files from An USB Flash Drive on Mac
- Jun 23, 2025Can macOS Read NTFS Drive?
- Sep 18, 2025Tuxera NTFS for Mac Review and Best Alternative
- May 28, 2025How to Use a Windows NTFS Drive on Mac? 5 Solutions

Maria
Maria is one of the senior writers & editors of Donemax who lives and works in Sydney, Australia. She loves PC, Mac and Internet Technology. She has 6 years of writing articles about data recovery on PC/Mac, disk cloning solution, data eraser and computer OS optimization, etc. She is also interested in testing various software and digital products.

Gerhard Chou
In order to effectively solve the problems for our customers, every article and troubleshooting solution published on our website has been strictly tested and practiced. Our editors love researching and using computers and testing software, and are willing to help computer users with their problems

