Written byCoco LinUpdated on Jul 01, 2024
How to Delete Partition on Mac?
Approved byGerhard Chou
PAGE CONTENT:
Managing your Mac's files well can make all the difference, especially if you have more than one partition. Knowing how to delete a partition to make more space, organize your drives better, or change how disk resources are used is useful. This complete guide will show you how to do it step by step, giving you the confidence to work with your Mac's files.
We'll review everything, from what partitions are and why you might want to delete one to how to use Disk Utility for more advanced control. If you want to get back in charge of your Mac's storage and speed it up, keep reading to learn how to safely and effectively delete a drive. This guide is for everyone, whether you've used a Mac before or this is your first time.

What Is A Partition?
A partition is a logically separate part of a hard drive that splits it into different areas that can be managed like separate drives. It helps organize data better because each partition can hold different kinds of files or be used for specific jobs. Partitions can also be used to run more than one operating system on the same computer.
It lets you switch between OS settings without affecting the others. By dividing your drive into partitions, you can better handle your storage, speed up your system, and keep your digital workspace cleaner and more organized.
Reasons to Delete A Partition on Mac
There are several strong reasons why you should get rid of a Mac partition:
- Free Up Space: Getting rid of partitions that aren't being used can free up important disk space, giving your main partition more room for programs, files, and system processes.
- Simplify Drive Management: Managing fewer partitions simplifies the drive layout, making organizing and finding files easier without going through multiple sections.
- Reallocate Resources: If you need to free up room on a disk partition, deleting another partition can help you do this more quickly. It ensures that your main partition and other important partitions have enough space to work properly.
- Remove Unnecessary Operating Systems: You may have set up a folder to run a second operating system you no longer require. Getting rid of this partition can make your system easier to use and free up disk room for more important tasks.
Preparation for The Deletion
There are a few important steps you need to take before you delete a partition to make sure you don't lose any important data and the process goes quickly.
- Backup Your Data
If you delete a disk, all its data will be lost. Because of this, it is very important to save a copy of any important information before moving on. Time Machine, a portable drive, or a cloud storage service are all good ways to back up your files. You also can use disk cloning software to clone everything of the Mac to an external hard drive, then create a full bootable clone backup for your Mac.
- Check Disk Usage
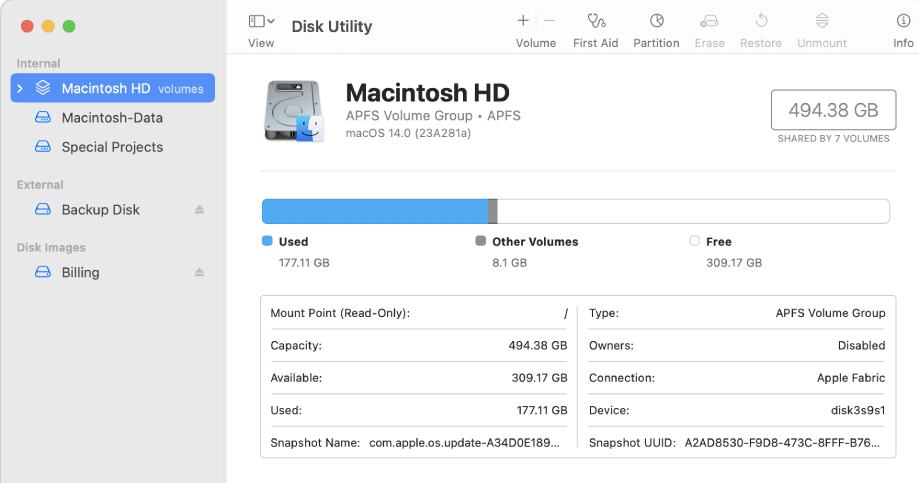
Ensure you know which partition you want to delete and what info is on it. The Disk Utility app on your Mac lets you see what's on each disk.
- Considerations for Boot Camp Partitions
Deleting a Boot Camp disk that lets you run Windows on your Mac is slightly different. The Boot Camp Assistant app can be used to handle Boot Camp partitions straight away.
Delete A Mac Partition Using Disk Utility
Mac OS has a Disk Utility app that lets you manage disks and folders. To get rid of a divide, follow these steps.
1. Open Disk Utility
Apps > Utilities > Disk Utility is where you can find Disk Utility.
2. Select the Drive
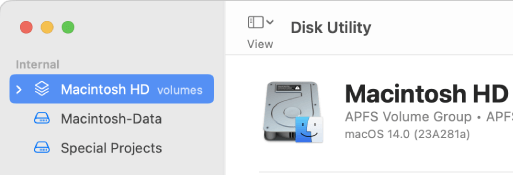
The left side of Disk Utility shows a list of possible drives and their partitions. Pick out the drive with the section you want to eliminate.
3. Show All Devices
Press the "View" button in the Disk Utility and choose "Show All Devices." It will show all the files and the drives that hold them.
4. Select the Partition
Pick out the section you want to delete under the drive you want to use.
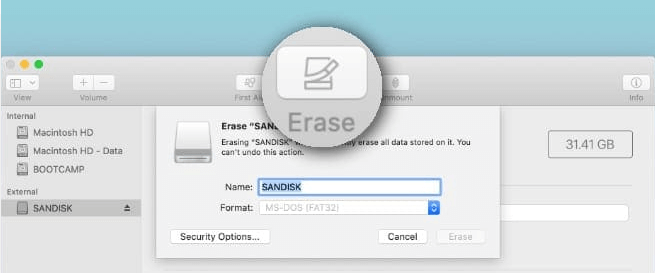
5. Erase the Partition
In the Disk Utility window, click the "Erase" button. When you do this, a box will appear where you can name and format the section you want to delete. Make sure you want to delete the file.
6. Delete the Partition
After erasing it, the partition should now be a free room. To get rid of it, go back to the main screen of Disk Utility, pick out the partition, and click the "-" button below the partition map.
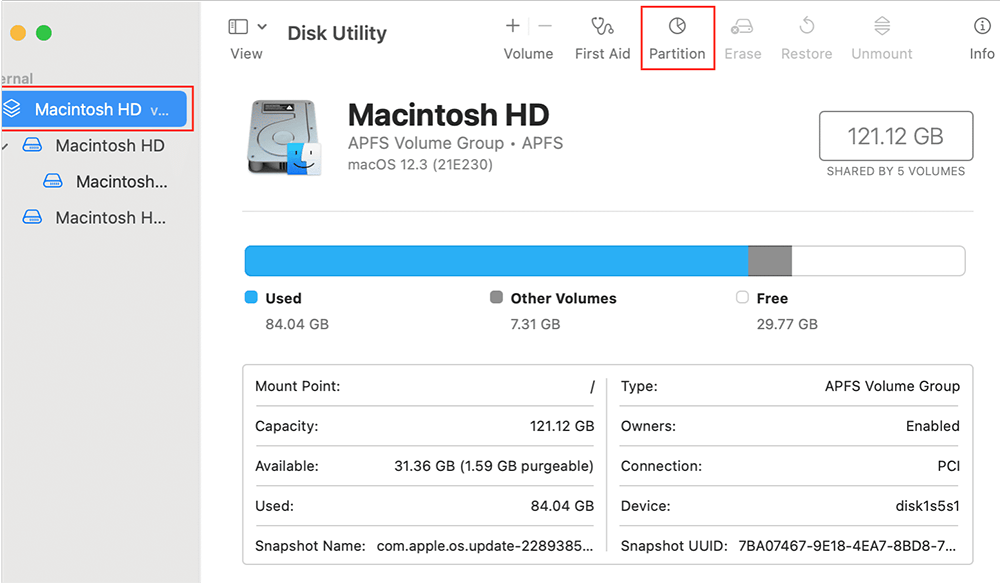
7. Reallocate Space
The deleted partition's room can now be used for something else. If you pick the partition, click the "Partition" button, and then drag the resize control to use this space, you can change the size of an existing partition.
Post-Deletion Considerations
- Verify Disk Integrity
After you delete a partition, you should check your disk's integrity to ensure no mistakes. Disk Utility lets you do this. Just pick out your main drive and click on "First Aid." This process will look for problems and fix them if it finds any. It will help keep your disk healthy.
- Reformatting and Creating New Partitions
Disk Utility makes it easy to make a new partition using the room that is no longer being used. Choose the drive you want to work with, click "Partition," and press "+" to add a new partition. You can give the new partition the format, name, and room size you want to use.
- Reinstalling Software
If the partition you removed had software, you may need to reinstall it. Ensure you have the program files or the ability to get the software again. This step makes sure that your programs will keep running without stopping.
- Backup and Maintenance
You must regularly back up your data to keep from losing important data. Use Time Machine or another good backup service to keep your files safe. If you take care of your Mac regularly, like making sure files are up to date and checking the disk's integrity, it will run smoothly.
How to Recover Lost Data after Deleting Partition on Mac?
If you have lost data due to erasing or deleting partition on your Mac, just use a data recovery program to help you get all lost files back! Donemax Data Recovery for Mac is a powerful Mac data recovery program. It can securely and completely recover lost files from erased or deleted partition on Mac.
Step 1. Download and install Donemax Data Recovery for Mac on your Mac, then open it, select the Mac disk such as Macintosh HD to start data recovery.

Step 2. Click on Scan button to deeply scan the Mac disk and find all recoverable files.

Step 3. Once the scan is completed, you can preview all recoverable files. Find the erased files and the files in the deleted partition, then select them, click on Recover button to save them.

Note: If you want to permanently erase all your data before selling your Mac, just try data erasure program to wipe all data from your Mac internal disk.
Conclusion:
Deleting a folder on your Mac is easy and can make your system run faster and be better organized. By reading this guide and knowing what partitions are, you can safely eliminate partitions you don't need, change how disk space is used, and keep your digital workspace clean.
Always back up your data before making changes, check the security of the disk afterward and think about reinstalling any software you need. By following these tips, you can easily take care of your Mac's storage, ensuring it works well and meets your needs.
Related Articles
- Jan 21, 2025HDD vs. SSD: A Detailed Comparison
- Jun 13, 2025macOS Tahoe 26: Everything You Should Know and Install it
- Jul 11, 2025How to Use an USB Drive on Mac?
- May 26, 2024How to Add Pictures for Mac Background?
- Apr 02, 20242025 Best 6 Disk Utility Alternatives for Mac
- Aug 10, 2025Windows 10 End of Support, What to Do?

Contributing Writer
Coco Lin
Coco has been a writer and a chief programmer at Donemax software since 2018. Over 10 years of experience of writing troubleshooting articles in the software industry, she is passionate about programming and loves to providing solutions to Windows and Mac users. Also she enjoys music and palying tennis in her free time.

Editor in chief
Gerhard Chou
In order to effectively solve the problems for our customers, every article and troubleshooting solution published on our website has been strictly tested and practiced. Our editors love researching and using computers and testing software, and are willing to help computer users with their problems
Hot Donemax Products
Clone hard drive with advanced clone technology or create bootable clone for Windows/Mac OS.

Completely and easily recover deleted, formatted, hidden or lost files from hard drive and external storage device.
Certified data erasure software - permanently erase data before selling or donating your disk or any digital device.