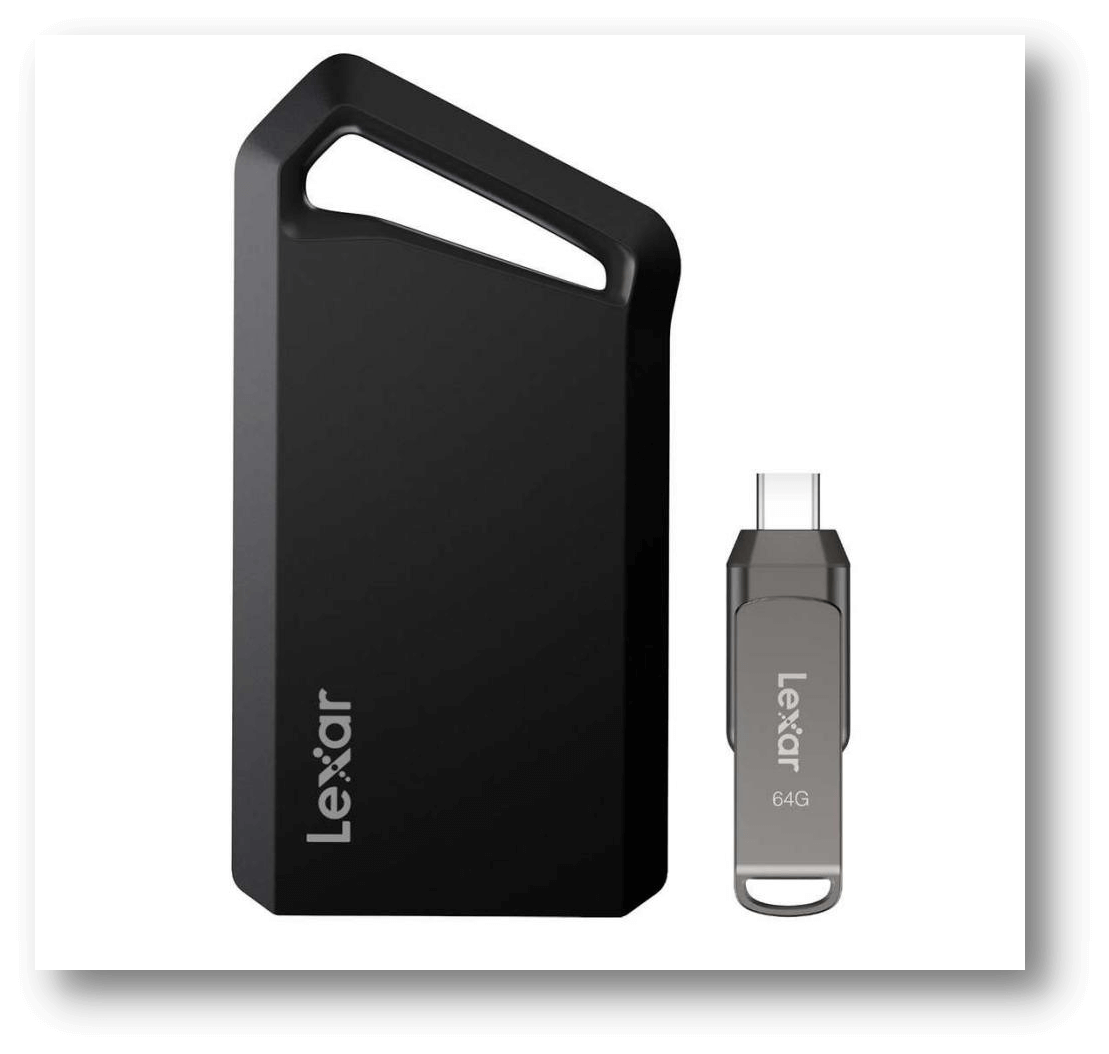
Hi, My 1TB Lexar portable SSD works well on my Windows PC, but I plug it into my new Windows 11 PC, it is not showing up. How to fix this issue?
PAGE CONTENT:
In today's fast-paced digital world, portable SSDs are must-haves for quickly saving and moving data. Lexar is a well-known brand in storage technology, and they have a wide range of high-quality compact SSDs to meet different needs. But there's nothing more annoying than not being able to see your Lexar Portable SSD on your Windows PC of choice.
Do not be afraid! This guide will look at the most common causes of this annoying problem and give you valuable tips on quickly fixing it. If you're confused about an SSD that won't show up, hold tight as we solve the puzzle and get your info back on track!

Why Is Lexar SSD Not Showing Up and How to Fix It
1. Connectivity Issue
Making sure the physical links are safe is the first thing that should be done when there is a connectivity problem. First, ensure that both ends of the USB cord connecting your Lexar Portable SSD to your Windows PC are firmly plugged in. If you're using a USB hub or an extension cord, connect the SSD directly to a USB port on your computer to ensure no other devices interrupt the connection.
2. Checking The USB Port And Cable
There are times when the USB port or cord itself is broken. To see if it works, connect your Lexar Portable SSD to a different USB port on your computer. Also, use a different USB cable to ensure the problem isn't caused by a broken one. It means that the first port or cable may be broken if the SSD shows up when attached to a different port or with a different cable.
3. Driver Installation and Updates
Sometimes, for your Windows PC to fully recognize and work with the Lexar Portable SSD, it may need specific drivers. Visit Lexar's website and grab the most up-to-date drivers for your device and Windows version. It will let you know if you have all the drivers you need for your SSD. Also, make sure that the updates and fixes for your Windows operating system are up to date. System software that is too old can sometimes cause problems when connecting external devices.
4. Disk Management
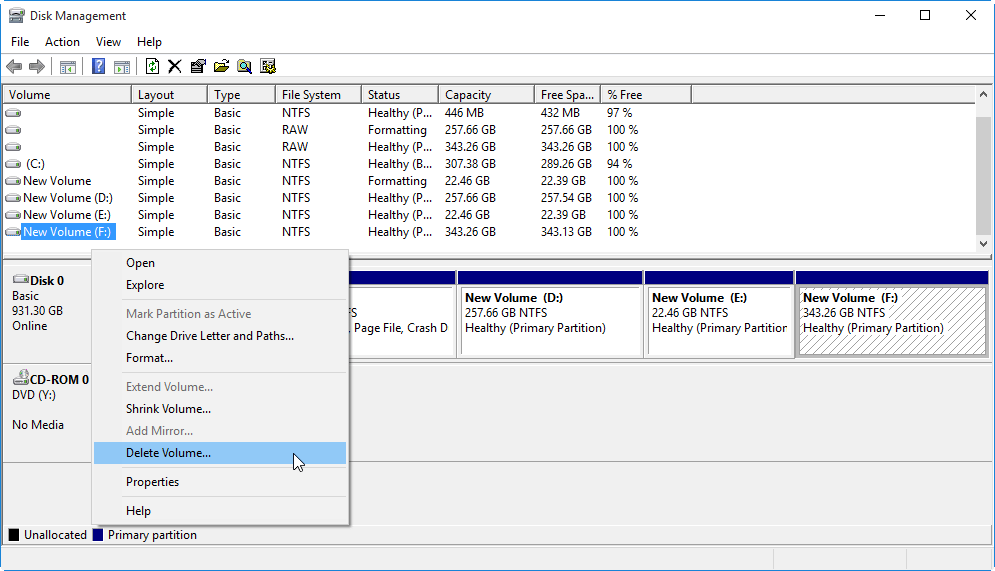
Even if your Lexar Portable SSD doesn't appear in File Explorer, your machine may still see it in Disk Management. To get to Disk Management, right-click on the Start menu and pick "Disk Management" from the menu. In the list of drives, look for your Lexar Portable SSD. If it shows up in Disk Management but as free space or with a state that says something is wrong, you might need to initialize the disk, give it a drive letter, or format it to make it usable. Here some fixes:
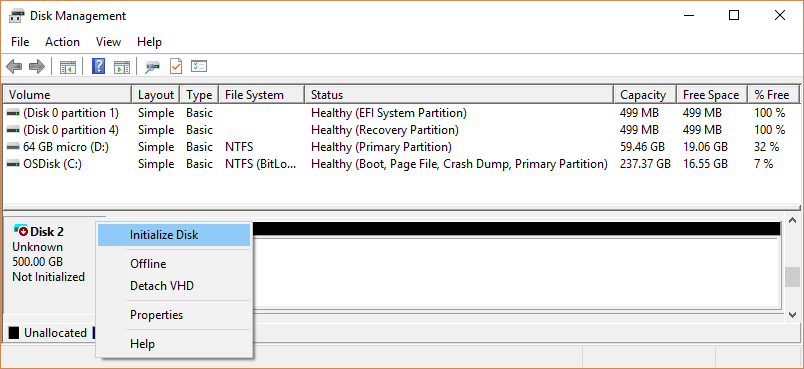
1 > If the Lexar is not initialized or shows as a RAW drive, right-click it and choose Initialize.
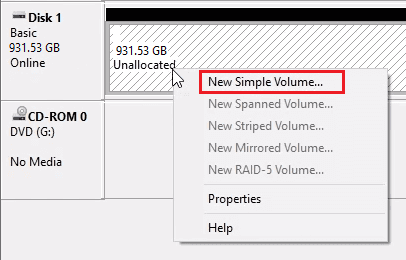
2 > If the Lexar SSD shows as Unallocated, right-click the space and choose New Simple Volume to create a new disk volume on the SSD.
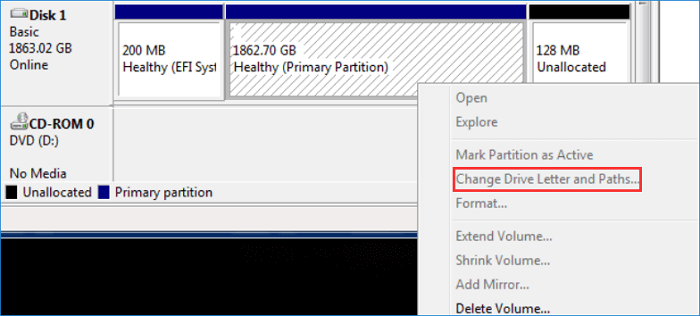
3 > Sometimes, the Lexar Portable SSD is not showing up issue caused by Drive letter conflict, right-click the SSD, choose Change Drive Letter and Paths.
4 > If the Lexar SSD has been formatted to APFS or Mac OS Extended, it is not compatible with Windows OS. Just right-click the SSD, choose Delete to delete the incompatible volume. Then choose Format to format it for your Windows PC.
5. Check Device Manager
Checking Device Manager for any possible problems with the Lexar Portable SSD is another step in fixing it. Pick "Device Manager" from the list when right-click the Start button. Click on "Disk drives" and then look for your Lexar SSD. If you see a yellow exclamation mark or any warning message about the SSD, it means there is a problem with the driver or the hardware. It might help to either update the SSD driver software or remove and restart it to see if that fixes the problem.
6. Setting for Power Management
Power control settings in Windows can sometimes make it hard for external storage devices to work right. Find your Lexar Portable SSD in the Device Manager, right-click on it, and choose "Properties." It will make sure that power-saving settings do not cause the problem. Uncheck the box that lets Windows turn off the device to save power in the Properties window's "Power Management" tab. After making the changes, click "OK" to see if the problem is fixed.
7. Problems With The Hardware
If none of the steps above fix the problem, the hardware in your Lexar Portable SSD may have broken. If this happens, connect the SSD to a different computer and see if it can be found. If the SSD still doesn't work on multiple computers after all the fixing steps have been tried, you should contact Lexar's customer service for more help. You might be able to get a replacement or repair, depending on the warranty state and the problem.
How to Recover Lost Data from Lexar SSD?
If you lose data due to fixing the Lexar portable SSD, just stop using the SSD. Data recovery software can help you recover lost data from the Lexar portable SSD after formatting or initializing it.
Step 1. Download and install data recovery program - Donemax Data Recovery.
Step 2. Plug the Lexar portable SSD into your PC, then open Donemax Data Recovery.

Step 3. Select the Lexar portable SSD and click on Scan button. It will deeply scan the Lexar portable SSD and find all recoverable files.

Step 4. Once the scan is completed, you can preview all recoverable files. Then select the wanted files and save them.

Conclusion:
It can be annoying when your Lexar Portable SSD doesn't show up on your Windows PC, but if you follow the proper steps for debugging, you can usually figure out what's wrong and fix it. You can make it more likely that your Lexar SSD will be detected and accessible by checking the hardware connections, ensuring the USB ports and cables work, updating drivers, and changing system settings. If you have a problem with the gear, calling Lexar's customer service can help you figure out what to do.
Related Articles
- Oct 23, 2024[2025 Full Guide] How to Fix ExFAT Drive Not Working on Mac?
- Feb 26, 2025Fix Corrupted CF Card and Recover Data
- Jan 12, 2025Fix APFS fsroot tree is invalid on Mac
- Dec 23, 20247 Solutions to Fix 'APFS Object Map is Invalid' on Mac Without Losing Data
- Feb 12, 2025USB Drive Keeps Disconnecting and Reconnecting: 6 Causes and 8 Solutions
- Sep 26, 2024Fix WD External Hard Drive is Unreadable on Mac

Steven
Steven has been a senior writer & editor of Donemax software since 2020. He's a super nerd and can't imagine the life without a computer. Over 6 years of experience of writing technical solutions and software tesing, he is passionate about providing solutions and tips for Windows and Mac users.

Gerhard Chou
In order to effectively solve the problems for our customers, every article and troubleshooting solution published on our website has been strictly tested and practiced. Our editors love researching and using computers and testing software, and are willing to help computer users with their problems
Hot Donemax Products

Clone hard drive with advanced clone technology or create bootable clone for Windows/Mac OS.

Completely and easily recover deleted, formatted, hidden or lost files from hard drive and external storage device.

Certified data erasure software - permanently erase data before selling or donating your disk or any digital device.