Before we start: Donemax Data Recovery for Mac can help mount any disk on Mac, repair damaged disks, reformat disks on Mac. It also can help you recover erased/deleted or lost data from a damaged or erased drive on Mac.
PAGE CONTENT:
Encountering error messages on your Mac can be frustrating, especially when they appear to prevent you from accessing or managing your disks. One such error that has caused issues for many users is the "com.apple.diskmanagement.disenter error 53249." If you're seeing this error, chances are you're attempting to perform a disk-related task, such as mounting an external drive or partitioning your internal drive, only to be halted by this confusing message. Fortunately, this error is not as ominous as it seems, and with the right guidance, you can fix it and get your Mac back to normal.
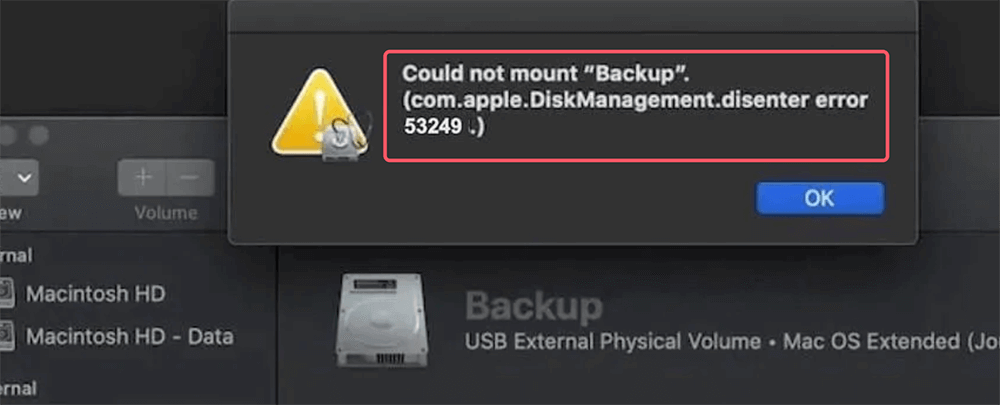
In this article, we will explore the causes of the "com.apple.diskmanagement.disenter error 53249," explain why it occurs, and walk you through a variety of troubleshooting steps to resolve the problem. Whether you're a casual Mac user or someone with a deeper understanding of disk management, this guide will provide you with actionable solutions.
What is the "com.apple.diskmanagement.disenter error 53249"?
The "com.apple.diskmanagement.disenter error 53249" is a macOS error code related to the system's inability to access, mount, or manage a disk. This error typically appears when users attempt to interact with external drives, but can also occur when working with internal drives. The issue often manifests when attempting to mount a disk using Disk Utility, when connecting an external drive, or during operations like partitioning or formatting.
Common Symptoms:
Prior exploring the solutions, it is recommended to understand the specific symptoms you might encounter when facing this error. Some of the common scenarios include:
- External drives not mounting or being recognized by the Mac.
- Disk Utility showing the "com.apple.diskmanagement.disenter error 53249" message when attempting to verify, repair, or format a drive.
- Inability to create or modify partitions on internal or external drives.
- Problems with reading or writing data to external storage devices.
- Disks showing as "uninitialized" or not responding at all.
If you've experienced any of the above, it's a sign that your Mac is struggling to manage the disk properly, and you’ll need to follow troubleshooting steps to resolve the issue.
Possible Causes of the "com.apple.diskmanagement.disenter error 53249":
There are several potential reasons why this error may occur. Understanding the root cause can help you select the right troubleshooting approach. Some of the most common causes include:
- Corrupt Disk Structure: The file system on the disk might be corrupted or damaged, making it difficult for macOS to recognize or mount the drive.
- Faulty External Device: The error could be a result of hardware problems with the external drive, including damaged cables, connectors, or the disk itself.
- Incompatible File System: macOS may not be able to read the file system of the external drive, especially if it's formatted in a system like NTFS (used by Windows) or EXT (used by Linux).
- macOS Software Glitch: Sometimes, the issue might stem from a software bug or glitch within macOS that affects disk management.
- Permissions Problems: The system might not have the necessary permissions to access or modify the drive, leading to the error.
- Disk Driver Problems: Outdated or corrupt disk drivers may prevent proper communication between macOS and the external device.
Now that we have an idea of why this error occurs, let's move on to the solutions.
8 Solutions Fix com.apple.diskmanagement.disenter error 53249 on Mac
Solution 1: Restart Your Mac
The first and simplest step to try is restarting your Mac. Many macOS errors, including disk-related ones, can sometimes be resolved by simply rebooting the system. Restarting clears the RAM, resets background processes, and may resolve any temporary conflicts between macOS and your drives.
Steps to Restart:
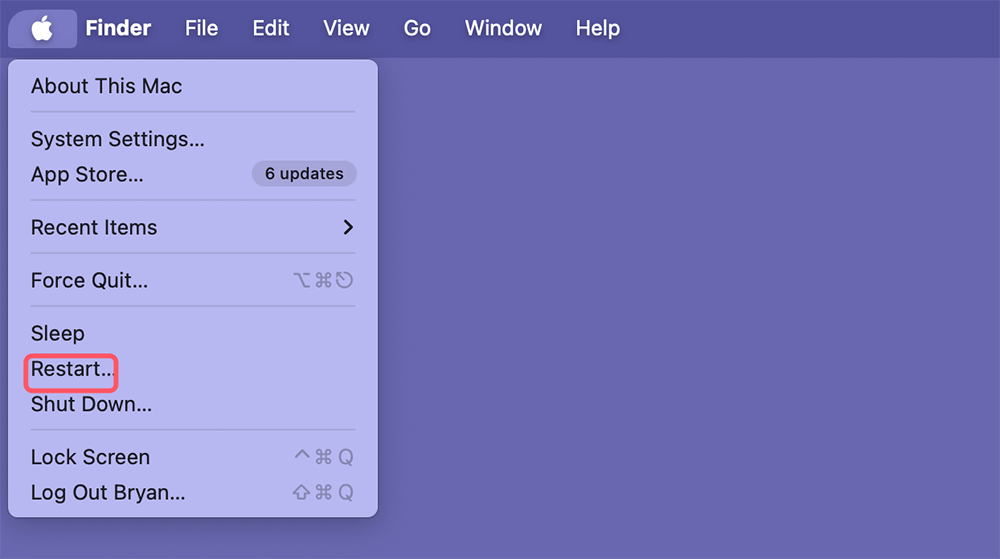
- Press the Apple emblem located in the upper-left corner of your display.
- From the drop-down option, choose Restart.
![Restart Your Mac]()
- Give your Mac time to shut down and boot back up.
Once your Mac restarts, reconnect your external drive or attempt the disk management operation again. If the issue persists, move on to the next solution.
Solution 2: Use Disk Utility to Verify and Repair the Drive
Disk Utility is a built-in tool in macOS designed to manage disks and storage devices. You can use it to verify the integrity of a disk and attempt repairs. If the "com.apple.diskmanagement.disenter error 53249" is related to disk corruption, Disk Utility might be able to fix it.
Steps to Use Disk Utility:
- Open Disk Utility (you can find it by searching in Spotlight or in Utilities under Applications folder)
- In the Disk Utility window, locate the problematic disk in the left sidebar.
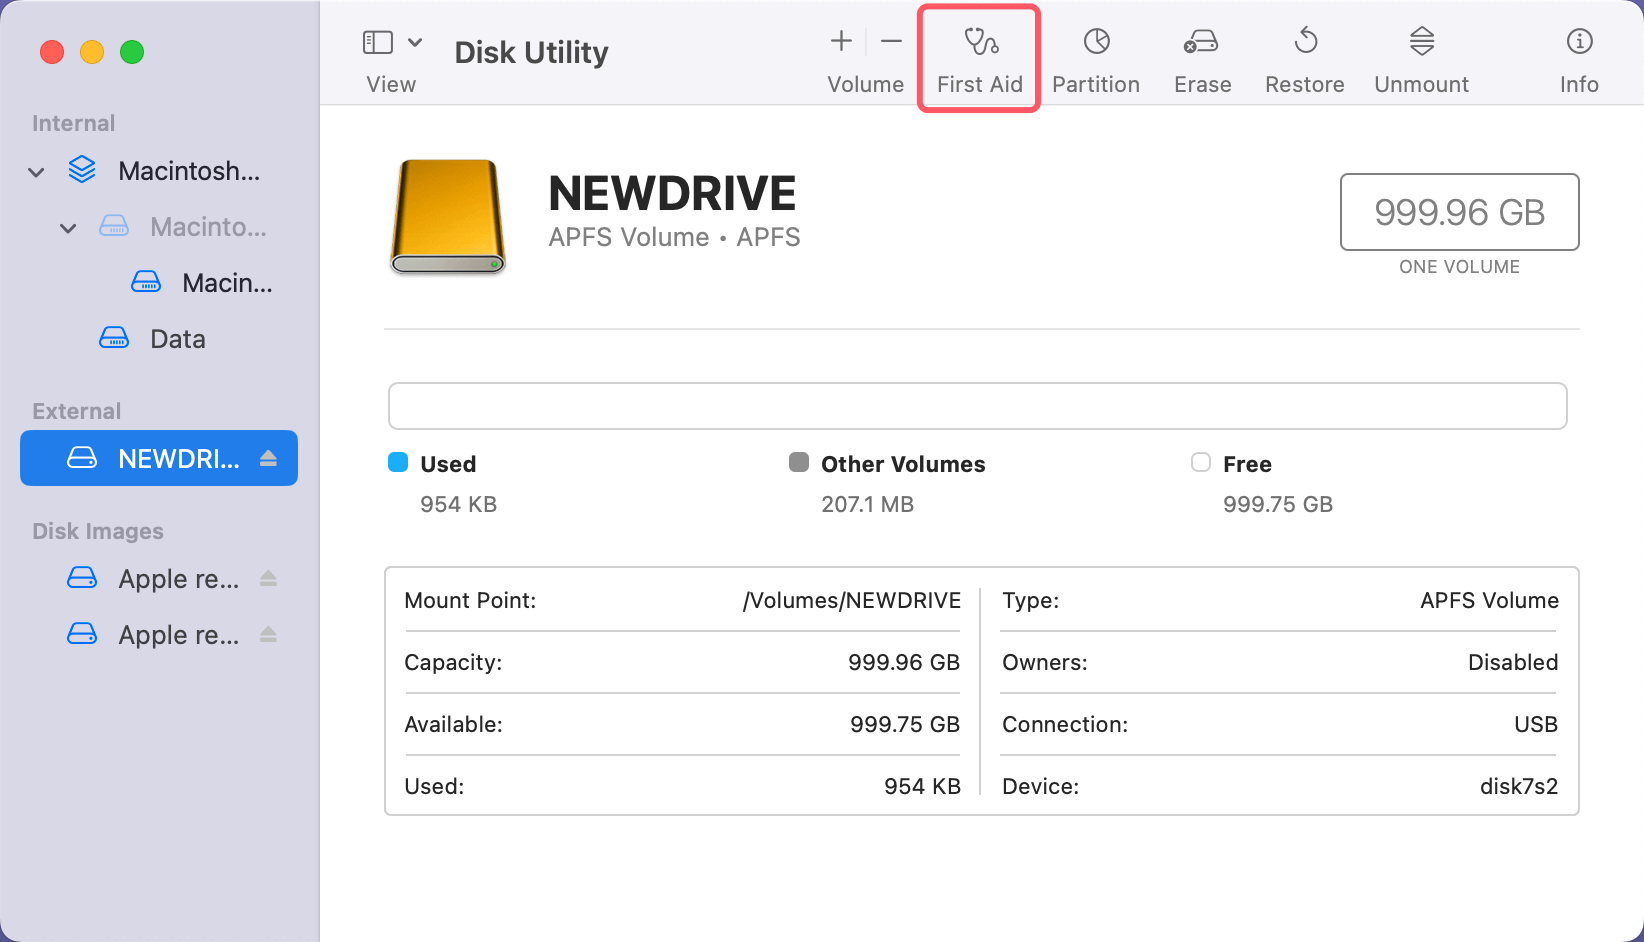
- After choosing the disk, select the First Aid option at the top.
![select the First Aid option at the top]()
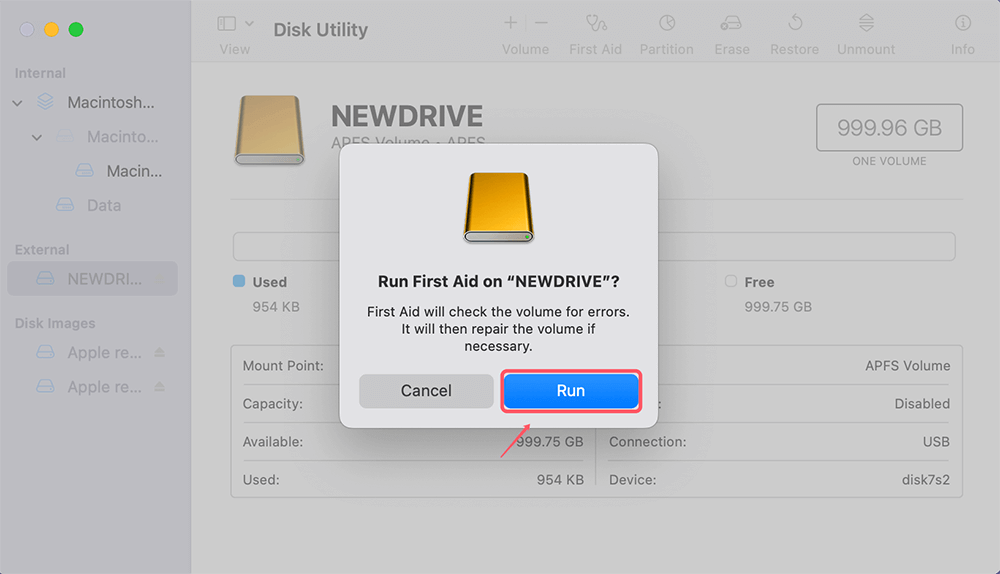
- Click Run to start the repair process.
![Click Run to start the repair process]()
Disk Utility will attempt to check and repair any file system issues on the drive. Once the process is complete, try accessing the disk again. If Disk Utility encounters errors it cannot fix, you may need to explore other options.
Solution 3: Check for File System Incompatibility
If you're trying to use an external drive formatted in a file system that macOS doesn't natively support, such as NTFS (used by Windows) or EXT4 (used by Linux), your Mac may struggle to mount or manage the drive. In such cases, macOS may throw the "com.apple.diskmanagement.disenter error 53249."
How to Check the File System:
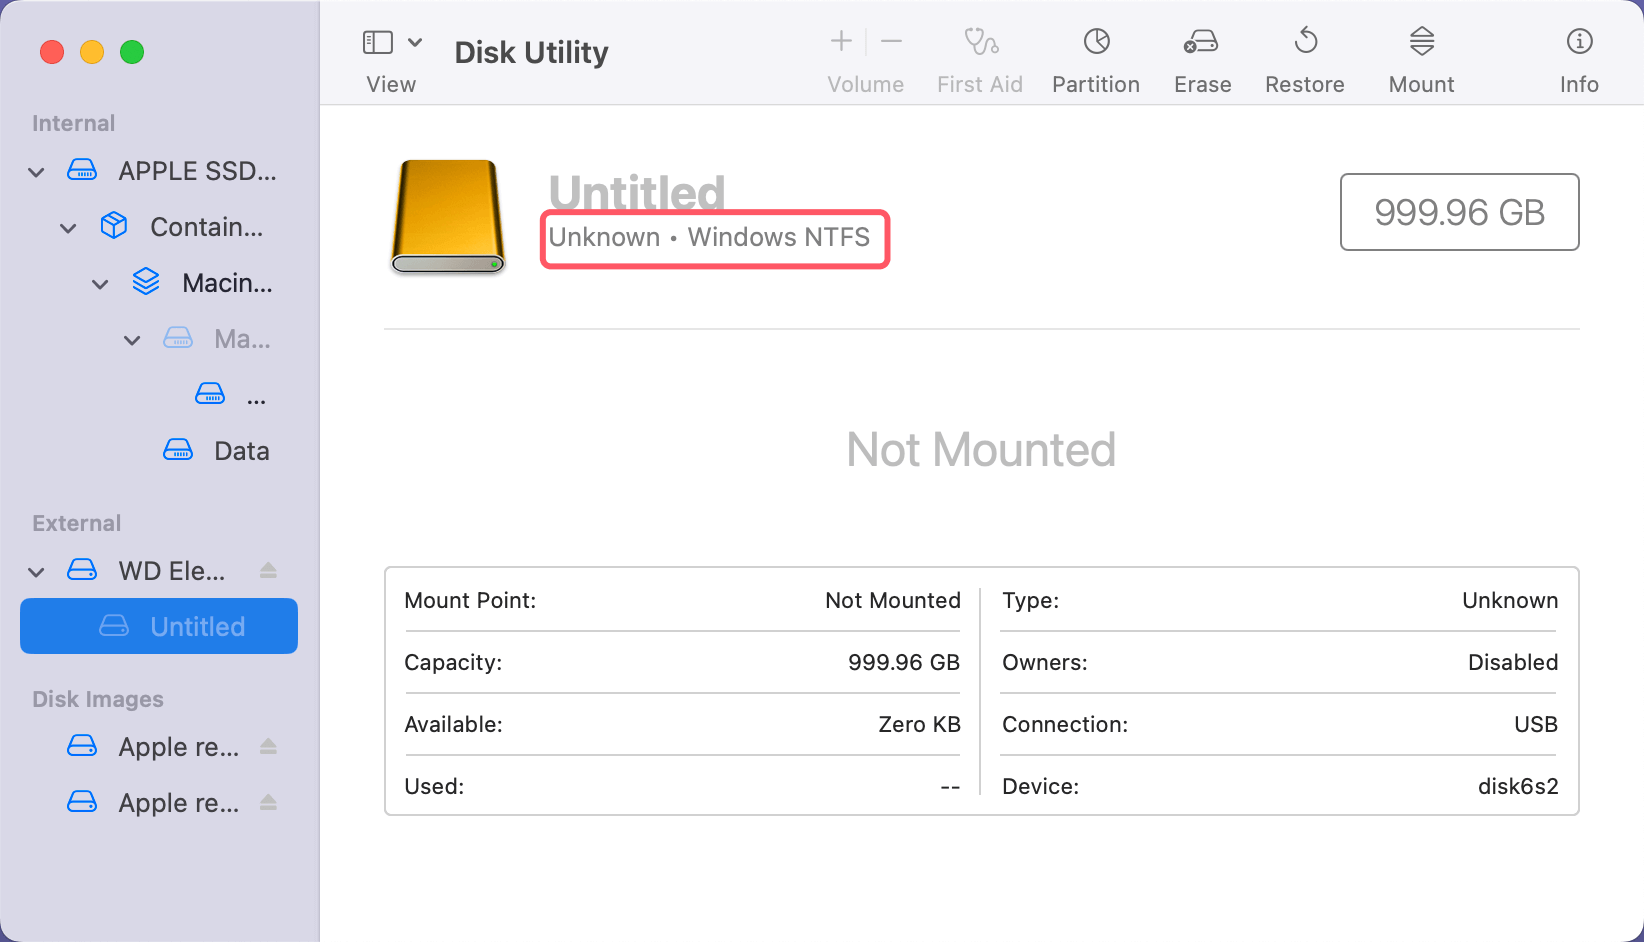
- Open Disk Utility and select the drive in the left sidebar.
- Look at the information provided about the drive. You'll see its file system (e.g., NTFS, HFS+, APFS).
![Check for File System Incompatibility]()
If the file system is not macOS-compatible, you'll need to either reformat the drive (which will erase all data) or install third-party software that allows macOS to read and write to the incompatible file system. Tools like Donemax NTFS for Mac or Tuxera NTFS for Mac enable macOS to handle NTFS-formatted drives.
Step 1. Download and install the reliable NTFS for Mac tool - Donemax NTFS for Mac on your Mac and make sure the NTFS external hard drive is connected to the Mac.
Step 2. Open Donemax NTFS for Mac, select the NTFS external hard drive, if it is unmounted, click on Mount button.

Step 3. To allow your Mac to read-write the NTFS external hard drive, click on Enable Writable button.

Solution 4: Check for Hardware Issues
If the problem is related to an external drive, it's important to check for hardware issues that could be causing the error. Sometimes, a faulty cable, port, or the drive itself can lead to the "com.apple.diskmanagement.disenter error 53249."
Steps to Check Hardware:
- Test the Drive on Another Mac or PC: Connect the drive to a different computer to see if it works. If the drive is recognized without issues on another device, the problem may lie with your Mac or its software.
- Try a Different USB Port or Cable: Faulty cables or USB ports can prevent proper communication between the drive and your Mac. Swap out the cable or try connecting the drive to a different port to see if that resolves the issue.
- Inspect the Drive for Physical Damage: If the external drive is making unusual noises or shows signs of physical wear, it might be failing. In such cases, data recovery services may be necessary.
Solution 5: Reset NVRAM/PRAM and SMC
Sometimes, resetting the NVRAM or PRAM and the SMC can resolve disk management issues on a Mac.
Steps to Reset NVRAM/PRAM:
- Turn off your Mac.
- After turning it on, press and hold Option, Command, P, and R simultaneously.
- Release these keys after holding them for around 20 seconds.
- Your Mac will restart, and the NVRAM/PRAM will be reset.
Steps to Reset the SMC (for Intel-based Mac):
- Turn off your Mac.
- If your Mac has a removable battery, remove it, and press the power button for 5 seconds before reinstalling the battery.
- Press and hold the Shift, Control, and Option keys as well as the power button on Macs without detachable batteries for ten seconds, then let go.
- Power on your Mac.
After resetting the NVRAM/PRAM and SMC, reconnect your external drive and check if the issue persists.
Solution 6: Use Terminal to Mount the Drive Manually
If Disk Utility fails to mount the drive or fix the error, you can try using the Terminal app to manually mount the disk. This method requires using command-line instructions but can bypass some of the limitations of Disk Utility.
Steps to Mount the Drive via Terminal:
- Open Terminal (you can find it through Spotlight or in Applications > Utilities > Terminal).
- Type the following command and press Enter:
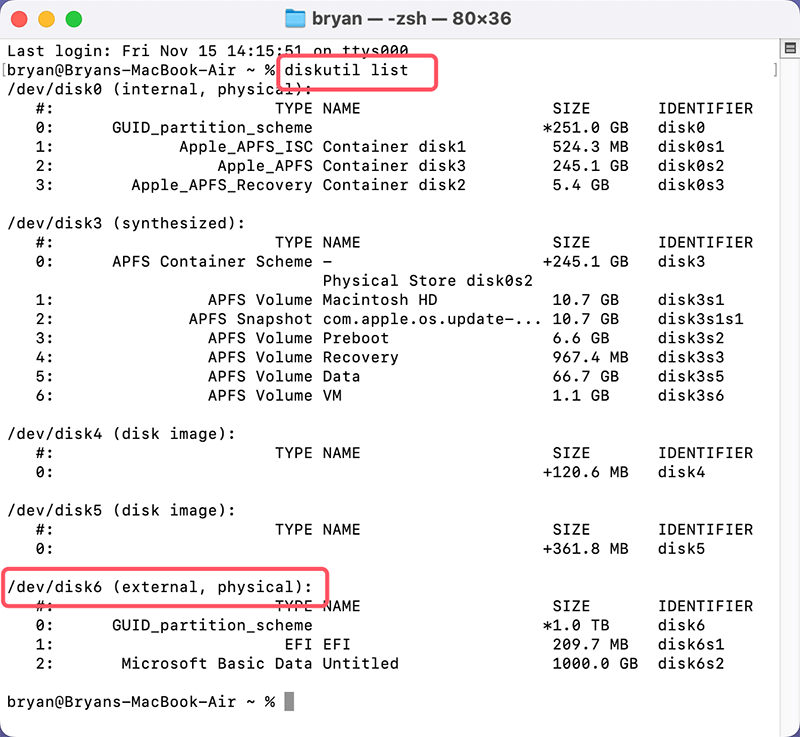
diskutil list
This will display a list of all connected drives and their respective identifiers (e.g., /dev/disk6).
![Use Terminal to Mount the Drive Manually]()
- Find the disk identifier for the problematic drive, then type the following command, replacing diskX with the actual identifier (e.g., disk2):
sudo diskutil mount /dev/diskX
![Use Terminal to Mount the Drive Manually]()
- Enter your administrator password if prompted.
If the drive mounts successfully, you should now be able to access it through Finder. If this solution doesn't work, the drive may have a more serious issue requiring more advanced intervention.
Solution 7: Reformat the Drive
If all other solutions fail, and you believe the drive is functional but corrupted, reformatting it may be your last option. Keep in mind that reformatting will erase all data on the drive, so it's recommended only if you have no other choice or have already backed up the data.
Steps to Reformat the Drive:
- Open Disk Utility and select the problematic drive.
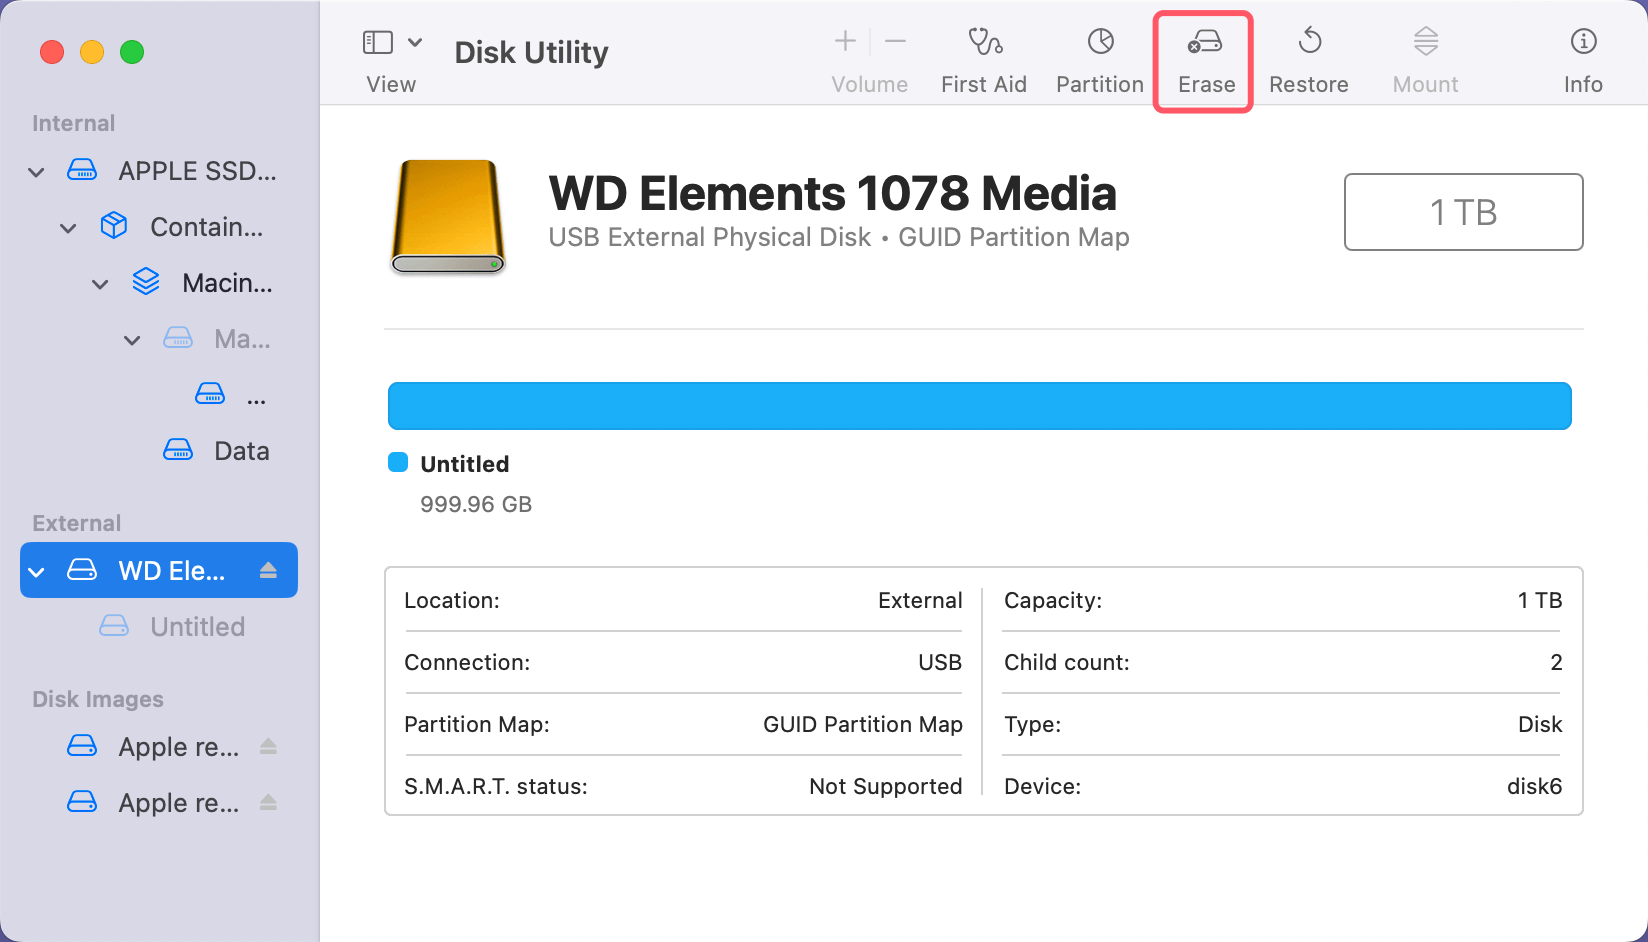
- Click the Erase button at the top of the window.
![Reformat the Drive]()
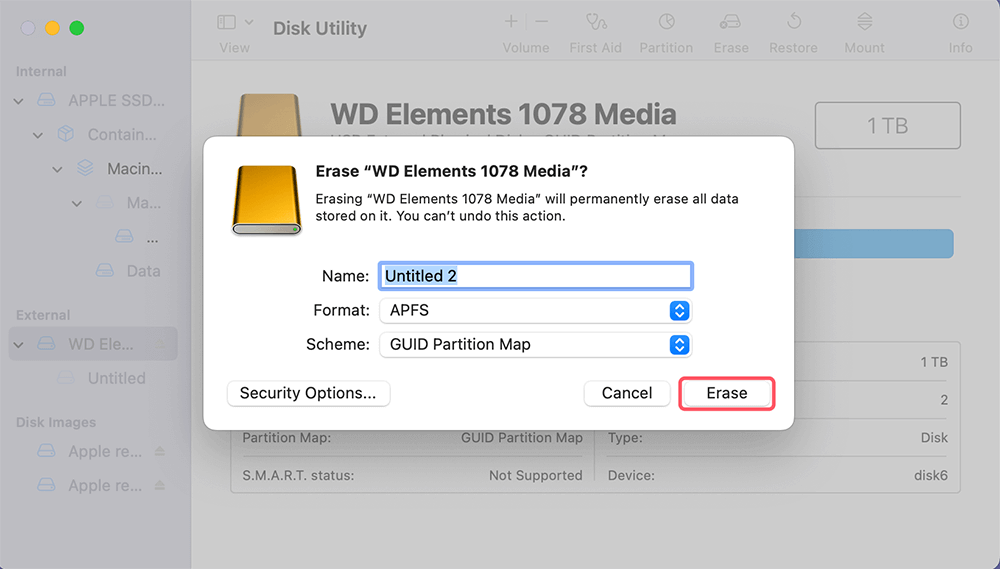
- Choose the desired file system (e.g., APFS, HFS+ for macOS, or exFAT for compatibility with Windows and macOS).
![Reformat the Drive]()
- Click Erase and wait for the process to complete.
Once the drive is reformatted, it should mount properly, and the "com.apple.diskmanagement.disenter error 53249" should no longer appear.
Solution 8: Seek Professional Help
If none of the above solutions work and you suspect that the issue lies with a hardware failure or severe corruption of the drive, you may need to seek professional assistance. Data recovery services can help retrieve important files from a failing drive, and certified Apple technicians can offer more advanced troubleshooting for disk management issues.
Recover Lost Data After Fixing Error 53249 on Mac
If you have lost data due to erasing the damaged drive, you can use Mac data recovery software to help you unformat the drive and get all lost data back.
Step 1. Download and install the reliable Mac data recovery software - Donemax Data Recovery for Mac.
Step 2. Open Donemax Data Recovery, then select the formatted or erased drive to start data recovery.

Step 3. Click on Scan button to deeply scan the drive and it will find all deleted/formatted/lost files.

Step 4. When the scan is completed, you can preview the recoverable files. Then select the wanted ones, click on Recover button to save them.

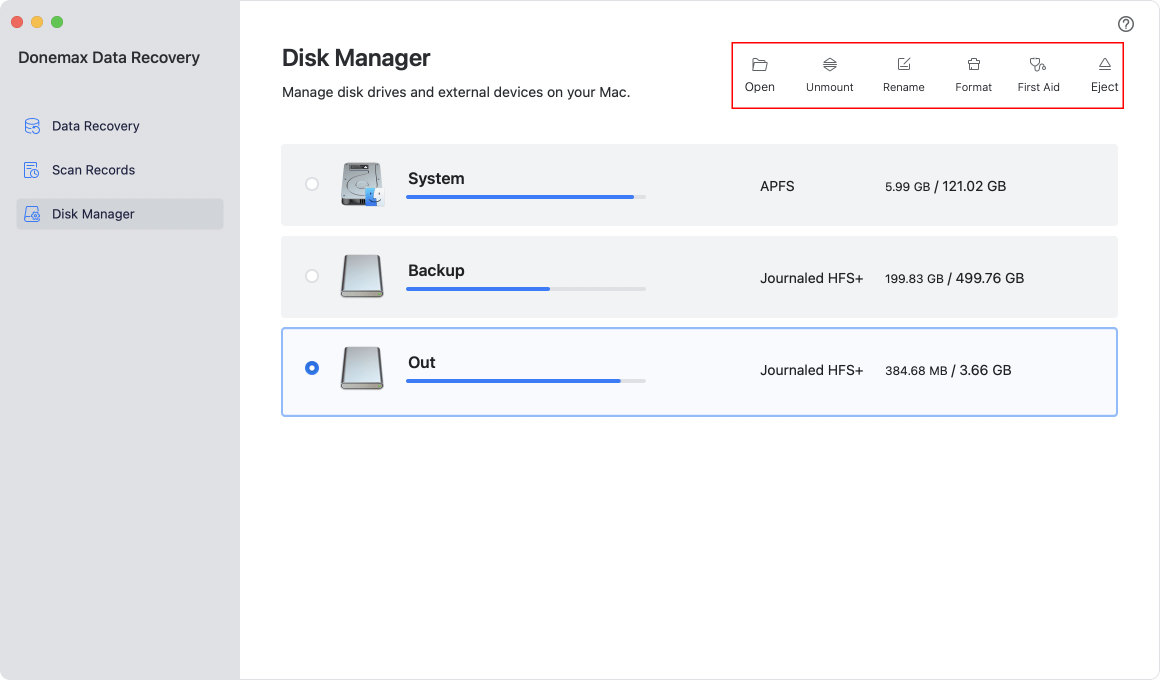
Donemax Data Recovery for Mac also can help you mount/repair/reformat damaged drives on Mac.
Conclusion
The "com.apple.diskmanagement.disenter error 53249" can be a frustrating obstacle, especially if it prevents you from accessing important data. However, by following the solutions described in this article, you should be able to troubleshoot and resolve the error. From basic steps like restarting your Mac to more advanced solutions like using Terminal or reformatting the drive, there's a wide range of options available to fix this issue. If all else fails, don't hesitate to seek professional help, especially when data recovery is essential.
With persistence and a systematic approach, you can overcome this error and get your Mac functioning smoothly once again.


Donemax Data Recovery for Mac
Donemax Data Recovery for Mac is one of the best Mac data recovery software. It is easy-to-use and can help in recovering deleted, formatted, inaccessible or lost data from Mac HDD/SSD, external disk, USB drive, SD card, camera or other storage devices.
Related Articles
- May 28, 2025[9 Fixes] Fix External Hard Drive Not Accessible on Windows 10
- Dec 19, 20249 Solutions to Fix WD My Passport Not Showing Up on Mac
- Feb 22, 2025How to Fix Corrupted XQD Card Without Losing Data?
- Dec 31, 2024Disk Utility Can't Check and Repair APFS Volumes/Containers on Mac: Fix It Now
- Feb 07, 2025How to Fix Can't Read SD Card on Mac? [8 Methods]
- Mar 01, 20259 Solutions to Fix SD Card Not Detected on Windows 11/10/8/7

Coco Lin
Coco has been a writer and a chief programmer at Donemax software since 2018. Over 10 years of experience of writing troubleshooting articles in the software industry, she is passionate about programming and loves to providing solutions to Windows and Mac users. Also she enjoys music and palying tennis in her free time.

Gerhard Chou
In order to effectively solve the problems for our customers, every article and troubleshooting solution published on our website has been strictly tested and practiced. Our editors love researching and using computers and testing software, and are willing to help computer users with their problems
Hot Donemax Products

Clone hard drive with advanced clone technology or create bootable clone for Windows/Mac OS.

Completely and easily recover deleted, formatted, hidden or lost files from hard drive and external storage device.

Certified data erasure software - permanently erase data before selling or donating your disk or any digital device.

