Written byMariaUpdated on Jul 14, 2024
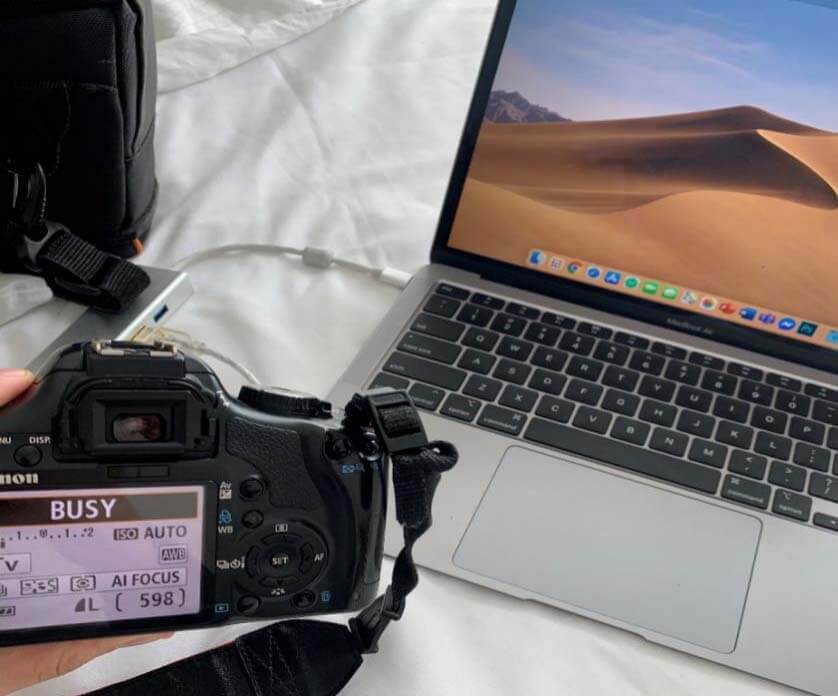
Connected Digital Camera Not Working on Mac, How to Fix This Issue?
Approved byGerhard Chou
PAGE CONTENT:
Connecting your digital camera to your Mac should be easy, but what happens when they won't work together? Connection problems can be very frustrating, whether you're a professional photographer eager to share your latest photos or a hobbyist wanting to save valuable memories.
You can try several different fixing steps to get your camera to work with your Mac. In this guide, we'll look at step-by-step ways to fix common issues that can stop a connection from working.
With these simple steps, you can quickly find and fix the problem so you can start editing, sharing, and enjoying your photos again right away. Let's get these link issues fixed right away!

How to Fix Digital Camera Not Working on Mac?
Method 1. Restart Your Mac and Camera
It's easy and works well to start troubleshooting by restarting both devices. It can fix brief problems and reset connections. To do this:
- Turn Off Both Devices: Turn Off your Mac and your camera.
- Please wait a Minute or Two: Give it a minute to make sure that all of its internal processes have stopped.
- Restart your Mac: Turn on your Mac and let it fully start up.
- Restart the Camera: Shut down and restart your camera. Then, put it in the right mode, like "Playback" or "PC."
- Reconnect the Camera: To connect your camera to your Mac again, use a USB connection.
- Check for Connection: On your Mac, open "Finder" or "Image Capture" to see if the camera shows up.
Method 2. Check the USB Cable
Connectivity problems are often caused by connections that are broken or not working right. Making sure the wire is in good shape can often quickly fix connection issues.

- Check the Cable: Check the USB Cable for any damage or wear that you can see.
- Try a Different Cable: Use a different USB wire that you know works.
- Connect the camera: To connect the camera to the Mac, use a wire that is either new or has been checked.
- Check the Connection: Startup "Finder" or "Image Capture" to check if the camera is found.
- Try It With A Different Device: If the camera still won't show up, connect something else to the Mac using the same wire.
Method 3. Verify If the USB Port Is Working
If the USB port is broken, your camera might not be able to connect. Checking to see if the port works helps determine whether the problem is with the camera or the port.
- Disconnect the Camera: Take the USB connection that's connecting your camera to the Mac and remove it.
- Try It With A Different Device: Connect another device, such as a mouse or USB drive, to the same USB port.
- Check Functionality: Check to see if the Mac can see and run with the new device.
- Check Out Other Ports: If the first USB port on your Mac doesn't work, connect your camera to a different one.
- Check The Ports For Damage: Make sure there is nothing wrong with the USB ports.
Method 4. Check the Card Reader
If something is wrong, it might not always be the USB link but something else inside the camera. Camera problems can be avoided by using a card reader.
- Remove the SD card: The memory card should be taken out of the camera.
- Put Into The Card Reader: In a separate card reader, put the memory card.
- Connect to Mac: Connect the card reader to your Mac's USB port.
- Check For Recognition: If the memory card doesn't show up, open "Finder" or "Image Capture."
- Transfer Files Manually: If the card is seen, move the information from the card to your Mac manually.
Method 5. Reinstall or Update the Camera Driver
Drivers that are out of date or missing can make it hard to join. Having the most up-to-date drivers can make things work better and be more compatible.
- Visit The Manufacturer's Website: Open the website of the company that made your camera and look for "support."
- Find Drivers: Find the most up-to-date drivers for your camera type.
- Download the Drivers: Get the right driver program for macOS by clicking on this link.
- Install the driver: Follow the manufacturer's instructions on how to install it.
- Restart your Mac: After setting up, restart your Mac.
- Reconnect the camera: Connect your camera to your Mac and make sure it can find it.
Method 6. Check the Status of Wi-Fi/NFC
Wi-Fi and NFC functions can sometimes interfere with USB connections. If you turn these features off, they won't interfere with the camera's link to the Mac.
- Access Camera Settings: Start up your camera and go to the settings menu.
- Find Wi-Fi and NFC settings: Find the options tab for Wi-Fi or NFC (Near Field Communication).
- Turn off Wi-Fi and NFC: Make sure that both Wi-Fi and NFC are off, as they can get in the way of USB links.
- Save Settings: Leave the settings page and save any changes you've made.
- Reconnect the camera: Use a USB cable to connect your camera to your Mac.
- Check the connection: Make sure the camera is recognized by going to "Finder" or "Image Capture."
Method 7. Update macOS
Keeping macOS up to date makes sure that it works with the newest devices and can fix problems that come up with old system software.
- Open System Preferences: To open System Preferences, select the Apple menu and choose "System Preferences."
- Go to Software Update: To see what changes are out there, click on "Software Update."
- Download and Install Updates: Click "Update Now" to get and install any available changes.
- Restart Your Mac: Once the work is done, you need to restart your Mac.
- Reconnect the camera: Use a USB cable to connect your camera to your Mac.
- Check For Recognition: Startup "Finder" or "Image Capture" to check if the camera is found.
How to Recover Lost Data from Digital Camera on Mac?
If you have lost data from your digital camera, you can use a data recovery app to scan the digital camera or SD card and get all lost data back. Donemax Data Recovery for Mac is one of the best Mac data recovery apps. It can help you export images/videos from a digital camera which is not working on Mac and recover deleted, formatted data from your digital camera.
Step 1. Download and install Donemax Data Recovery for Mac, and connect the digital camera to your Mac. Open Donemax Data Recovery for Mac, select the digital camera to start data recovery.

Step 2. Click on Scan button to deeply scan the digital camera and find all recoverable files.

Step 3. Once the scan is completed, just select the wanted images and videos, then click on Recover button to save them.

Conclusion:
Some problems can happen when you try to connect a digital camera to a Mac, but if you follow the right steps, you can quickly fix the problem. You can get the link back by restarting your devices, checking the cables and ports, using a card reader, updating the drivers, and changing the settings.
Making sure your macOS is up-to-date can also help it work better with new gadgets. By following these steps, you can fix your connection issues and quickly get back to editing, sharing, and enjoying your pictures. Follow these steps to quickly fix any connection problems and keep your photography process running smoothly.
Related Articles
- Jul 31, 2023Can't Delete Files on Mac, How to Fix It?
- Jun 02, 2024Can't See C Drive in File Explorer, Fix It Without Losing Data
- Dec 24, 20246 Solutions to Fix Sabrent External Hard Drive Not Working on Mac
- Dec 09, 20248 Solutions to Fix Can't Rename an External Hard Drive or USB Drive on Mac
- Dec 24, 2024Seagate External Hard Drive Shows Wrong Capacity: How to Fix It
- Feb 07, 2025How to Fix Can't Read SD Card on Mac? [8 Methods]

Contributing Writer
Maria
Maria is one of the senior writers & editors of Donemax who lives and works in Sydney, Australia. She loves PC, Mac and Internet Technology. She has 6 years of writing articles about data recovery on PC/Mac, disk cloning solution, data eraser and computer OS optimization, etc. She is also interested in testing various software and digital products.

Editor in chief
Gerhard Chou
In order to effectively solve the problems for our customers, every article and troubleshooting solution published on our website has been strictly tested and practiced. Our editors love researching and using computers and testing software, and are willing to help computer users with their problems
Hot Donemax Products

Clone hard drive with advanced clone technology or create bootable clone for Windows/Mac OS.

Completely and easily recover deleted, formatted, hidden or lost files from hard drive and external storage device.

Certified data erasure software - permanently erase data before selling or donating your disk or any digital device.