PAGE CONTENT:
The Recycle Bin is a valuable feature in Windows, offering a temporary storage space for deleted files, giving users a chance to recover items before they are permanently erased. However, while it serves an important function, it can also become a source of clutter, consuming valuable disk space over time. Whether you're managing a busy computer or simply looking to free up more space, learning how to automatically empty the Recycle Bin can help you keep your system running smoothly without constant manual intervention.
In this guide, we will walk you through the various ways to set up automatic Recycle Bin cleaning in Windows 11 and Windows 10. We'll explore the built-in tools, such as Storage Sense and Task Scheduler, as well as discuss the option of third-party software for those who want more control. Let's dive into the steps for each approach.

Understanding the Recycle Bin in Windows 11/10
Before automating the emptying process, it's important to understand how the Recycle Bin works in both Windows 11 and 10.
The Recycle Bin is a storage area where deleted files are temporarily stored before they are permanently removed from your computer. When you delete files, instead of being instantly erased, they are moved to the Recycle Bin, which allows you to recover them if needed. The Recycle Bin helps protect you from accidental deletions.

However, this convenience comes with a downside. Over time, the Recycle Bin can fill up with deleted files, consuming a significant portion of your disk space. Depending on the size of your Recycle Bin and the files you delete, this can slow down your system or cause your hard drive to run out of space. Automatically emptying the Recycle Bin can help manage this issue.
Why You Might Want to Automatically Empty the Recycle Bin?
Here are a few reasons why you might want to automate the process of emptying the Recycle Bin:
- Storage management: If you frequently delete large files, the Recycle Bin can fill up quickly. Automating this task helps maintain available storage space without having to remember to do it manually.
- Privacy concerns: If you regularly delete sensitive or private data, emptying the Recycle Bin automatically ensures that those files are permanently erased without delay.
- Convenience: Automating the process reduces the need for manual intervention, saving you time and effort.
How to Automatically Empty Recycle Bin?
Now that we've covered the basics, let's look at the methods you can use to automatically empty the Recycle Bin in Windows 10 and 11.
1. Using Storage Sense (Windows 10 and 11)
Both Windows 10 and 11 come with a built-in feature called Storage Sense, which is designed to help you manage your disk space automatically. One of the tasks that Storage Sense can handle is emptying the Recycle Bin after a certain period.
How to Set Up Storage Sense in Windows 10 and 11:
Step 1: Open Storage Settings
- On Windows 11:
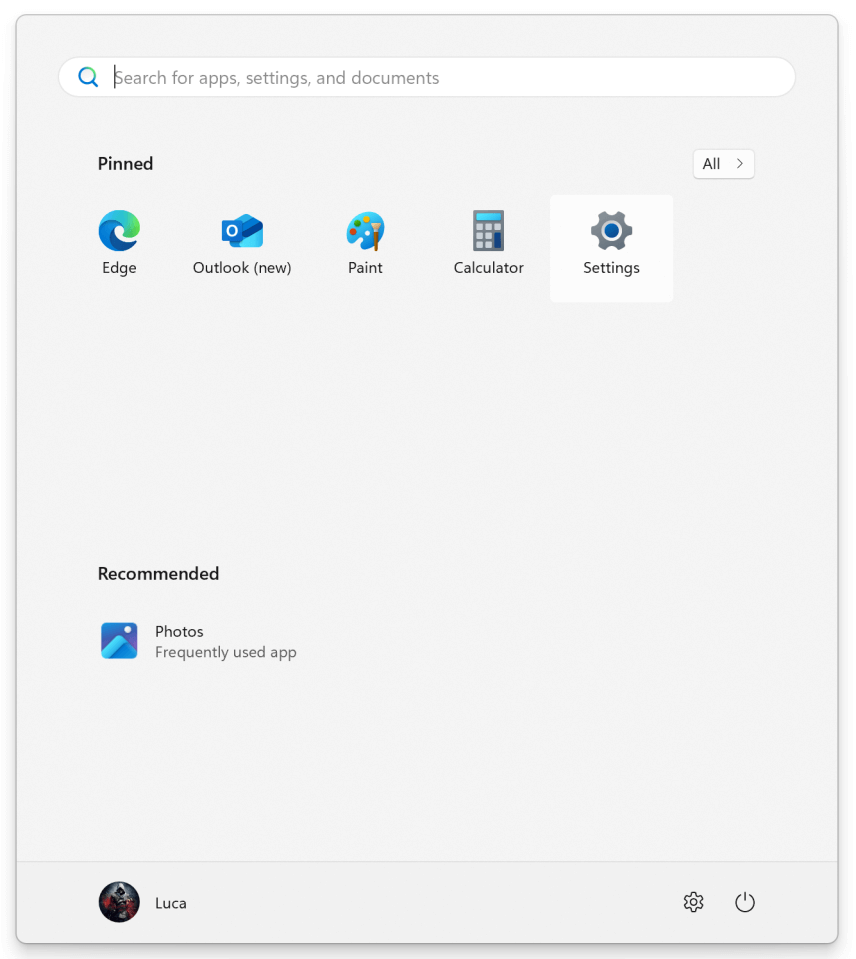
- Click on the Start menu, then select Settings.
![automatically empty the Recycle Bin]()
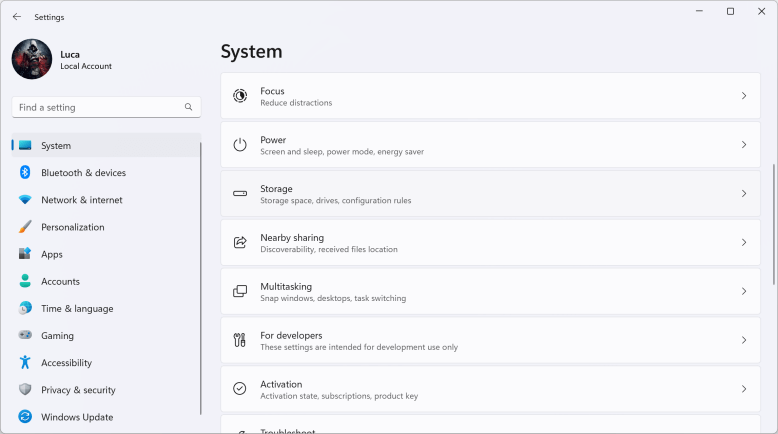
- In the Settings window, go to System and click on Storage.
![automatically empty the Recycle Bin]()
- Click on the Start menu, then select Settings.
- On Windows 10:
- Open the Start menu and click on Settings.
- Navigate to System and click on Storage.
Step 2: Turn on Storage Sense
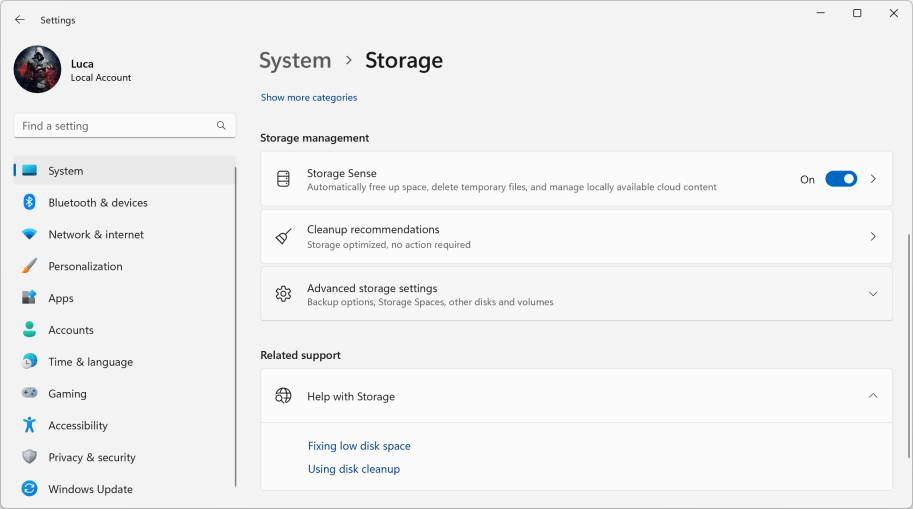
- Scroll down and find the Storage Sense section.
- Click on Configure Storage Sense or run it now.
![automatically empty the Recycle Bin]()
Step 3: Customize Storage Sense Settings
- In the Storage Sense settings, you can configure when you want it to run.
- Under "Temporary Files", you'll find the option to delete files from the Recycle Bin automatically.
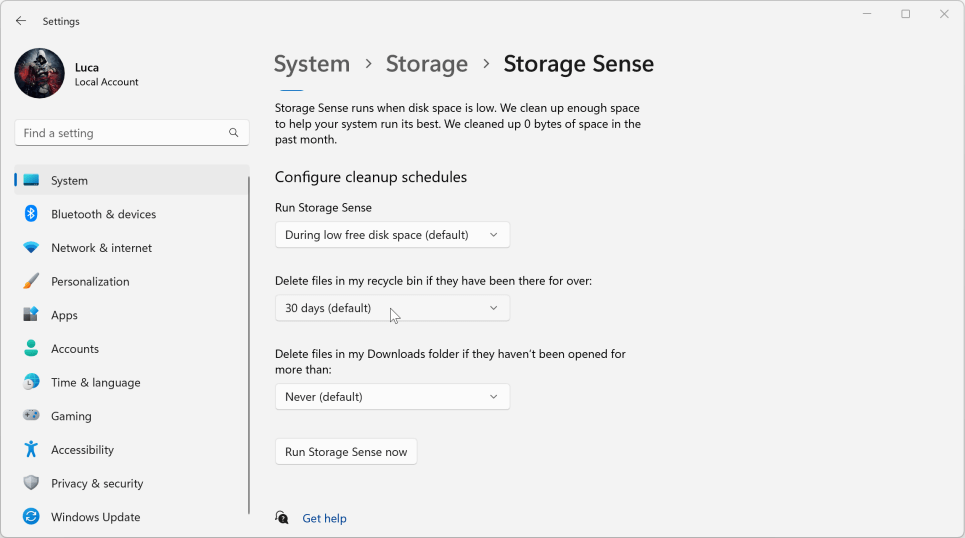
- Choose Delete files in my Recycle Bin if they have been there for over and select a time frame (such as 1 day, 14 days, or 30 days).
![automatically empty the Recycle Bin]()
- Choose Delete files in my Recycle Bin if they have been there for over and select a time frame (such as 1 day, 14 days, or 30 days).
Step 4: Activate Storage Sense
- Once you've made your selections, toggle the switch to On at the top of the page to enable Storage Sense.
- You can also choose to have Storage Sense run automatically or manually by setting a specific frequency.
Benefits of Using Storage Sense:
- Automatic process: Once set up, Storage Sense runs automatically without you needing to do anything.
- Customizable time: You can set it to empty the Recycle Bin after a period that suits you, ensuring that files don’t stay there longer than necessary.
- Built-in feature: Since it’s already included in Windows, there’s no need to download or install anything extra.
Drawbacks:
- Less control: While Storage Sense is convenient, it doesn’t offer the same level of customization as other methods, like Task Scheduler.
- Not ideal for users with very specific needs: If you need more control over when and how your Recycle Bin is emptied, you might need a more tailored solution.
2. Using Task Scheduler (Windows 10 and 11)
If you prefer more control over when the Recycle Bin is emptied, Task Scheduler is an excellent option. This built-in Windows tool allows you to create automated tasks that run on a schedule you set. By creating a task to empty the Recycle Bin, you can ensure that it happens at a specific time, such as daily, weekly, or monthly.
How to Set Up Task Scheduler to Empty the Recycle Bin:
Step 1: Open Task Scheduler
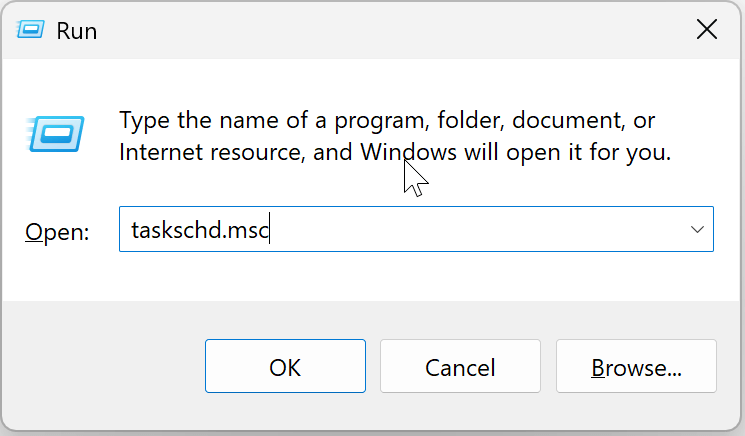
- Press Win + R to open the Run dialog box.
- Type taskschd.msc and press Enter to open Task Scheduler.
![automatically empty the Recycle Bin]()
Step 2: Create a New Task
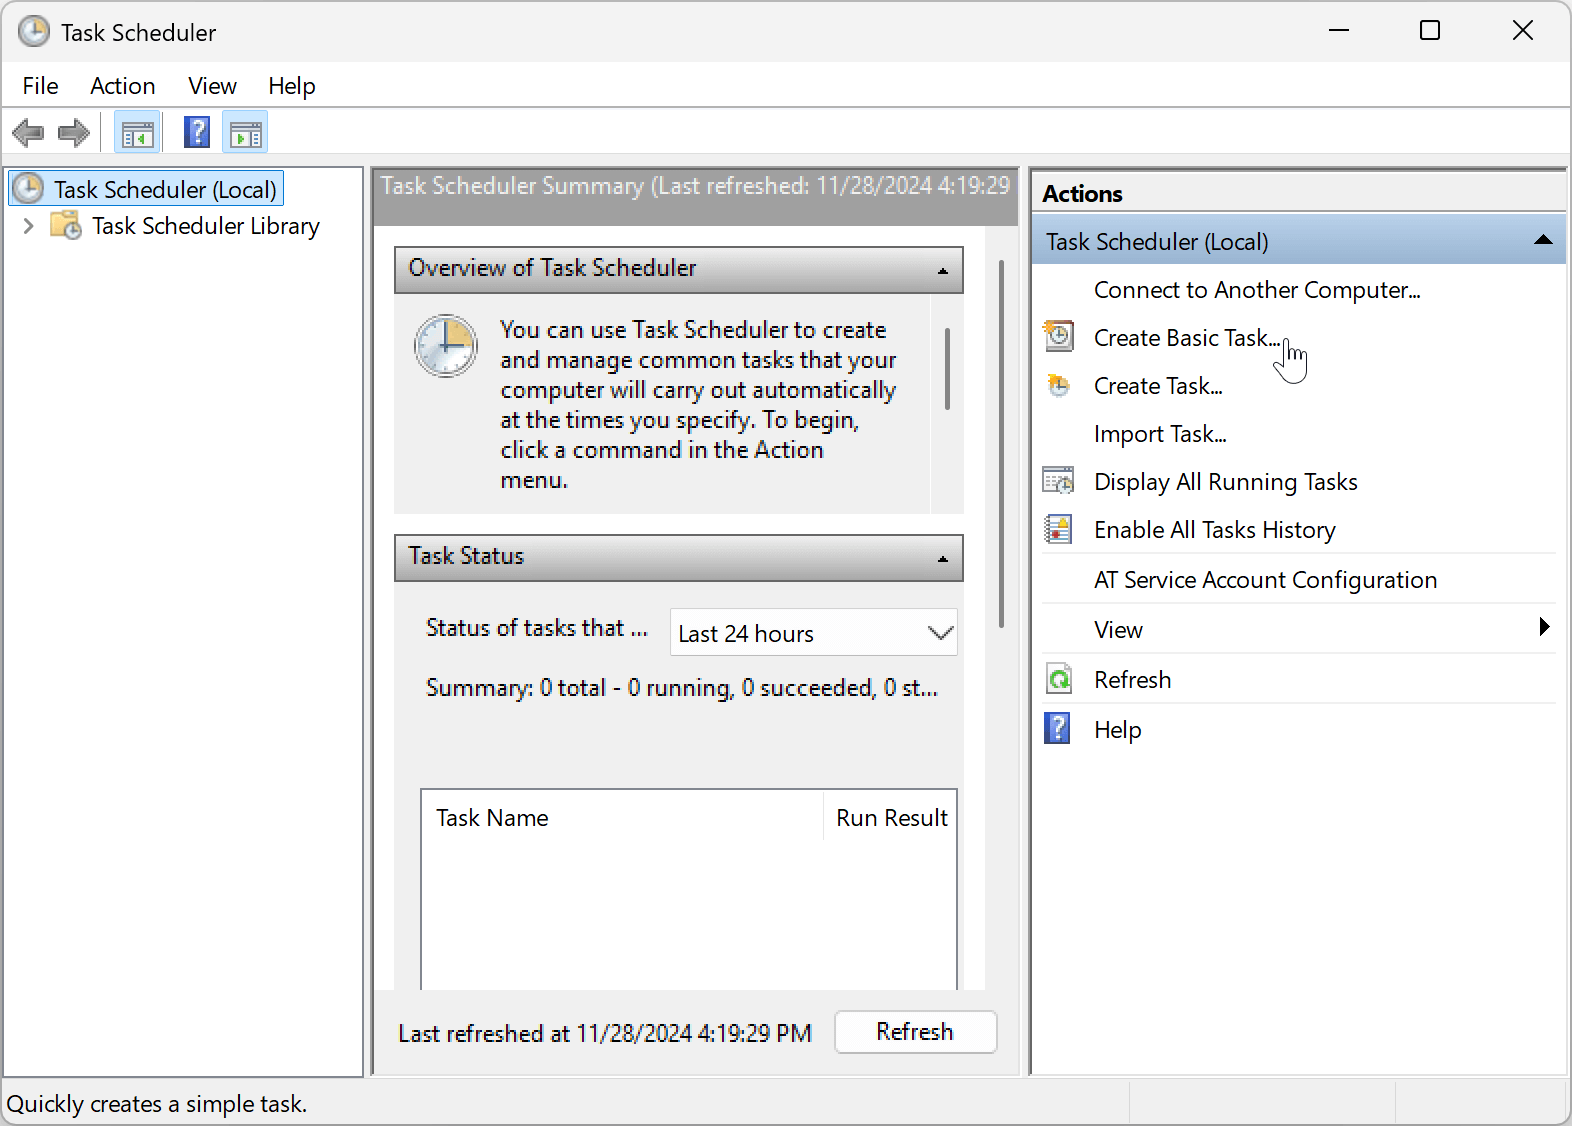
- In the right-hand pane of Task Scheduler, click on Create Basic Task.
![automatically empty the Recycle Bin]()
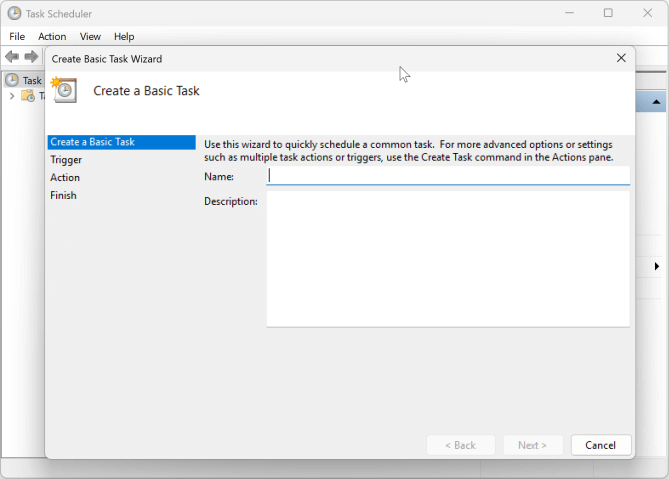
- Give the task a name, such as Empty Recycle Bin.
![automatically empty the Recycle Bin]()
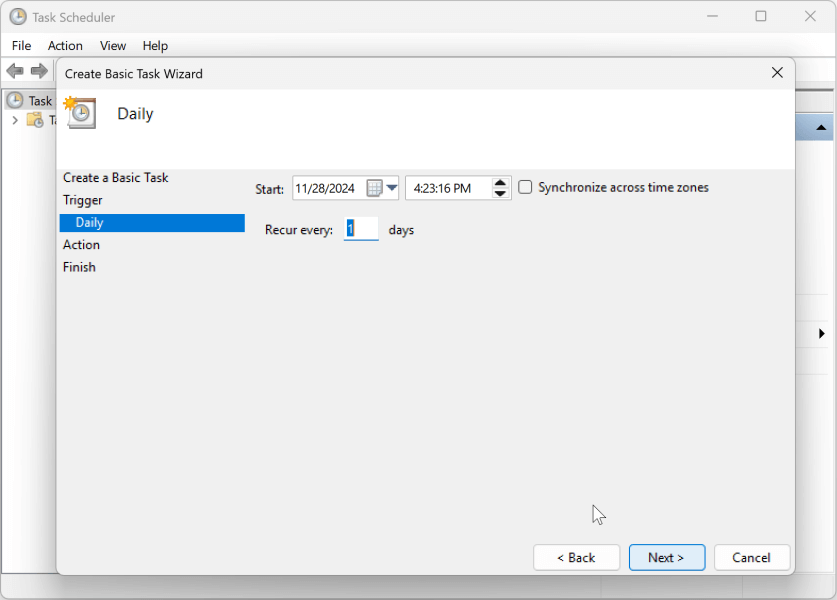
Step 3: Set the Trigger for the Task
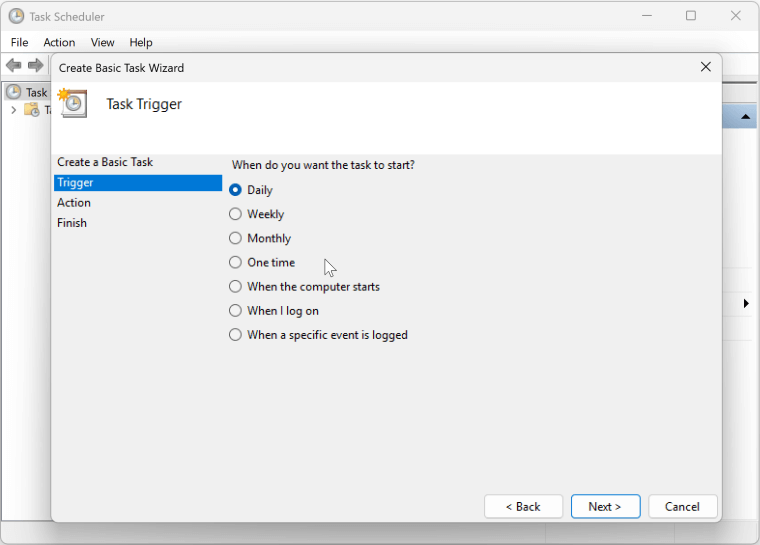
- Select the trigger for your task (e.g., Daily, Weekly, etc.).
![automatically empty the Recycle Bin]()
- Choose the specific start date and time you want the task to run.
![automatically empty the Recycle Bin]()
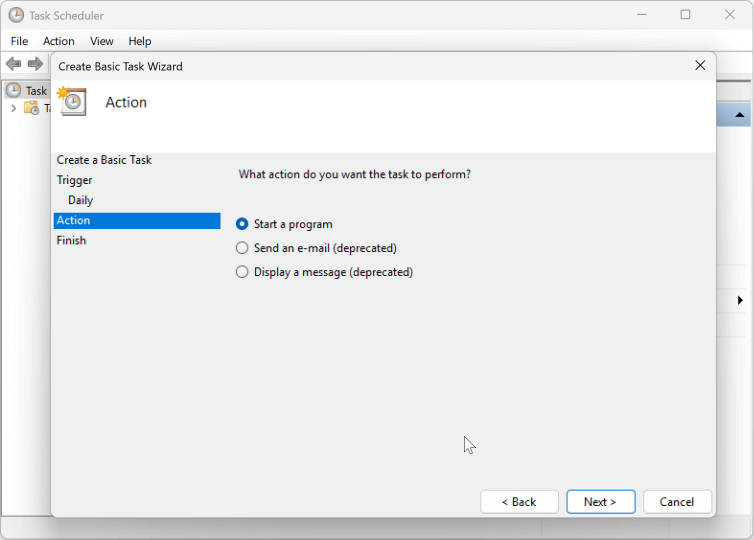
Step 4: Set the Action
- In the Action section, select Start a Program.
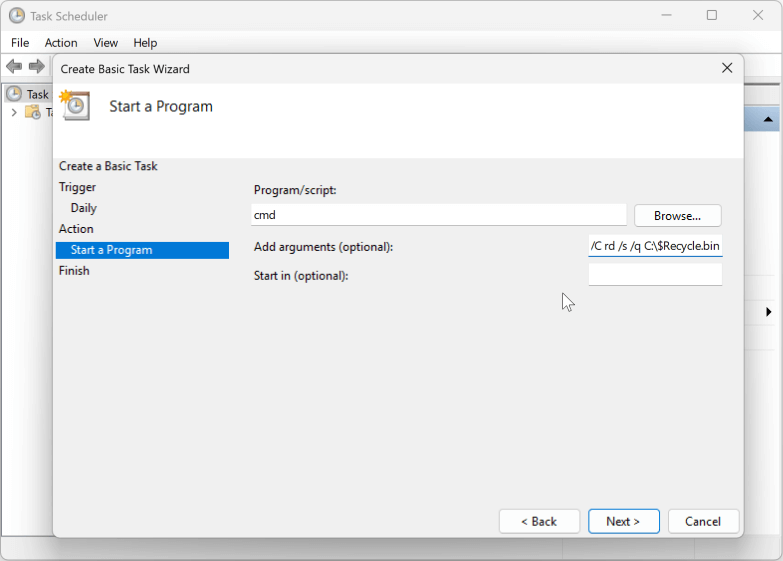
![automatically empty the Recycle Bin]()
- In the Program/Script box, type cmd (this opens Command Prompt).
- In the Add Arguments box, enter the following command to delete the contents of the Recycle Bin:
/C rd /s /q C:\$Recycle.bin
![automatically empty the Recycle Bin]()
This command clears the Recycle Bin without asking for confirmation.
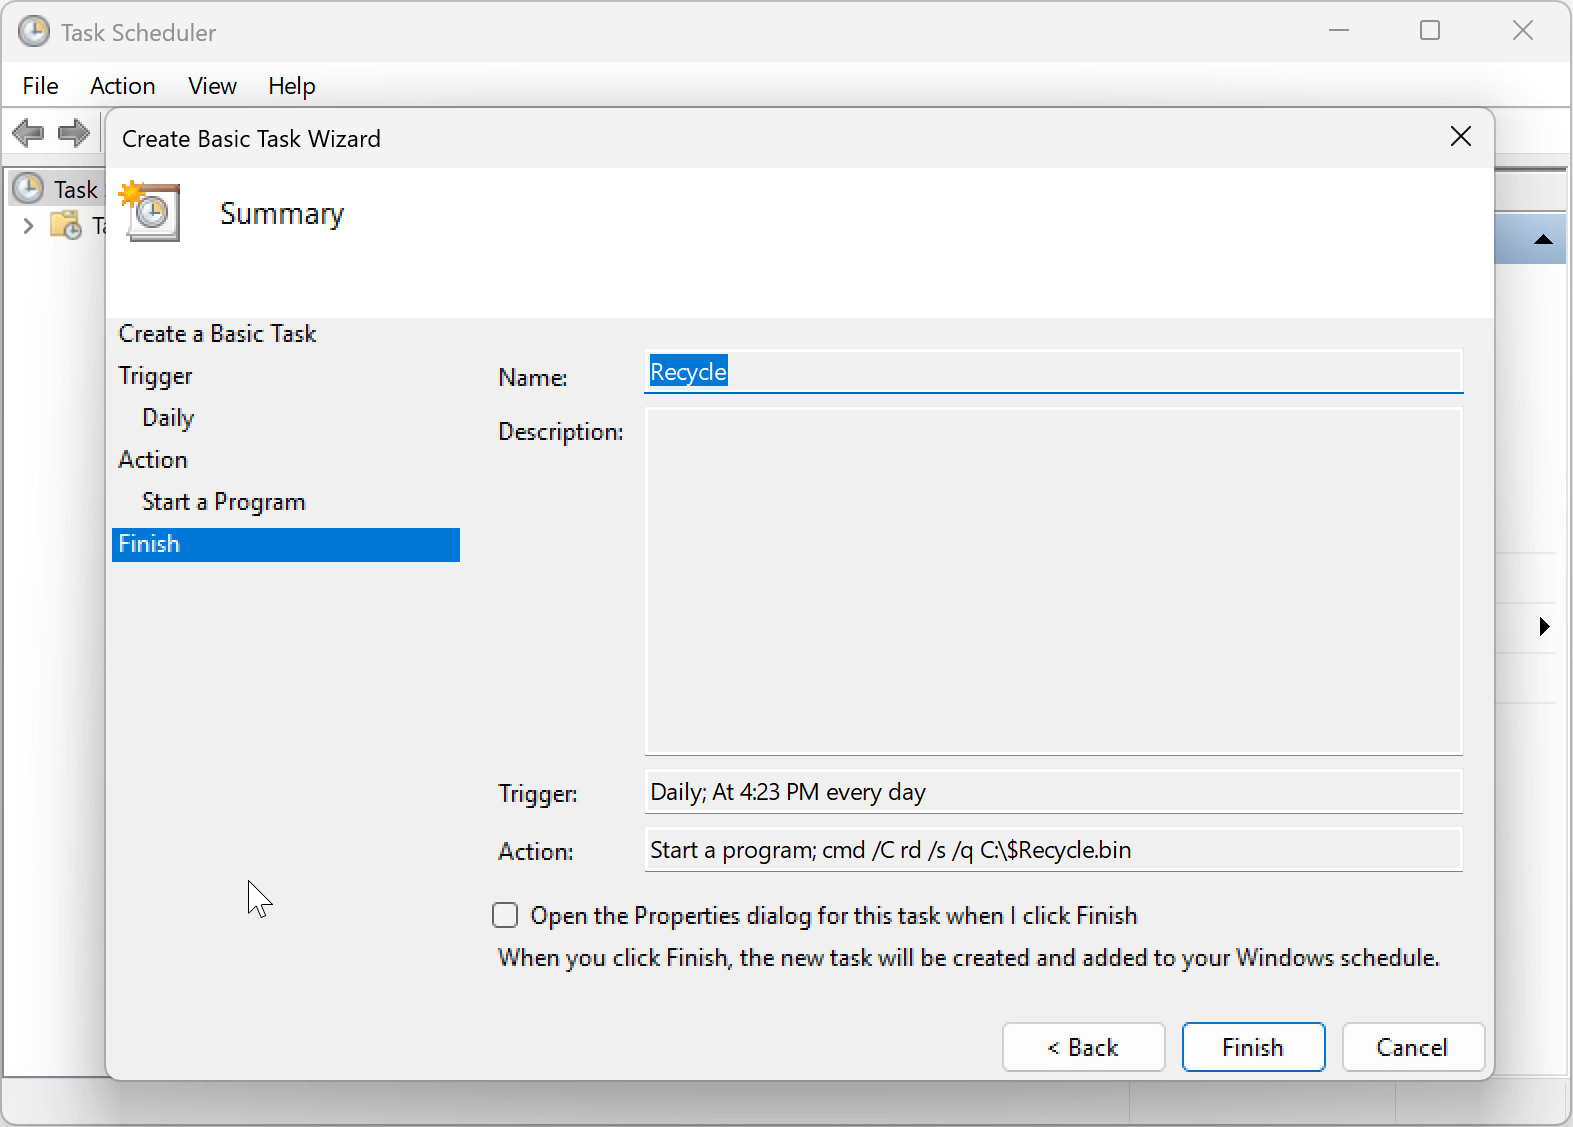
Step 5: Finish the Setup
- Click Next, review your settings, and then click Finish to create the task.
![automatically empty the Recycle Bin]()
Benefits of Using Task Scheduler:
- Full control: You can schedule the task to run exactly when you want.
- Customizable: You can adjust the settings as needed, whether it's for a specific frequency or a one-time event.
- No third-party software needed: Task Scheduler is a native Windows tool, so there's no need to install anything extra.
Drawbacks:
- More complex setup: The process of setting up Task Scheduler is more involved than using Storage Sense, which may be overwhelming for less experienced users.
- No built-in notifications: If something goes wrong, Task Scheduler won't notify you, so you'll need to manually check if the task runs as expected.
3. Using Third-Party Software
For users who want even more flexibility and ease of use, there are third-party programs designed to automate the process of emptying the Recycle Bin. Popular tools like CCleaner and Wise Disk Cleaner offer options to clean the Recycle Bin automatically along with other system optimization tasks.
How to Set Up CCleaner for Auto-Emptying the Recycle Bin:
Step 1: Download and Install CCleaner
- Go to the CCleaner website and download the free version of the software.
- Install CCleaner on your computer.
Step 2: Open CCleaner and Set Up Automatic Cleaning
- Open CCleaner and go to the Tools section.
- Select Startup and configure the program to run automatically at startup.
- Under the Cleaner tab, make sure that the Recycle Bin option is checked.
- Set the Scheduling option to automate the cleaning process (e.g., daily, weekly).
Benefits of Using Third-Party Software:
- Advanced features: Third-party software often includes additional features, such as cleaning other temporary files, optimizing system performance, and offering more detailed control over the cleaning process.
- Ease of use: These tools typically have user-friendly interfaces, making them easy to set up and use for automation.
Drawbacks:
- Potential privacy concerns: Some third-party software may require additional permissions or might have features that access personal data.
- Extra software: Unlike built-in Windows tools, you'll need to install and maintain third-party software on your system.
4. Troubleshooting Common Issues
While automating the emptying of your Recycle Bin can be a great way to manage space, there can occasionally be issues that prevent it from working as expected. Here are a few troubleshooting tips:
- Check Task Scheduler: If your scheduled task isn't running, ensure the task is configured properly. Open Task Scheduler and check that the task is set to run at the right time.
- Verify Storage Sense Settings: If Storage Sense isn't automatically emptying the Recycle Bin, make sure the settings are properly configured, and ensure it's turned on.
- Use built-in troubleshooting tools: If you're having trouble, try running Windows' built-in troubleshooting tools for Storage or Task Scheduler.
Conclusion
Automatically emptying the Recycle Bin in Windows 10 and 11 can help you free up space and keep your system running smoothly. Whether you use the built-in Storage Sense feature, create a custom task with Task Scheduler, or rely on third-party software like CCleaner, each option has its advantages and potential drawbacks.
If you prefer simplicity, Storage Sense is a great option that requires minimal setup. For more control, Task Scheduler allows you to automate the process exactly how you want it. Lastly, third-party tools offer additional features but come with the potential downsides of extra software installation.
Choose the method that best suits your needs and enjoy a cleaner, more organized system without the hassle of manual Recycle Bin management.


Donemax Data Eraser
One of the best data erasure programs for permanently erase data from PC, Mac, HDD, SSD, USB drive, digital camera and other devices. Once the data is erased, it is lost for good, cannot be recovered by any method.
Related Articles
- Nov 12, 2024What is Desktop.ini & Can I Delete it?
- Oct 23, 2024How to Format a Drive to FAT32?
- Feb 07, 2025How to Fix Crucial SSD Not Detected/Not Showing Up?
- Nov 20, 2024Files Become Shortcuts: How to Fix and Prevent It
- Feb 13, 2025[10 Solutions] Fix USB Flash Drive Not Working on Windows 11/10/8/7
- Feb 19, 2025Format SD Card with Command Prompt (CMD)/Diskpart: A Comprehensive Guide

Christina
Christina is the senior editor of Donemax software who has worked in the company for 4+ years. She mainly writes the guides and solutions about data erasure, data transferring, data recovery and disk cloning to help users get the most out of their Windows and Mac. She likes to travel, enjoy country music and play games in her spare time.

Gerhard Chou
In order to effectively solve the problems for our customers, every article and troubleshooting solution published on our website has been strictly tested and practiced. Our editors love researching and using computers and testing software, and are willing to help computer users with their problems
