Written byStevenUpdated on Mar 04, 2025
How to Permanently Delete a File or Folder from an SSD?
Approved byGerhard Chou
Before we start: With Donemax Data Eraser, you can securely and permanently delete files and folders from an SSD. Once the files are folders are removed from the SSD, the files and folders are lost forever, can't be recovered by any method.
PAGE CONTENT:
With digital security concerns on the rise, simply deleting a file from your computer is often not enough. When you delete a file or folder, it typically remains recoverable, especially on HDDs. However, SSDs function differently, making secure deletion a bit more complex.
Unlike HDDs, SSDs use a different data storage and deletion mechanism that involves the TRIM command, which helps manage unused data blocks efficiently. However, even with TRIM, permanently deleting files requires additional steps to ensure they cannot be recovered.
In this article, we will explore how SSDs handle data deletion, why standard methods are insufficient, and the best ways to permanently erase files and folders from an SSD.
How File Deletion Works on SSDs?
How File Deletion Works on Storage Devices?
When you delete a file, whether on an SSD or HDD, it does not immediately disappear from the storage medium. Instead, the operating system marks the space as "available" for new data. Until latest information is written over it, the old file remains recoverable using specialized recovery software.
However, the way SSDs handle deletion is fundamentally different from HDDs due to how data is stored and managed in flash memory.
How HDDs Handle File Deletion?
HDDs use spinning magnetic platters to store data. When you delete a file from an HDD, the system does not physically remove it. Instead, it does the following:
- The file system marks the storage space as available but does not erase the actual data.
- The data remains intact until it is overwritten by new information.
- Until overwritten, the deleted file can be easily recovered using software like Donemax Data Recovery.
To ensure secure deletion on an HDD, users must overwrite the data multiple times using data-wiping software like Donemax Data Eraser, AweEraser, DBAN (Darik's Boot and Nuke) or Eraser. These tools repeatedly write random data over the deleted file, making recovery nearly impossible.
How SSDs Handle File Deletion?
SSDs do not use spinning platters. Instead, they store data in NAND flash memory chips, which work differently from HDDs. Since SSDs have a limited number of write cycles, they are designed to optimize performance and lifespan by handling deletions efficiently.
How SSDs Store Data?
SSDs store data in NAND flash memory cells, which are grouped into pages. Several pages form a block, and SSDs can only erase entire blocks at once, not individual pages. This limitation makes SSDs more efficient but also complicates the deletion process.
When a file is written to an SSD:
- The data is stored in available pages within a block.
- The SSD controller manages data placement for speed and efficiency.
- When a file is modified, the new version is written to a different location, and the old version is marked as invalid.
Why Simple Deletion Doesn't Work on SSDs?
When you delete a file in Windows, macOS, or Linux, the operating system:
- Marks the space as available.
- Removes the file's reference from the system.
- Does not immediately erase the actual data from the SSD's memory cells.
This means that even though the file appears deleted, it remains recoverable until the SSD decides to clear it. This is where the TRIM command comes into play.
What is TRIM and How Does it Work on SSD?
TRIM is a command that allows the operating system to inform the SSD which blocks of data are no longer needed. Unlike traditional HDDs, which wait until new data is written to overwrite old data, SSDs need a more proactive approach due to the way they handle memory blocks.
How TRIM Works?
- When a file is deleted, the OS sends a TRIM command to the SSD.
- The SSD marks those blocks as invalid and ready for erasure.
- During idle periods, the SSD's Garbage Collection process clears these blocks, making them truly empty.
This improves performance by ensuring the SSD does not slow down when writing new data. However, TRIM does not guarantee immediate erasure, which means deleted files could still be temporarily recoverable.
How to Check if TRIM is Enabled on Windows?
Since TRIM is crucial for SSD performance and security, you should ensure it is enabled. Here's how:
Method 1: Using Command Prompt
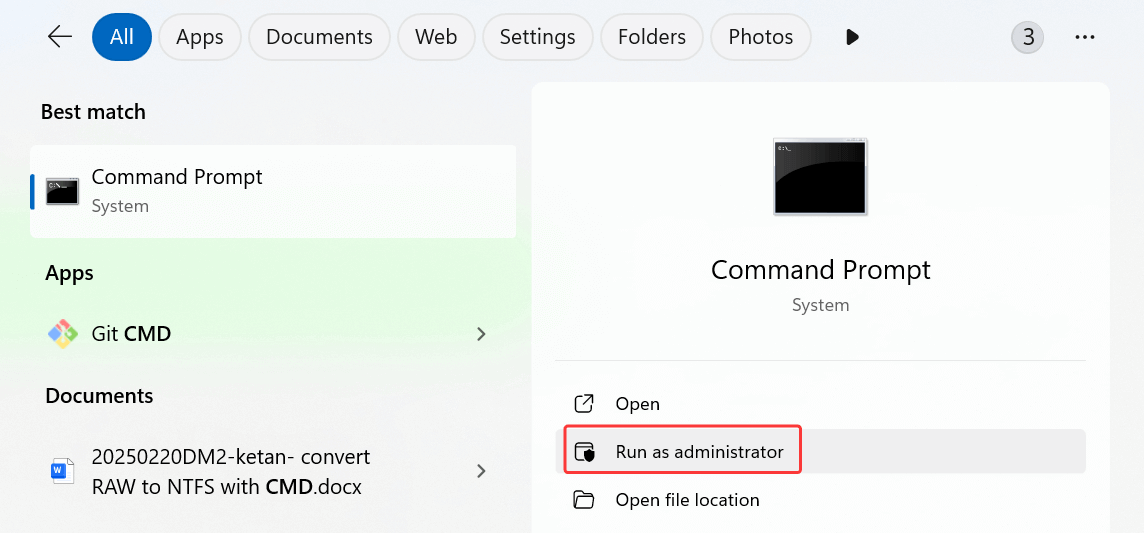
1. Open Command Prompt as Administrator.
2. Type the following command:
fsutil behavior query DisableDeleteNotify
3. Press Enter.
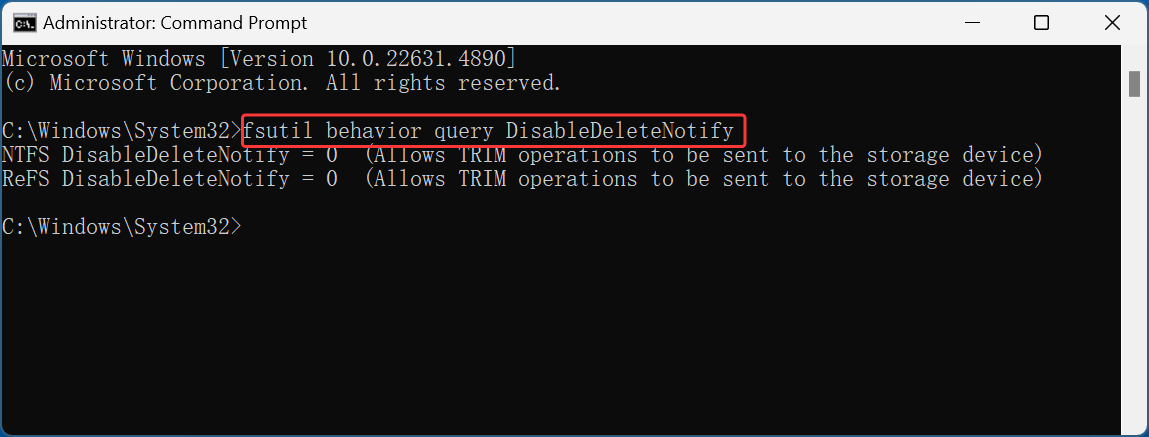
Results Interpretation:
- If the result is 0, TRIM is enabled.
- If the result is 1, TRIM is disabled, and you should enable it.
Method 2: Enabling TRIM (If Disabled)
If TRIM is disabled, enable it by running:
fsutil behavior set DisableDeleteNotify 0
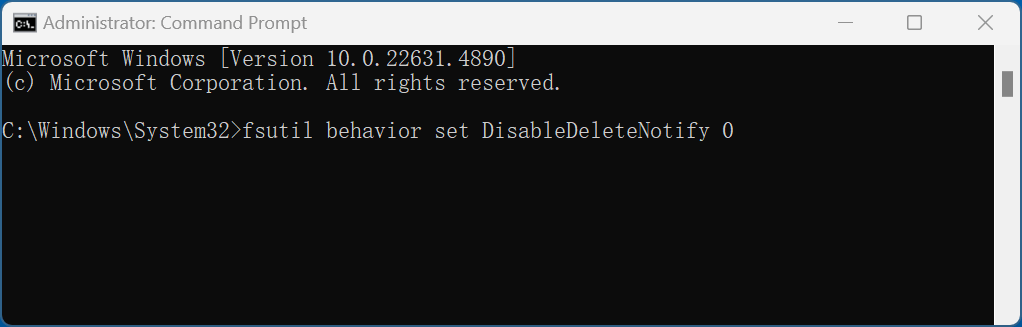
This will activate TRIM, allowing the SSD to properly erase deleted data.
Limitations of TRIM
While TRIM is effective at ensuring deleted files are erased over time, it has some limitations:
- It does not immediately erase data - files may still be recoverable for a short period.
- It relies on the SSD's garbage collection process, which operates on its own schedule.
- TRIM does not work if the SSD is connected via a USB enclosure - only internal SSDs using SATA, NVMe, or PCIe support TRIM.
For immediate and guaranteed deletion, you may need to overwrite deleted files using specialized software, as discussed in later sections.
Implications for Secure File Deletion on SSDs
1. Standard Deletion Methods Are Not Enough
- Simply moving a file to the Recycle Bin or using Shift + Delete does not actually erase it.
- Even formatting the drive does not guarantee secure deletion because some data may still be recoverable.
2. SSD-Specific Deletion Methods Are Required
- Due to the way SSDs handle file storage, traditional HDD wiping methods (like multiple overwrites) are ineffective.
- Instead, users must use SSD-specific secure deletion tools like Donemax Data Eraser, Secure Erase utilities or manually trigger TRIM to ensure files are permanently erased.
By understanding these differences, users can take the right approach to securely delete files and folders from an SSD, ensuring they cannot be recovered.
How to Permanently Delete Files and Folders from an SSD?
Donemax Data Eraser is one of the best data erasure programs. It is fully capable of permanently deleting files and folders from an SSD. Once the files/folders are deleted by Donemax Data Eraser, the files/folders are lost for good, can't be recovered by any method.
First of all, download and install Donemax Data Eraser on your computer:
Follow the steps below to securely and permanently delete files and folders from an SSD:
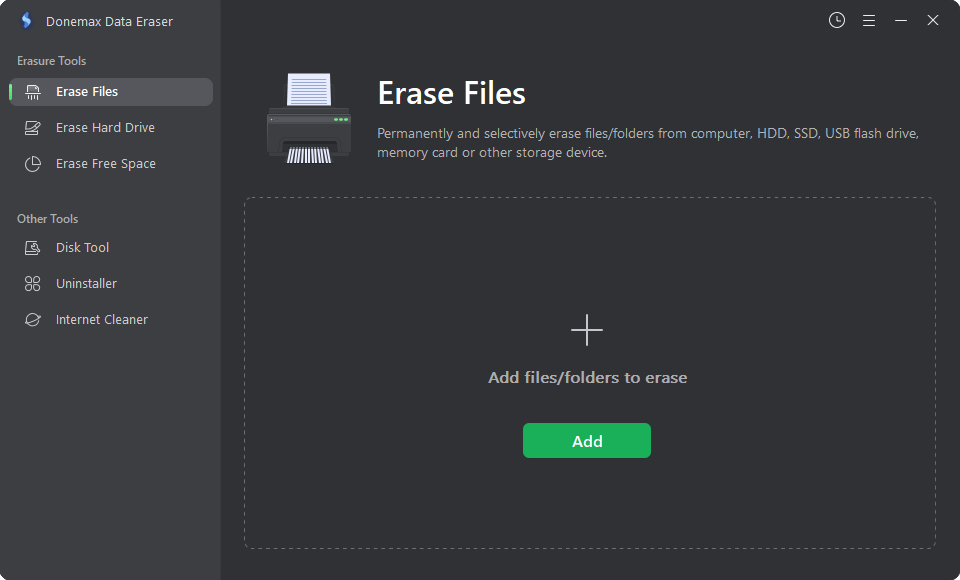
Step 1. Open Donemax Data Eraser on your computer, it offers three data erasure modes:
- Erase Files - permanently erase files and folders.
- Erase Hard Drive - permanently wipe all data from a drive.
- Erase Free Space - wipe free disk space of a drive and permanently erase all deleted/lost data from the drive.
If you only want to shred some files and folders from an SSD, just choose Erase Files mode.
Step 2. Click on Add button to add files and folders you want to delete from the SSD, then click on Erase Now button to permanently delete the selected files/folders.
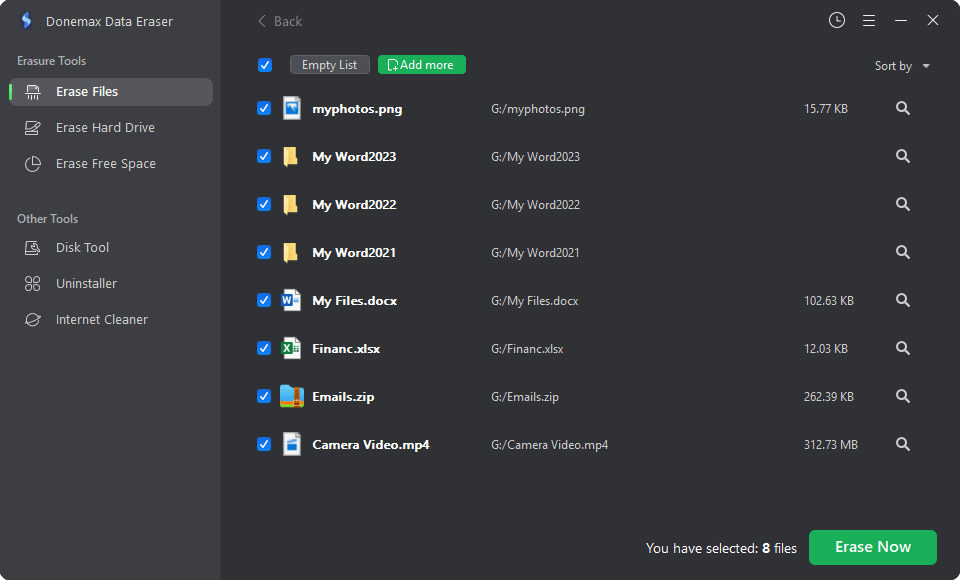
Once the process gets finished, the files/folders are lost for good, cannot be recovered by any method.
More Methods for Securely Erasing Files/Folders on SSD:
More effective methods to ensure files and folders are permanently erased from an SSD.
▪️ Using Secure Erase Tools
The majority of SSD manufacturers offer specialized tools that safely delete data that cannot be recovered. These tools execute a secure erase command, clearing all data at the firmware level.
Steps to Perform Secure Erase:
- Download and install the SSD manufacturer's utility tool.
- Backup any necessary data, as this process will wipe the entire drive.
- Run the secure erase function within the tool.
- The SSD will be securely wiped, ensuring no data remains.
Secure erase is one of the best ways to permanently remove all files from an SSD, but it erases the entire drive rather than specific files.
▪️ Overwriting with Data Wiping Software
You must overwrite them with specialized data cleaning software if you wish to remove only particular files or directories.
Recommended Tools for Secure Overwriting:
- AweEraser – Open-source tool that securely wipes files and free space.
- CCleaner (Drive Wiper Feature) – Can overwrite free space to ensure deleted files cannot be recovered.
- Secure Eraser – Offers multiple overwrite passes to ensure complete deletion.
Steps to Overwrite a File or Folder:
- Install and open a secure erasure tool.
- Select the file or folder you want to permanently delete.
- Choose an overwrite method (1-pass, 3-pass, or 7-pass).
- Run the process to overwrite the data.
Why Overwriting Works:
Overwriting data fills the storage blocks with new information, making it nearly impossible to recover the original files.
▪️ Encrypting and Deleting (For Extra Security)
Another method to make file recovery impossible is encrypting the file before deleting it. Without the encryption key, even if the file is recovered, its contents will remain inaccessible.
How to Encrypt Before Deletion:
- Use BitLocker (Windows) to encrypt entire drives.
- Use VeraCrypt to create an encrypted volume for sensitive files.
Steps to Encrypt & Delete a File:
- Encrypt the file using BitLocker, VeraCrypt, or similar encryption software.
- Delete the encrypted file normally.
- Overwrite the free space using a secure erasure tool.
Even if a deleted file is retrieved, encryption makes sure that it cannot be read without the right decryption key.
▪️ Manually Triggering the TRIM Command
Even though the TRIM command is automatically handled by modern operating systems, you can manually trigger it to ensure that deleted data is erased sooner.
Steps to Run TRIM Manually (Windows):
- Open Command Prompt as Administrator.
- Type the following command and press Enter:
fsutil behavior set DisableDeleteNotify 0
- Run the TRIM command using:
defrag C: /L
(Replace C: with the correct SSD drive letter.)
This forces the SSD to execute TRIM immediately, making deleted files harder to recover.
▪️ Physical Destruction (Last Resort)
If you want to ensure data is 100% unrecoverable, physical destruction is the ultimate solution. This method is only necessary if you plan to discard or recycle your SSD.
Safe Ways to Destroy an SSD:
- Drill holes through the NAND chips (Do not drill the controller chip, as it does not store data.)
- Use a hammer to break the chips into small fragments.
- Shred the SSD using an industrial shredder.
- Use extreme heat or acid to destroy the chips (only for professionals).
When to Use Physical Destruction:
- When disposing of an old SSD.
- When handling highly sensitive data (government, military, or corporate security).
Conclusion
Permanently deleting files from an SSD requires more than just sending them to the Recycle Bin or using Shift + Delete. Due to how SSDs store and manage data, recovery remains possible unless proper methods are used.
Best Practices for SSD File Deletion:
- Use Secure Erase tools for complete drive wipes.
- Use Data Wiping software to overwrite specific files.
- Encrypt sensitive files before deleting them for extra security.
- Run the TRIM command manually to speed up data erasure.
- Physically destroy the SSD if necessary.
By following these steps, you can ensure that your deleted files are gone for good, preventing any chance of unauthorized recovery.
Donemax Data Eraser
One of the best data erasure programs for permanently erase data from PC, Mac, HDD, SSD, USB drive, digital camera and other devices. Once the data is erased, it is lost for good, cannot be recovered by any method.
Related Articles
- Jan 28, 2024How to Wipe Toshiba External Hard Drive?
- Feb 23, 2024How to Destroy Data on Hard Drive to Make Data Be Unrecoverable?
- Feb 05, 2024How to Wipe A Lexar Portable SSD?
- Jan 14, 20262026 Best SD 6 Card Formatter: Format/Wipe/Repair SD Card
- Jan 08, 2024What Is Drive Eraser or Drive Wiper for Windows?
- Apr 25, 2025Factory Reset Windows 7: A Complete Step-by-Step Guide

Contributing Writer
Steven
Steven has been a senior writer & editor of Donemax software since 2020. He's a super nerd and can't imagine the life without a computer. Over 6 years of experience of writing technical solutions and software tesing, he is passionate about providing solutions and tips for Windows and Mac users.

Editor in chief
Gerhard Chou
In order to effectively solve the problems for our customers, every article and troubleshooting solution published on our website has been strictly tested and practiced. Our editors love researching and using computers and testing software, and are willing to help computer users with their problems