PAGE CONTENT:
Managing deleted files is an essential part of using a computer effectively. The Windows operating system simplifies this process with a feature called the Recycle Bin. Whether you're a new user or an experienced one, understanding how to use the Recycle Bin efficiently can save you from losing valuable data. This article delves into what the Recycle Bin is, how to empty it, and how to hide or unhide it, empowering you to manage your files with confidence.
What is the Windows Recycle Bin?
Definition and Purpose:
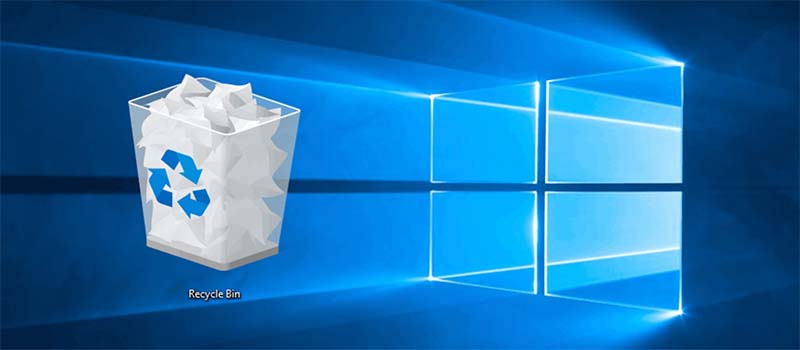
The Windows Recycle Bin is a system folder that acts as a temporary holding area for files and folders that have been deleted. When you delete a file, it isn't removed from your computer immediately. Instead, it is moved to the Recycle Bin, allowing you to recover it if needed. This functionality prevents accidental data loss by offering a safety net before files are permanently deleted.
The Recycle Bin comes with every version of Windows, from Windows 95 to the latest Windows 11, making it a core feature for file management. Its icon, often found on the desktop, is easily recognizable and serves as a visual reminder of files waiting to be purged or restored.
Key Features:
- Temporary Storage: Files in the Recycle Bin are stored temporarily until the bin is emptied. This duration depends on the space allocated to the bin and your system's storage capacity.
- Selective Recovery: You can recover individual files or all contents of the Recycle Bin.
- Space Limitations: By default, the Recycle Bin uses a percentage of your disk space. When it reaches this limit, older files are automatically removed to make room for new ones.
Importance of the Recycle Bin:
The Recycle Bin is crucial for managing file deletion effectively. It reduces the risk of accidental data loss by allowing you to restore files quickly. However, it's not a permanent storage location, and files will be lost if the bin is emptied without review. Knowing how to use it properly is vital for efficient data management.
How to Empty the Recycle Bin?
The Recycle Bin, while useful for temporary file storage, can quickly accumulate files and take up significant space on your hard drive. Regularly emptying it is essential for maintaining optimal performance and ensuring you don't run out of storage. Here's a comprehensive guide to different methods of emptying the Recycle Bin.
1. Manual Emptying
The most straightforward way to empty the Recycle Bin is by manually selecting the option to clear all its contents. Here's how:
- Locate the Recycle Bin Icon:
By default, the Recycle Bin icon is on your desktop. It appears as a trash can icon, which changes appearance depending on whether it contains files.
- Full Icon: Indicates the Recycle Bin contains files.
- Empty Icon: Indicates the Recycle Bin is already cleared.
- Right-Click the Recycle Bin Icon:
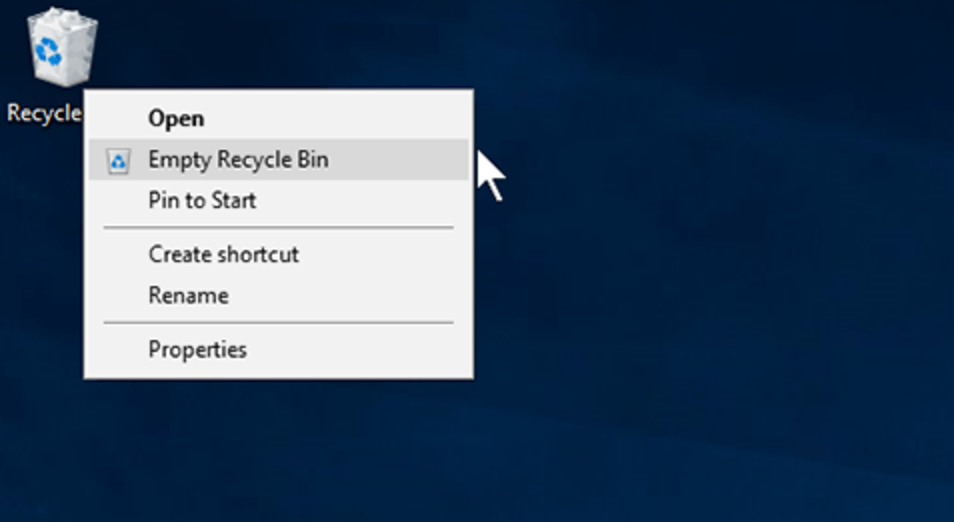
Once located, right-click the icon to open a context menu with several options.
- Select "Empty Recycle Bin":
From the menu, click on Empty Recycle Bin. This action will prompt a warning dialog asking you to confirm the deletion of all files.
![Manual Emptying]()
- Confirm the Action:
A pop-up window appears, stating, "Are you sure you want to permanently delete these items?" Confirm by clicking Yes. This will permanently remove all files in the Recycle Bin.
When to Use Manual Emptying:
- After a cleanup session: If you've recently deleted a large number of files, manually emptying the Recycle Bin ensures they no longer occupy disk space.
- When low on storage: Manually clearing files can instantly free up space, especially on SSDs or smaller hard drives.
2. Automatic Emptying with Storage Sense
For users who prefer an automated approach, Windows includes a feature called Storage Sense that can manage Recycle Bin contents for you. This feature allows the system to clean up unnecessary files periodically, including those in the Recycle Bin.
Steps to Enable Storage Sense:
- Open Settings:
Press Win + I to open the Windows Settings menu.
- Navigate to Storage Options:
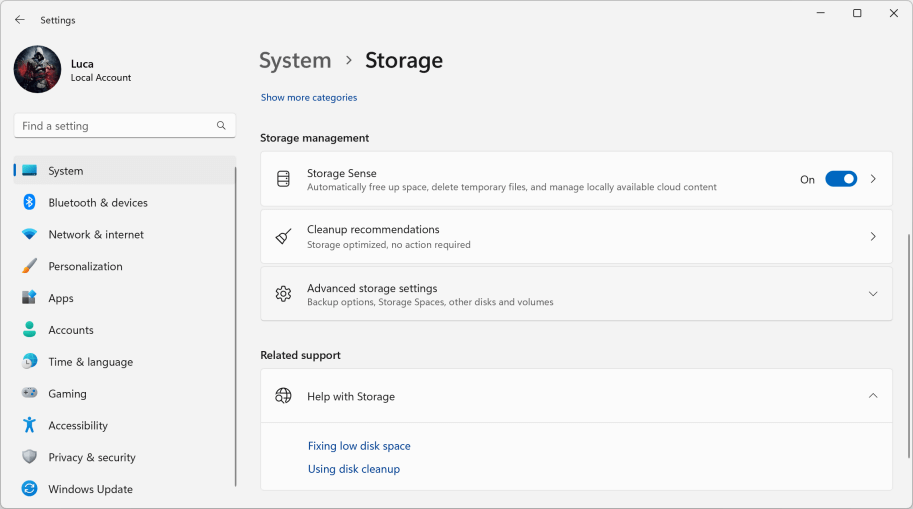
Go to System > Storage. You'll see an option for Storage Sense near the top of the page.
![Navigate to Storage Options]()
- Turn on Storage Sense:
Toggle the switch to enable Storage Sense. Once activated, click on Configure Storage Sense or run it now for additional settings.
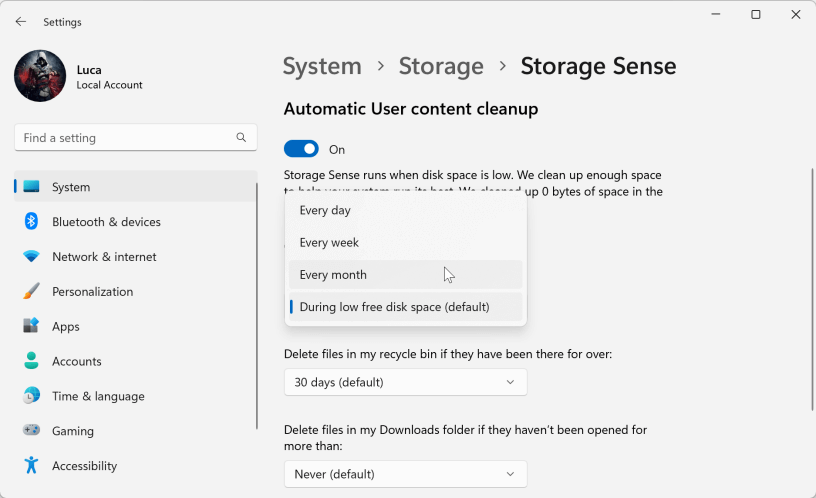
- Set Automatic Recycle Bin Cleanup:
Under the cleanup options, find the section labeled Temporary Files. Here, you can specify how often Windows should delete files from the Recycle Bin. Options include:
- Every Day
- Every Week
- Every Month
- When Disk Space is Low
![Set Automatic Recycle Bin Cleanup]()
Advantages of Automatic Emptying:
- Convenience: No need to remember to empty the bin manually.
- Customizability: Allows you to control how often files are cleared and which files are targeted.
- Efficiency: Ensures optimal storage usage without user intervention.
3. Selective File Deletion
Sometimes, you may want to delete specific files from the Recycle Bin while retaining others. This method is useful when you're unsure about permanently removing all files.
Steps for Selective Deletion:
- Open the Recycle Bin:
Double-click the Recycle Bin icon to open it. This will display all files currently stored in the bin.
- Browse and Select Files:
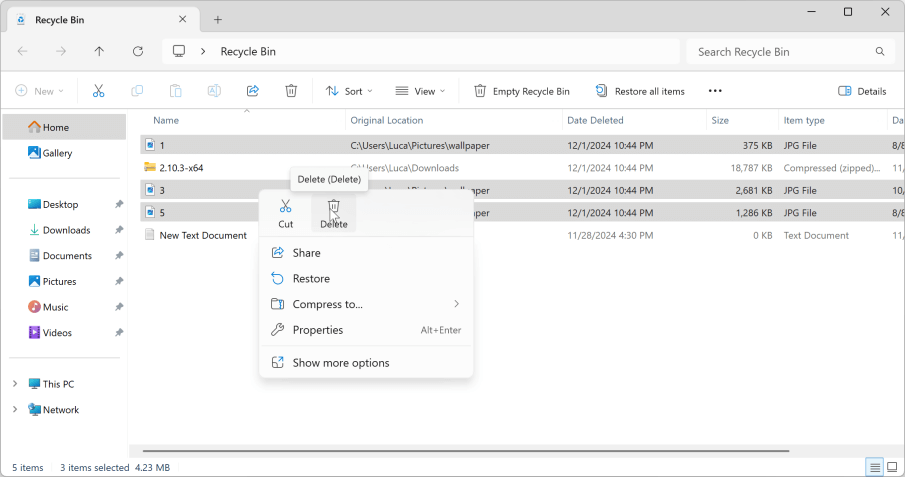
Scroll through the list to find the files you wish to delete. You can select multiple files using:
- Ctrl + Click: Select multiple non-consecutive files.
- Shift + Click: Select a range of files.
- Right-Click and Delete:
Once selected, right-click on any of the highlighted files and choose Delete. Confirm the deletion in the pop-up window.
![Right-Click and Delete]()
When to Use Selective Deletion:
- Uncertain about some files: If you're unsure whether you might need a file later, keep it in the Recycle Bin for the time being.
- Managing specific storage needs: Remove only the largest files or files you know are no longer required.
4. Emptying via Command Prompt or PowerShell
For advanced users, the Recycle Bin can also be emptied using Command Prompt or PowerShell. This method is quick and bypasses the need for GUI interactions.
Steps to Empty Recycle Bin via Command Prompt:
- Open Command Prompt:
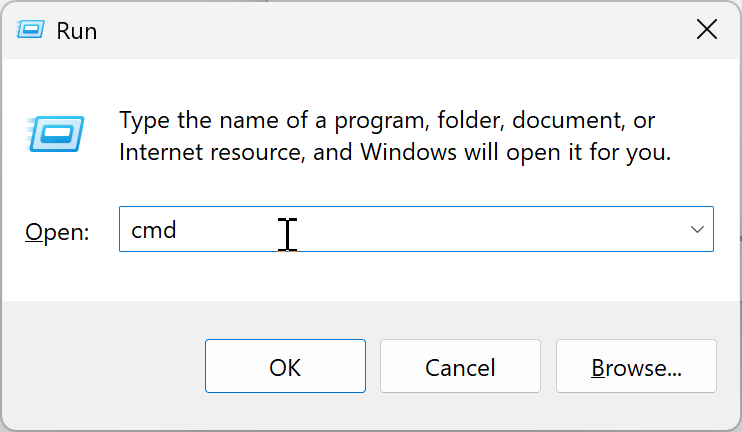
- Press Win + R, type cmd, and press Enter.
![Open Command Prompt]()
- Press Win + R, type cmd, and press Enter.
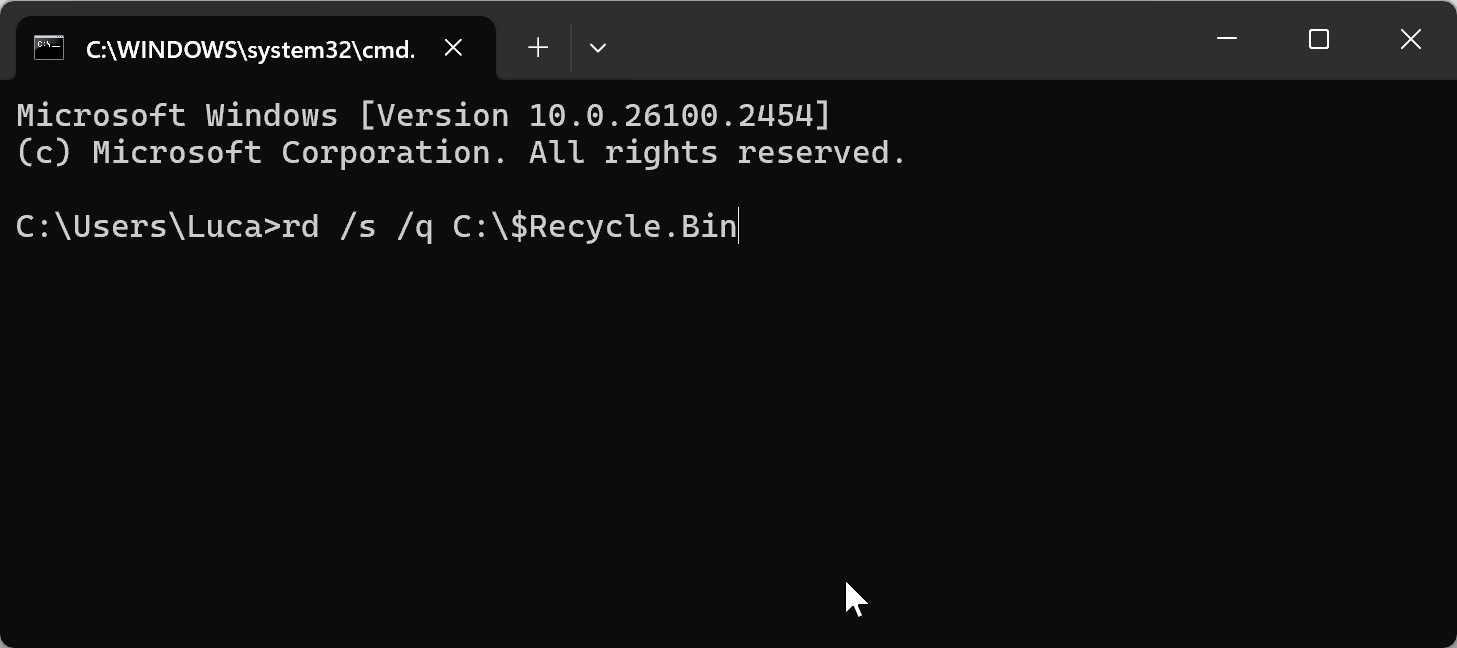
- Type the Following Command:
rd /s /q C:\$Recycle.Bin
This command will delete all contents of the Recycle Bin across all drives.
![Steps to Empty Recycle Bin via Command Prompt]()
- Press Enter:
The Recycle Bin will be emptied without further prompts.
Steps to Empty Recycle Bin via PowerShell:
- Open PowerShell:
- Type PowerShell by pressing Win + S, then hit Enter.
- Execute the Cleanup Command:
Clear-RecycleBin -Force -ErrorAction:SilentlyContinue
The Recycle Bin is cleared by this command without displaying any confirmation dialogs.

Advantages of Using Command-Line Tools:
- Speed: Ideal for tech-savvy users who prefer keyboard shortcuts over graphical interfaces.
- System-Wide Cleanup: Ensures all drives' Recycle Bin contents are cleared.
5. Important Considerations Before Emptying
- Double-Check for Important Files: Always review the Recycle Bin before emptying it. Accidental deletions can lead to permanent data loss.
- Backup Critical Data: If in doubt, consider moving important files to a secure location before clearing the bin.
- Monitor Disk Space: Regularly check storage usage to determine when it's necessary to empty the Recycle Bin.
If you have deleted important files by mistake and have emptied them from recycle bin, you can use data recovery software to get the deleted files back.

How to Recover Permanently Deleted Files
Recover deleted files which have been emptied from recycle bin with data recovery software.
How to Hide or Unhide the Recycle Bin?
Depending on your preferences or desktop organization, you might want to hide or unhide the Recycle Bin icon. Here's how you can do it.
Hiding the Recycle Bin
- Access Desktop Icon Settings:
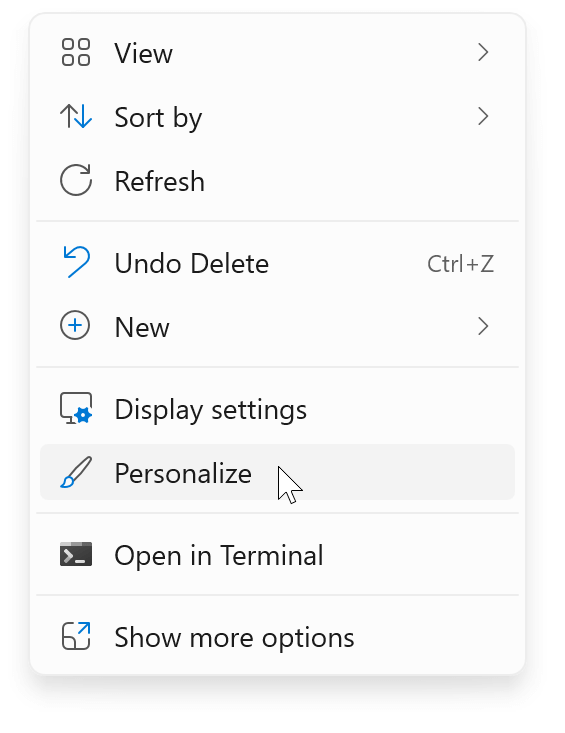
- Right-click on the desktop and select Personalize.
![Right-click on the desktop and select Personalize]()
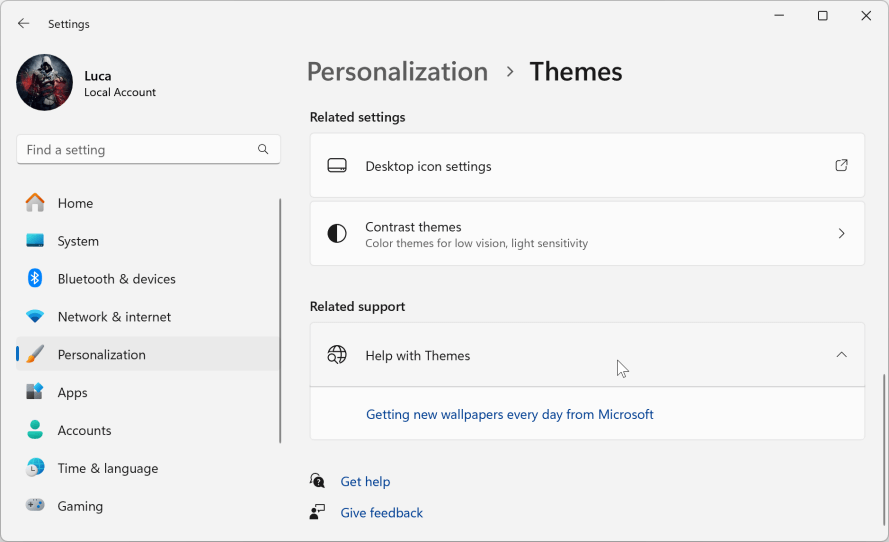
- Select Desktop Icon Settings from the Related Settings menu under Themes.
![Select Desktop Icon Settings from the Related Settings menu under Themes]()
- Right-click on the desktop and select Personalize.
- Uncheck the Recycle Bin Option:
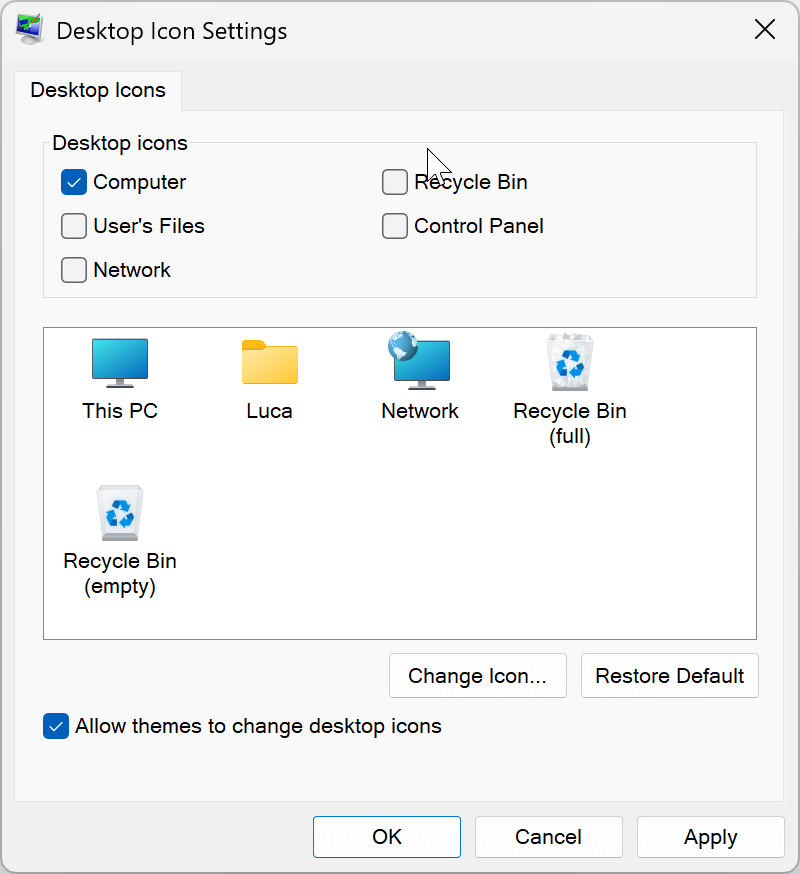
- In the Desktop Icon Settings window, uncheck the box next to Recycle Bin.
![Uncheck the Recycle Bin Option]()
- In the Desktop Icon Settings window, uncheck the box next to Recycle Bin.
- Apply Changes:
- Click Apply and then OK. The Recycle Bin icon will disappear from your desktop.
Unhiding the Recycle Bin
If you want to make the Recycle Bin visible again:
- To access Desktop Icon Settings, take the same actions.
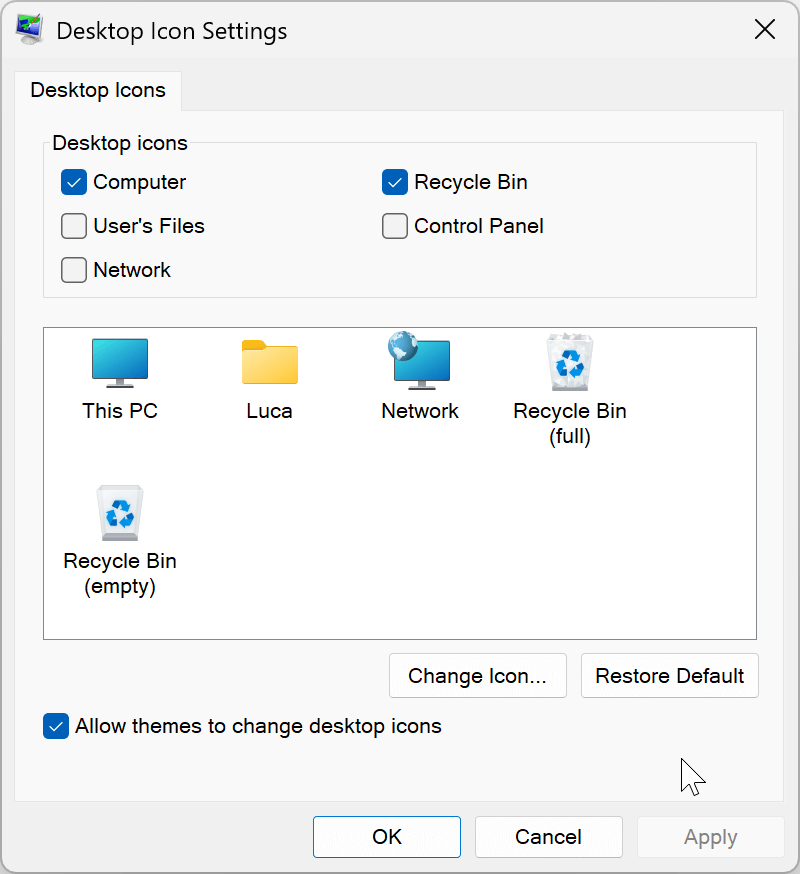
- Select the Recycle Bin box.
- To return the icon to your desktop, click Apply and OK.
![Unhiding the Recycle Bin]()
Alternative Methods
Advanced users can also use registry tweaks or third-party tools to manage the visibility of the Recycle Bin. However, these methods are not recommended unless you're familiar with system configurations.
Tips for Managing the Recycle Bin
Efficient use of the Recycle Bin can enhance your file management experience. Here are some additional tips:
Adjusting Storage Size:
The amount of disk space allotted to the Recycle Bin can be changed:
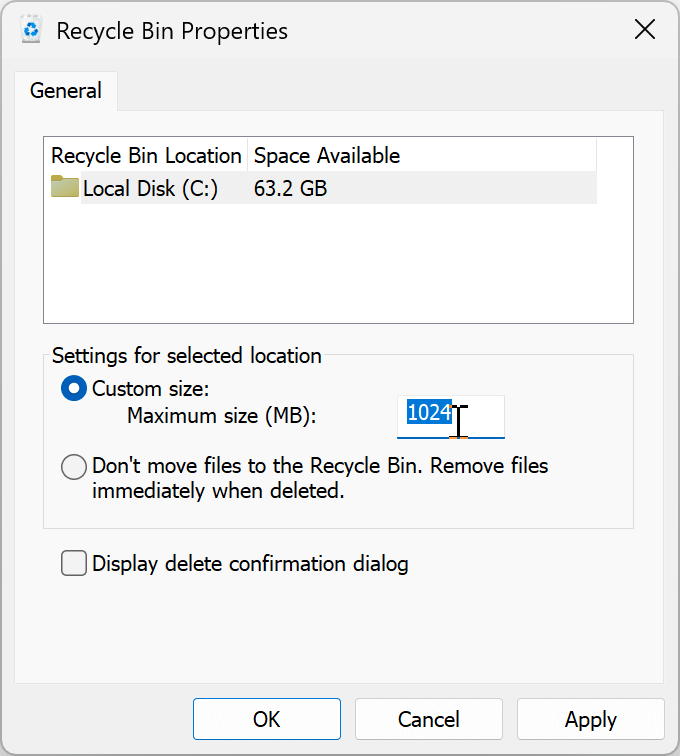
- Choose Properties by performing a right-click on the Recycle Bin icon.
- Under the Settings for Selected Location, adjust the maximum size in megabytes.
- Click Apply and OK.
![Adjusting Storage Size]()
This adjustment helps prevent the bin from occupying excessive disk space while ensuring it can store deleted files effectively.
Keyboard Shortcuts:
Speed up file management with these shortcuts:
- Delete Key: Moves selected files to the Recycle Bin.
- Shift + Delete: Files are permanently erased without being moved to the Recycle Bin.
Backup Strategies:
To avoid accidental data loss, consider using backup solutions like OneDrive, Google Drive, or external storage devices. Regular backups ensure critical files remain accessible even if they're accidentally deleted from the Recycle Bin.
Conclusion
An essential tool for efficiently handling deleted data is the Windows Recycle Bin. By understanding its features, learning how to empty it, and knowing how to manage its visibility, you can optimize your file management process and avoid unnecessary data loss. Whether you're organizing your desktop, freeing up disk space, or safeguarding critical files, mastering the Recycle Bin is a fundamental skill for all Windows users. Take a moment to explore its settings on your device and experience seamless file management today.
If you want to wipe recycle bin before selling or donating your computer, you can use disk wipe software to wipe free disk space of the internal disk and permanently erase all deleted/lost data from the disk, ensuring no trace is left behind.
Related Articles
- Jan 12, 2025APFS vs. HFS+ (Mac OS Extended) – A Comprehensive Guide
- Mar 26, 2025What is the File Explorer on Mac? – All You Need to Know
- Apr 15, 2024What Is Mac Internet Recovery Mode? What Can It Do?
- Feb 01, 2024What Is Data Erasure?
- Aug 05, 2024Mac Trash Bin: Everything You Should Know
- Nov 27, 2024What is ReFS File System?

Coco Lin
Coco has been a writer and a chief programmer at Donemax software since 2018. Over 10 years of experience of writing troubleshooting articles in the software industry, she is passionate about programming and loves to providing solutions to Windows and Mac users. Also she enjoys music and palying tennis in her free time.

Gerhard Chou
In order to effectively solve the problems for our customers, every article and troubleshooting solution published on our website has been strictly tested and practiced. Our editors love researching and using computers and testing software, and are willing to help computer users with their problems
Hot Donemax Products

Clone hard drive with advanced clone technology or create bootable clone for Windows/Mac OS.

Completely and easily recover deleted, formatted, hidden or lost files from hard drive and external storage device.

Certified data erasure software - permanently erase data before selling or donating your disk or any digital device.
