Written byMariaUpdated on Feb 11, 2025
Disk Copy on macOS Sequoia – 1:1 Copy Disk on macOS Sequoia
Approved byGerhard Chou
Before we start: Donemax Disk Clone is a reliable disk copy software for macOS Sequoia. It can help you copy HDD/SSD/External device on macOS Sequoia, create bootable clone backup for macOS Sequoia, etc.
PAGE CONTENT:
In today's digital world, data is crucial, and ensuring its safety is a priority for individuals and businesses alike. One of the best ways to protect your data is by creating a 1:1 disk copy, also known as disk cloning. This process duplicates an entire disk, including the operating system, installed applications, system files, and personal data, ensuring an exact replica that can be used for backup, migration, or recovery purposes.
With macOS Sequoia, Apple has introduced enhancements in system security, disk management, and file integrity. While these updates improve performance and security, they also impact how users perform disk cloning. Whether you're upgrading to a new drive, making a backup, or setting up multiple Macs with the same configuration, knowing how to perform a 1:1 disk copy on macOS Sequoia is essential.
In this guide, we will explore different methods for cloning a disk on macOS Sequoia, covering both built-in and third-party tools, best practices, and troubleshooting techniques.

Methods for Disk Copy on macOS Sequoia
There are multiple ways to create an exact copy of a disk on macOS Sequoia. These methods range from using built-in tools like Disk Utility to third-party disk copy software that offers additional functionality. Below are the most effective ways to achieve a 1:1 disk copy.
Method 1. Copy Disk on macOS Sequoia with Disk Utility
Apple provides Disk Utility, a graphical user interface (GUI) tool that allows users to manage disks, partitions, and perform disk cloning.
Steps to Copy a Disk Using Disk Utility:
Step 1. Connect the Target Disk – Plug in the external drive or secondary internal disk that will serve as the destination for cloning.
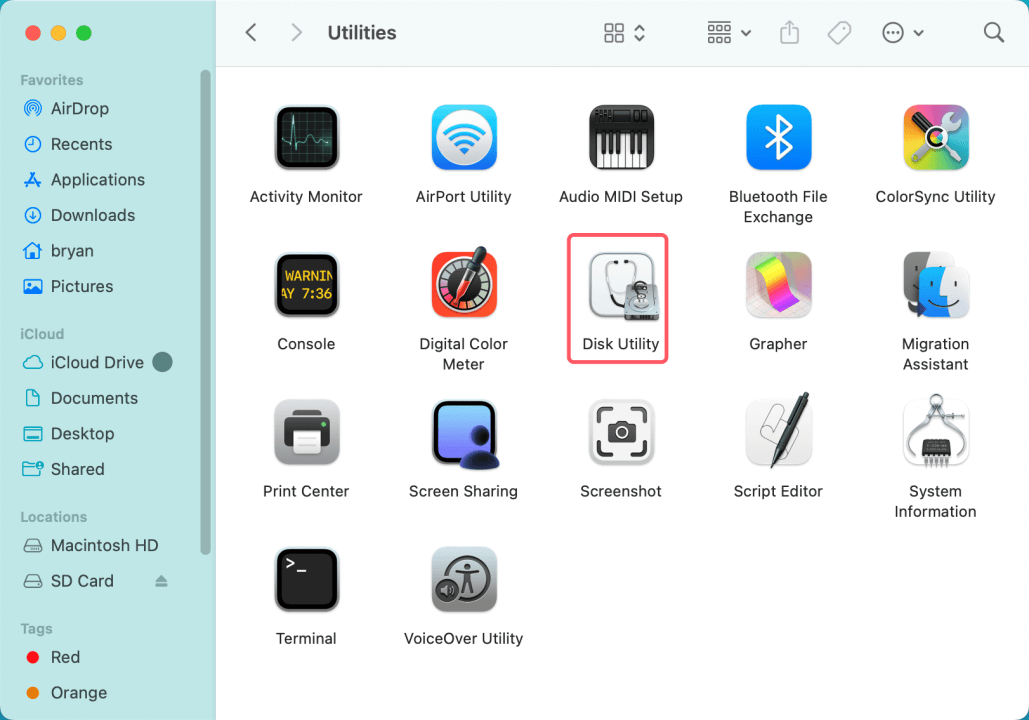
Step 2. Open Disk Utility – Navigate to Applications > Utilities > Disk Utility.
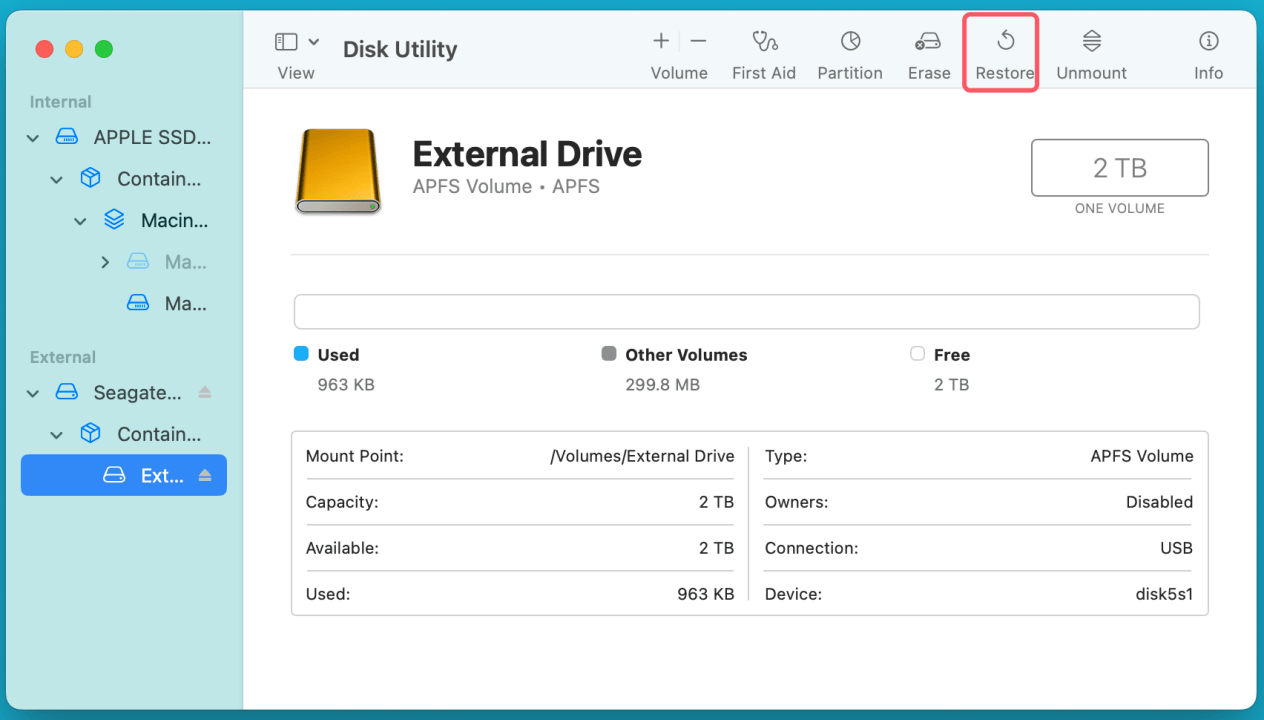
Step 3. Select the External Hard Drive – In the left panel, choose the disk as the destination drive.
Step 4. Click "Restore" – Click on the "Restore" tab.
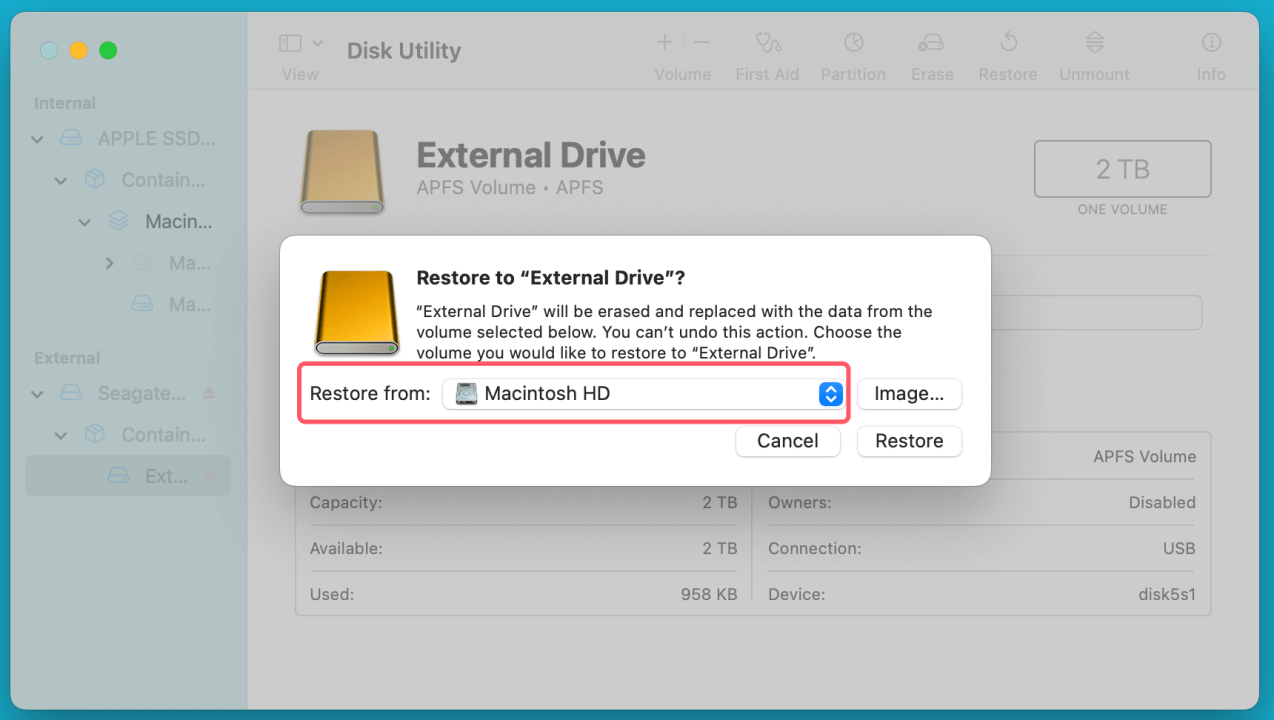
Step 5. Choose the Source Disk – Choose Restore from XXX (replace the XXX with the disk of the source disk.).
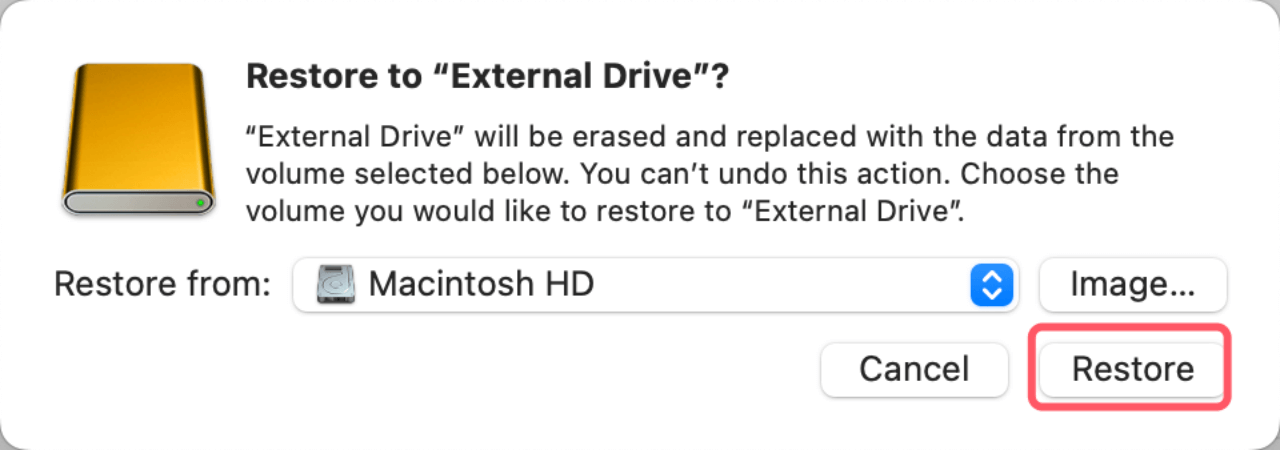
Step 6. Start the Process – Click "Restore" to begin the cloning process. Then it will copy data from your Mac's internal disk to the external hard drive.
Pros and Cons of Using Disk Utility:
Pros:
- Free and built into macOS
- Easy-to-use graphical interface
- Reliable for simple disk copies
Cons:
- Cannot clone the startup disk while it's in use
- Does not support incremental backups
- May not work with certain file systems or encrypted drives
- Can't create bootable clone
Method 2. Use Donemax Disk Clone for Disk Copy on macOS Sequoia
If you prefer a more flexible and feature-rich solution, third-party disk cloning software provides additional functionalities like full disk copy, creating bootable clone, etc.
Donemax Disk Clone is a powerful disk cloning program for macOS Sequoia.
Donemax Disk Clone for Mac
- Copy disk including HDD/SSD/external device on macOS Sequoia.
- Create full bootable clone backup for macOS Sequoia.
- Create disk image backup for macOS Sequoia.
It offers three disk copy modes for macOS Sequoia:
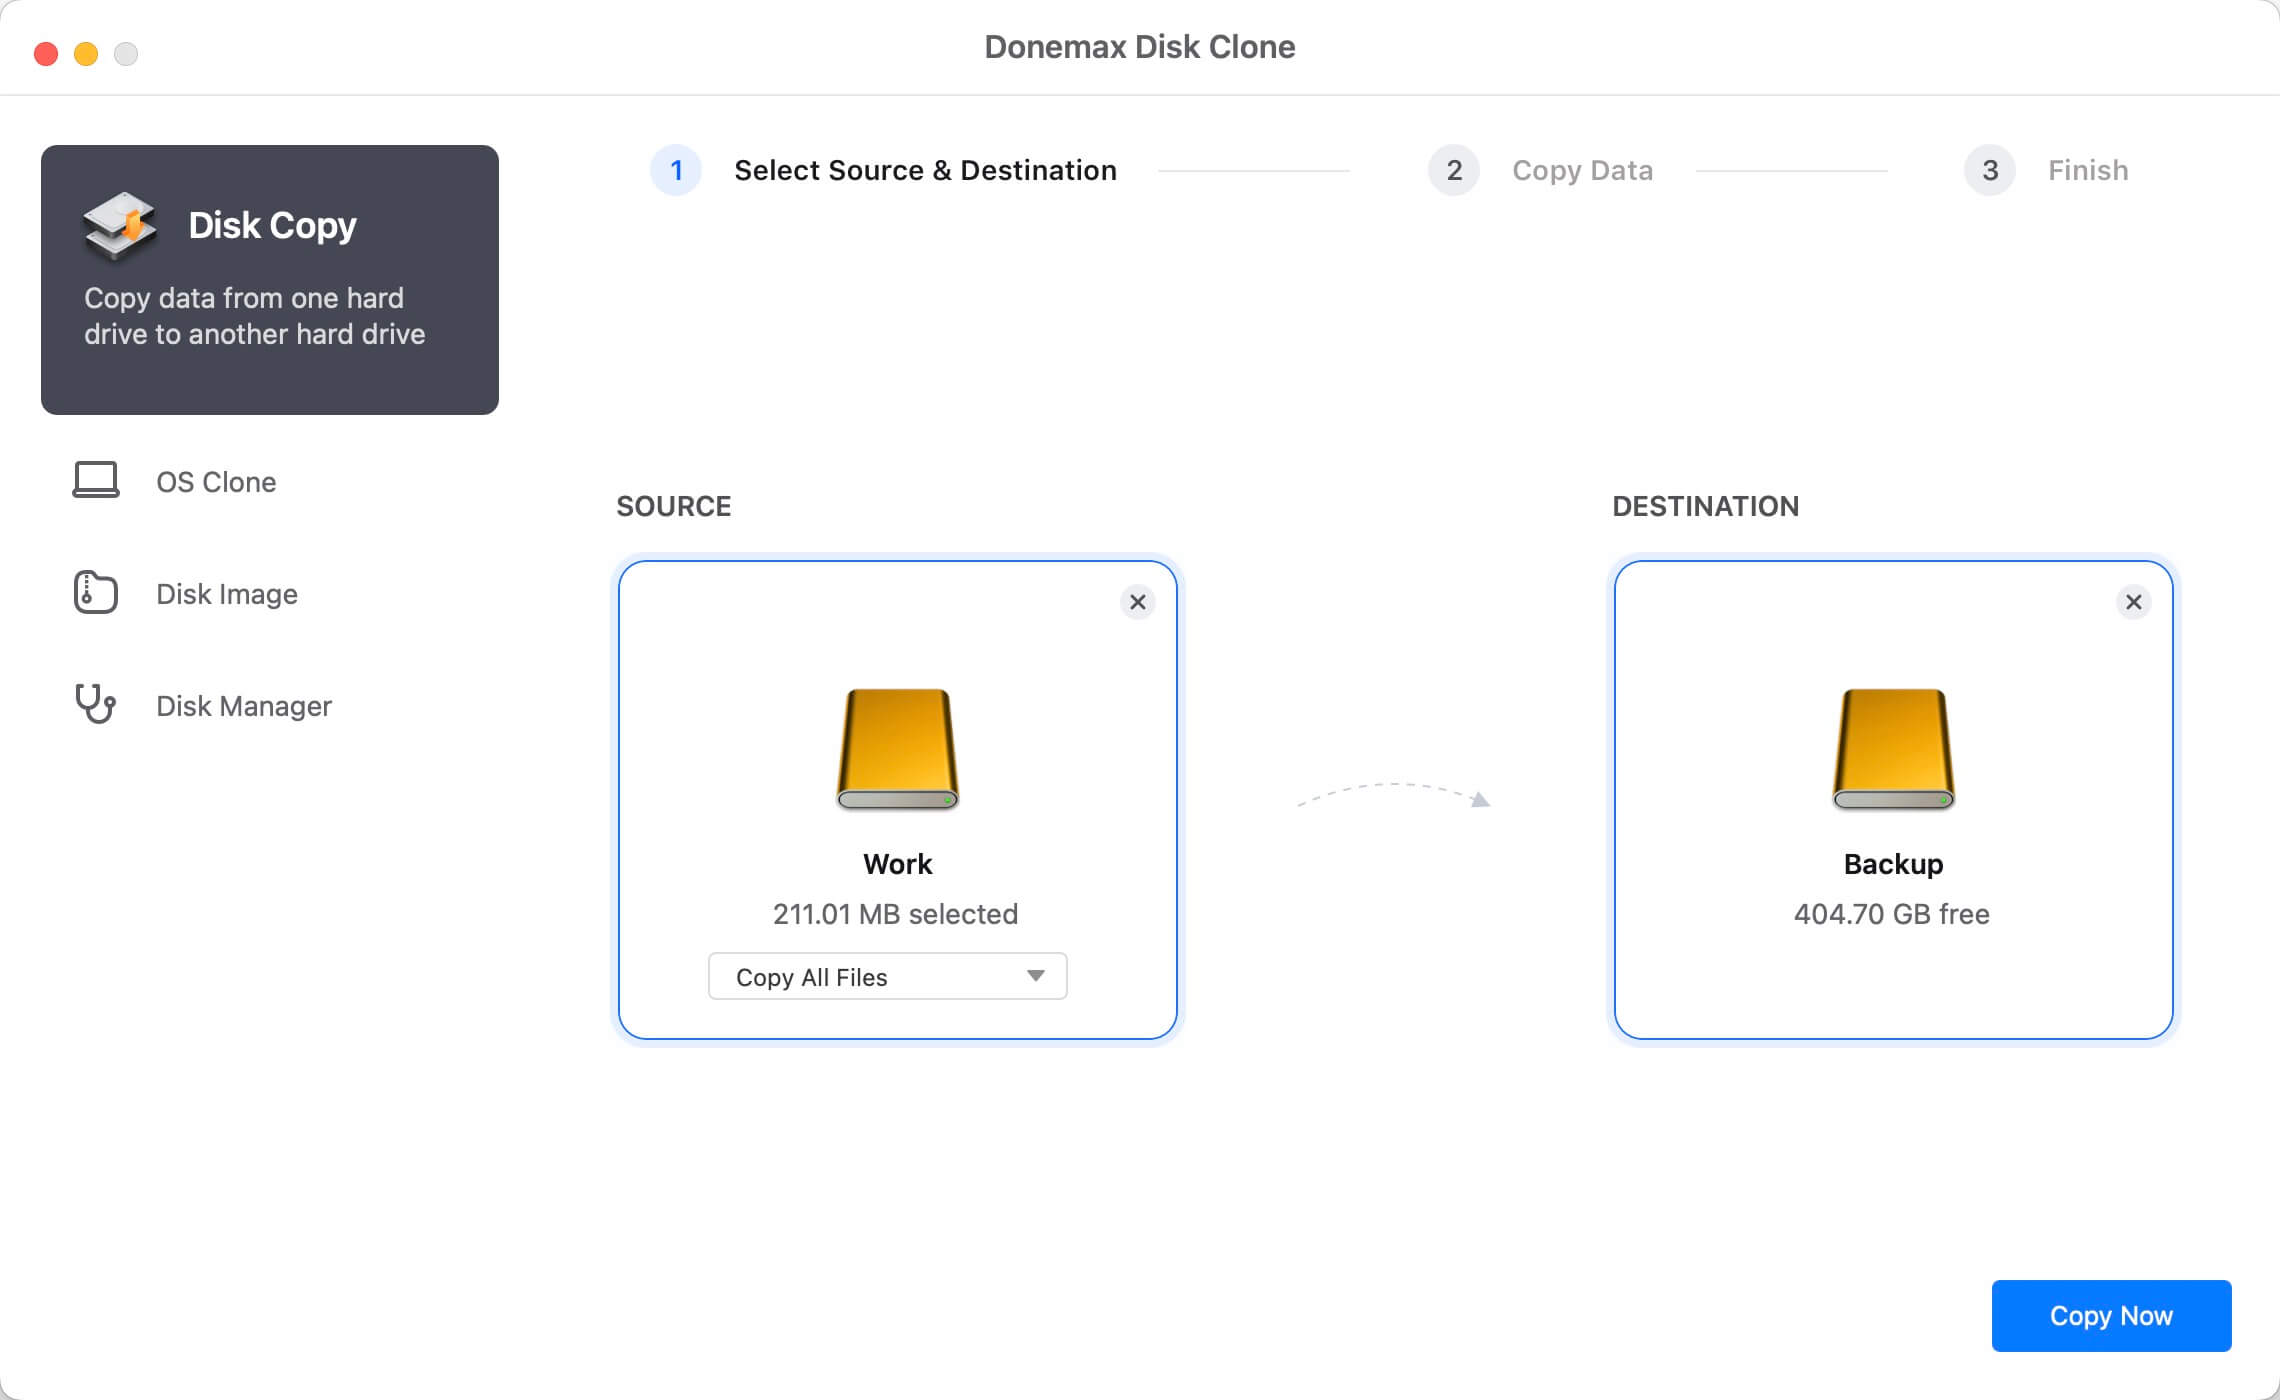
Mode 1: Disk Copy - select destination drive and source drive. Then click on Copy Now button to copy all data from the source drive to the destination drive.
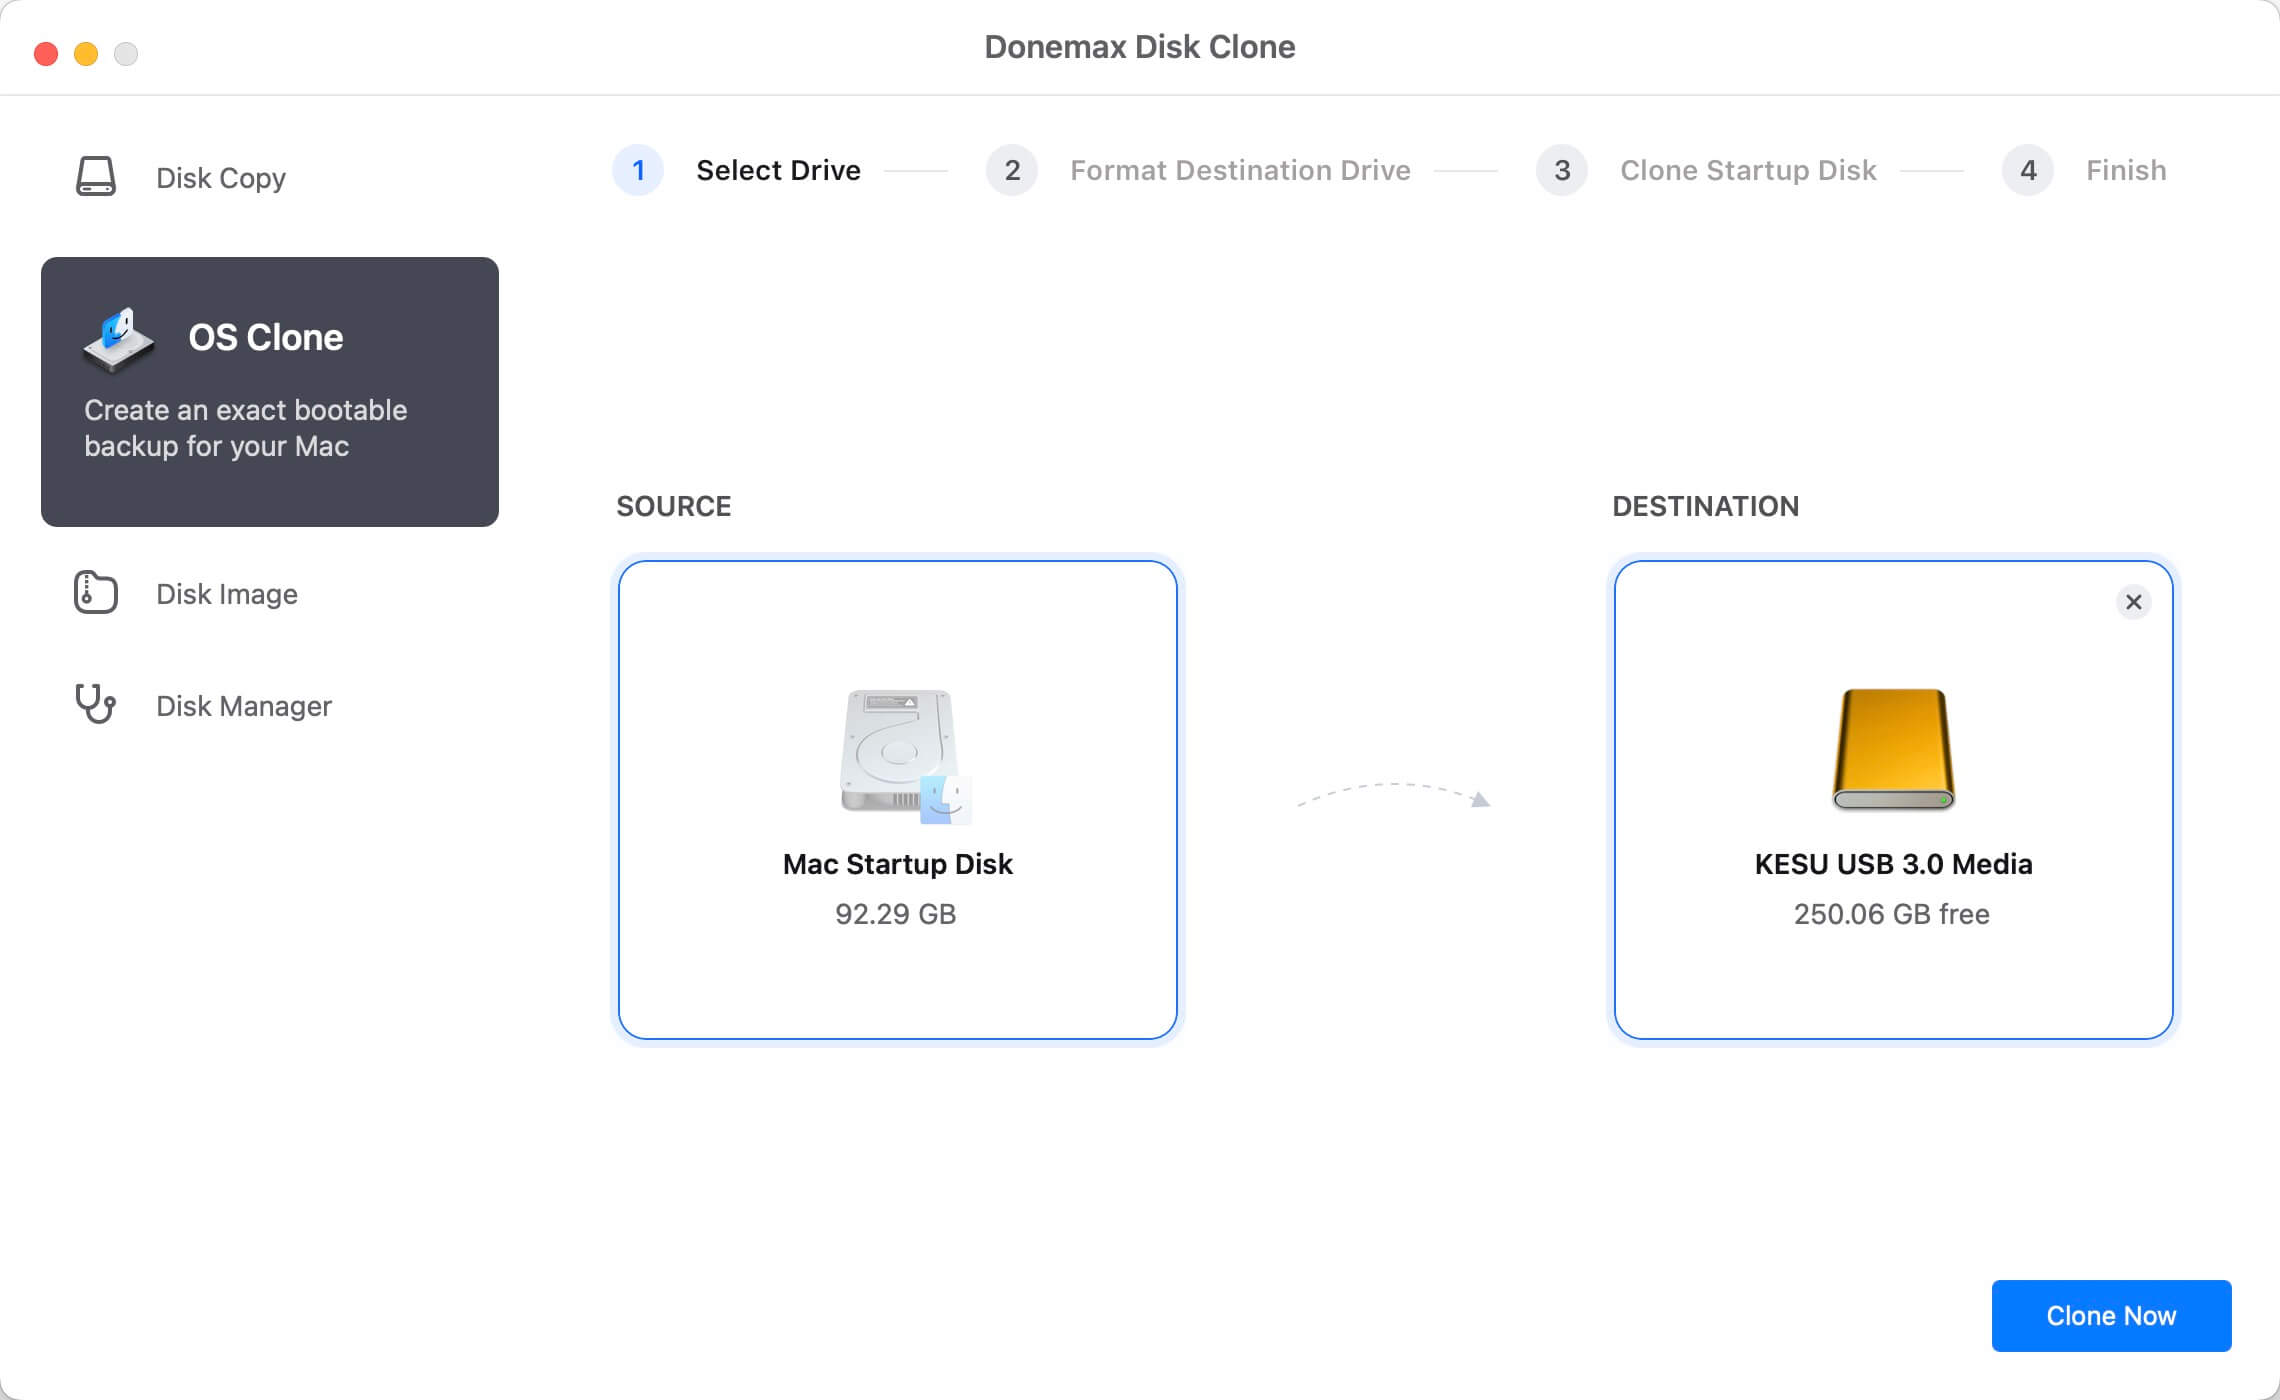
Mode 2: OS Clone - connect an external hard drive to the Mac, select it as the destination drive. Click on Clone Now button to clone everything including macOS Sequoia, settings, apps, user data from the Mac's internal disk to the external hard drive, creating a full bootable clone backup.
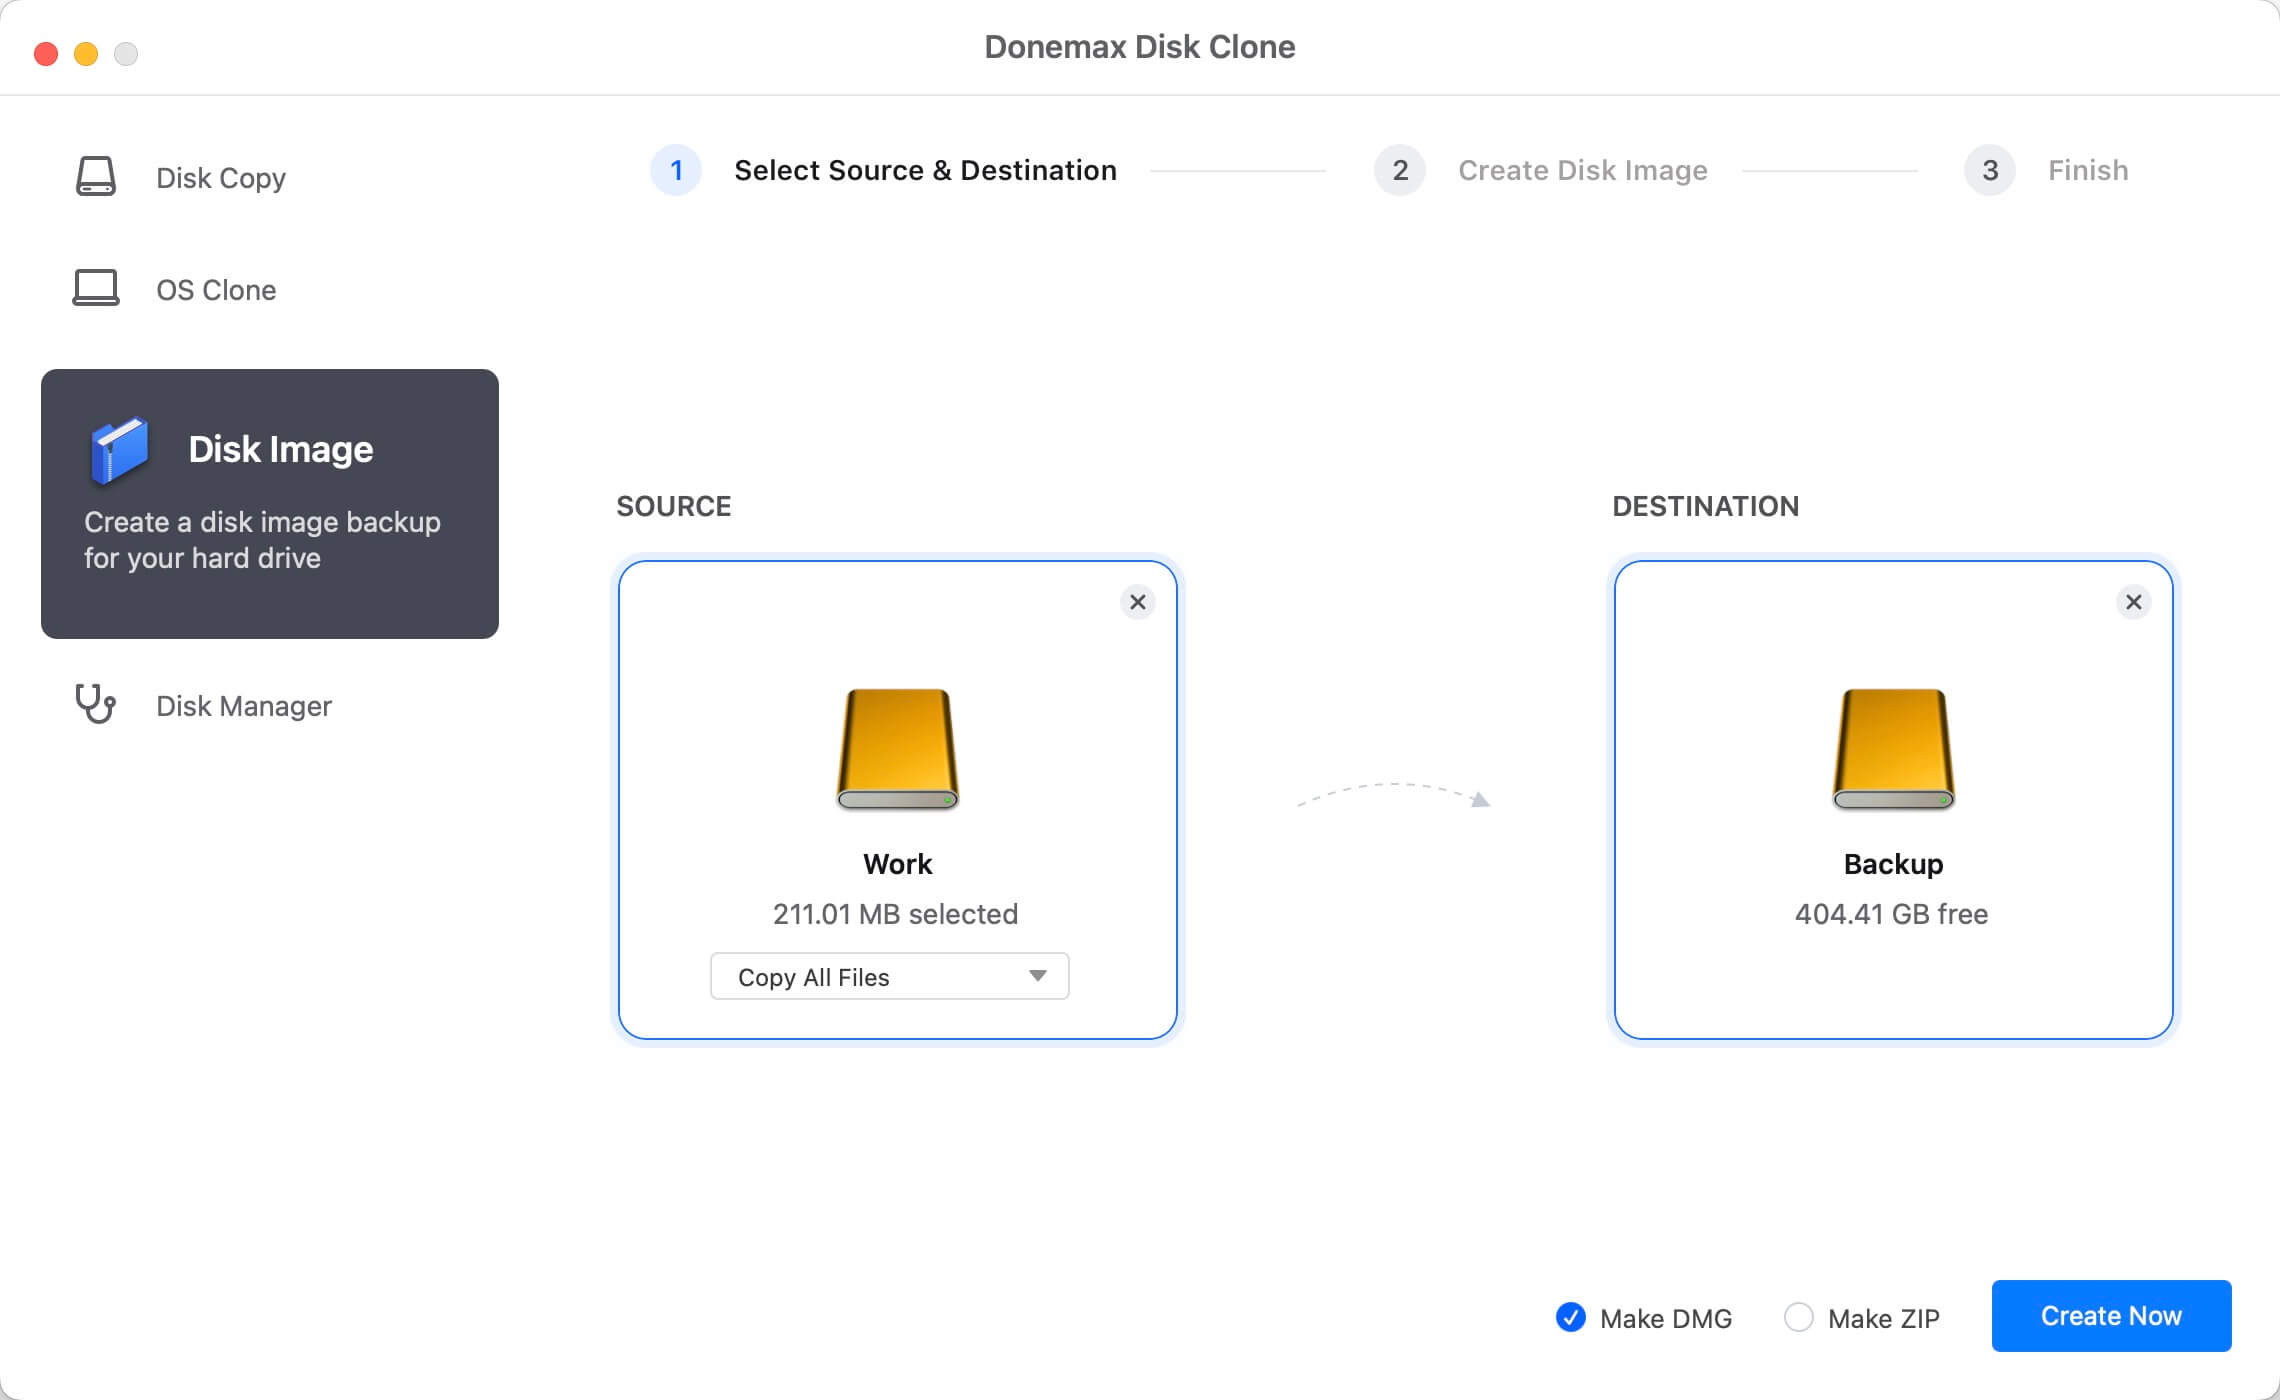
Mode 3: Disk Image - create a compressed disk image (DMG or ZIP) for the source drive and save disk image backup to the destination drive.
Other disk copy software for macOS Sequoia:
1. Carbon Copy Cloner (CCC)
Features:
- Creates bootable clones of macOS
- Supports incremental backups
- Offers smart updates (copies only changed files)
2. SuperDuper!
Features:
- User-friendly interface
- Supports smart updates for fast backups
- Allows bootable backups
3. Clonezilla
Features:
- Free and open-source
- Works with multiple operating systems
- Can perform disk-to-disk or disk-to-image cloning
More Tips for Disk Copy on macOS Sequoia
1. Prepare for a Successful Disk Copy on macOS Sequoia
Before starting the cloning process, preparation is crucial to avoid errors, ensure compatibility, and maintain data integrity. Below are the essential steps to follow before performing a 1:1 disk copy on macOS Sequoia.
▪️ Check the Health of the Source and Target Disks
Before cloning, it is essential to check both the source disk (the one being copied) and the target disk (the one receiving the data). If the source disk has bad sectors or file system errors, the cloning process may fail or result in corrupted data on the target disk.
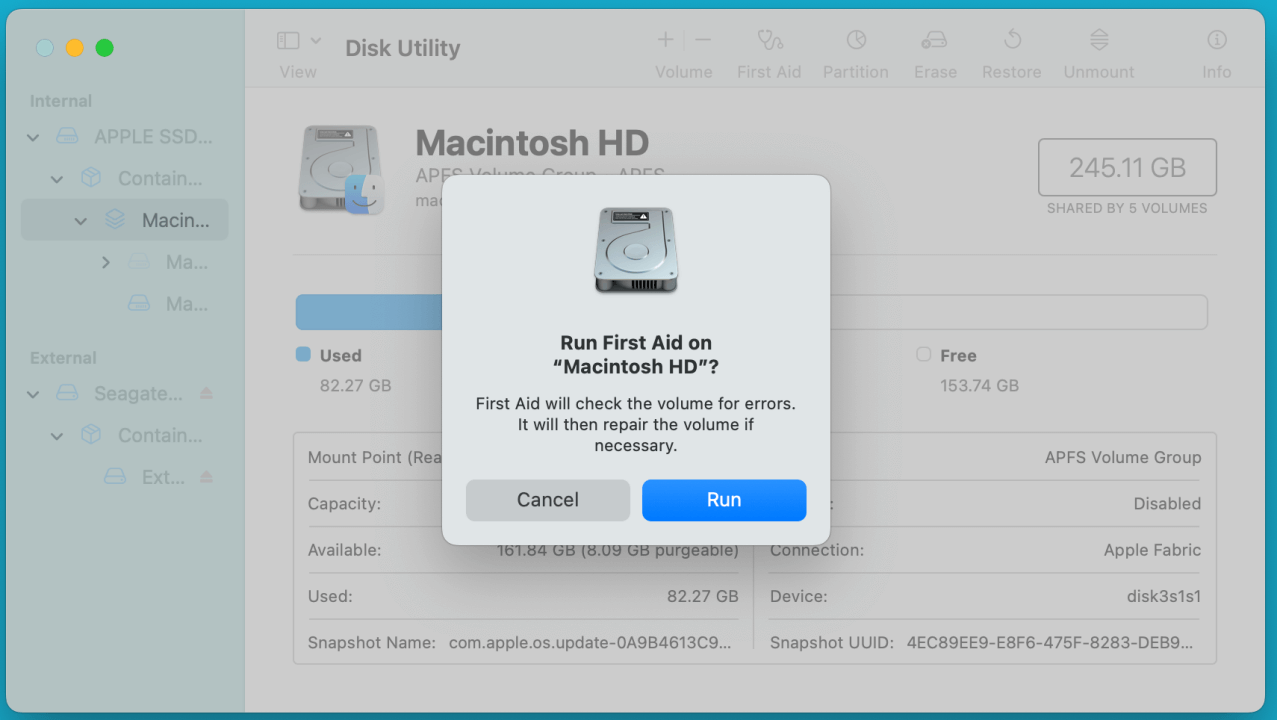
How to Check Disk Health Using Disk Utility:
- Open Disk Utility from Utilities via Applications.
- Select the source disk from the left sidebar.
- Click First Aid, then select Run to check for errors and repair them if necessary.
![perform a 1:1 disk copy on macOS Sequoia]()
- Repeat the process for the target disk to ensure it’s in good condition.
How to Check Disk Health Using Terminal:
For a more detailed analysis, you can use the command-line tool diskutil.
- Open Terminal from Utilities via Applications
- List all disks:
diskutil list
Identify your source disk (e.g., /dev/disk2) and target disk (e.g., /dev/disk3).
- Run the verification command:
diskutil verifyDisk /dev/disk2
If errors are found, repair them using:
diskutil repairDisk /dev/disk2
If the repair process fails, it may indicate hardware failure, and you should consider replacing the disk before cloning.
▪️ Format the Target Disk Properly
The target disk must be properly formatted before cloning to ensure compatibility. The correct file system type depends on your usage scenario:
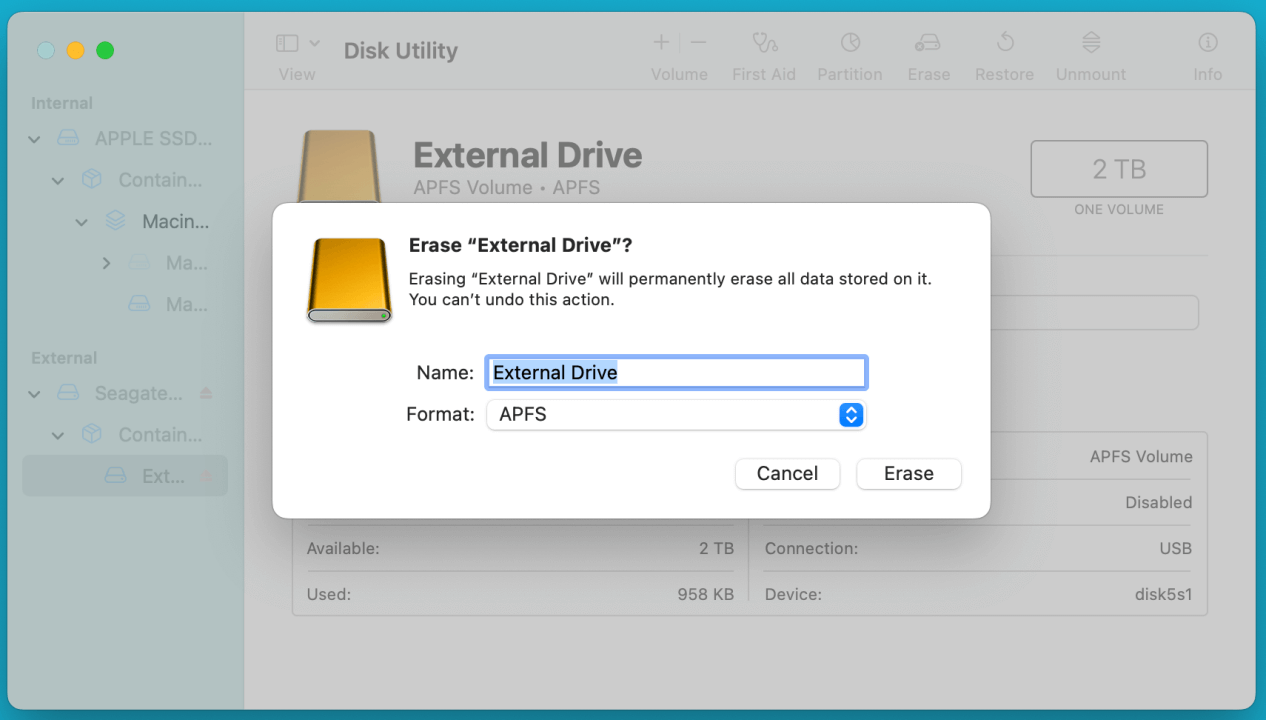
How to Format the Target Disk Using Disk Utility:
- Open Disk Utility.
- Select the target disk (external drive or secondary internal drive).
- Click Erase at the top menu.
- Choose the file system format (APFS for macOS Sequoia).
- Name the drive (e.g., BackupDrive).
- Click Erase to format the disk.
![perform a 1:1 disk copy on macOS Sequoia]()
How to Format the Target Disk Using Terminal:
If you prefer a command-line approach, use diskutil to format the disk.
- Identify the target disk using:
diskutil list
- Erase and format the disk with APFS:
diskutil eraseDisk APFS "BackupDrive" /dev/disk3
If you need Mac OS Extended (Journaled) instead:
diskutil eraseDisk HFS+J "BackupDrive" /dev/disk3
⚠️ Warning: Formatting will erase all data on the target disk. Ensure you have backed up any important files before proceeding.
▪️ Ensure Sufficient Space on the Target Disk
The target disk must have equal or greater capacity than the source disk. If the target disk is smaller, the cloning process will fail or result in incomplete data transfer.
How to Check Disk Space
- Open Finder > Right-click the source disk > Select Get Info.
- Check Used Space and compare it to the target disk’s available space.
- If needed, clear unnecessary files from the source disk before cloning.
If the target disk is smaller but still large enough to fit the actual data (excluding free space), you may need to use third-party cloning tools like Donemax Disk Clone for Mac, which allow selective file copying.
▪️ Back Up Important Data Before Cloning
Although disk cloning is generally safe, errors can occur due to unexpected interruptions, power failures, or disk corruption. It is recommended to create a backup of critical files before proceeding.
Ways to Back Up Data on macOS:
✔ Use Time Machine:
- Connect an external hard drive.
- Open System Settings > General > Time Machine.
- Select Backup Disk and start the backup process.
✔ Manually Copy Files:
Drag and drop essential files to an external drive or cloud storage (Google Drive, iCloud, or Dropbox).
✔ Use Third-Party Backup Tools:
- Donemax Disk Clone for Mac: Creates bootable backups.
- SuperDuper!: Allows incremental backups.
By ensuring your important data is backed up, you can prevent data loss in case of unexpected issues during disk cloning.
▪️ Disable FileVault (If Enabled)
FileVault is Apple's disk encryption tool that protects user data. However, it can interfere with the cloning process, especially when using Disk Utility or Terminal methods.
How to Disable FileVault Before Cloning:
- Open System Settings > Privacy & Security > FileVault.
- Click Turn Off FileVault.
- Wait for the decryption process to complete (this may take some time).
Once cloning is complete, you can re-enable FileVault to protect your data.
▪️ Ensure Correct Disk Permissions and Accessibility
Incorrect disk permissions can cause permission errors when copying system files. Resetting permissions ensures a smooth cloning process.
How to Repair Disk Permissions:
- Open Terminal.
- Run the following command to reset permissions:
sudo diskutil resetUserPermissions / `id -u`
- Restart your Mac to apply the changes.
2.Verify the Copied Disk
After copying, ensure the disk is properly cloned:
- Check File Structure – Open Finder and compare files.
- Boot from the Cloned Disk – Restart your Mac and hold Option (⌥) to select the cloned disk (for Intel-based Mac) or boot into macOS Recovery, select the external hard drive as the boot drive (for Apple silicon Mac).
- Run Disk Utility’s Verify Feature – Open Disk Utility and verify the target disk.
Conclusion
Creating a 1:1 disk copy on macOS Sequoia is an essential skill for backups, system migration, and recovery. Whether you use Disk Utility or third-party tools, each method has its pros and cons.
For a simple GUI approach, Disk Utility works well. If you want to create a bootable clone for macOS Sequoia, choose Donemax Disk Clone for Mac. For advanced users looking for incremental backups and smart updates, Carbon Copy Cloner or SuperDuper! are excellent choices.
By following this guide, you can confidently clone your disk and ensure your data is always secure.
Donemax Disk Clone for Mac
An award-winning disk cloning program to help Mac users clone HDD/SSD/external device. It also can create full bootable clone backup for Macs.
Related Articles
- Jul 14, 2023How to Make A Bootable Clone Backup Before Upgrading to macOS Sonoma?
- Jun 12, 2023How to Clone a USB Drive to Mac?
- Nov 18, 2024How to Create a Bootable Clone for a Mac with Apple Silicon M4 Chip?
- Oct 07, 2023Top 10 Disk Cloning Software for Mac - macOS Sequoia Supported
- Jun 16, 2023Create A Bootable USB Installer for macOS High Sierra
- Jan 01, 2024How to Create Disk Image Backup on macOS Sonoma?

Contributing Writer
Maria
Maria is one of the senior writers & editors of Donemax who lives and works in Sydney, Australia. She loves PC, Mac and Internet Technology. She has 6 years of writing articles about data recovery on PC/Mac, disk cloning solution, data eraser and computer OS optimization, etc. She is also interested in testing various software and digital products.

Editor in chief
Gerhard Chou
In order to effectively solve the problems for our customers, every article and troubleshooting solution published on our website has been strictly tested and practiced. Our editors love researching and using computers and testing software, and are willing to help computer users with their problems