Before we start: Donemax Data Eraser for Mac is a powerful data erasure program. It can securely and permanently shred files, erase data, wipe deleted/lost data on OS X El Capitan, ensure the data is lost for good, cannot be recovered by any method.
PAGE CONTENT:
When it comes to selling your Mac, one of the most critical steps you must take is ensuring that all your personal data is securely wiped from the device. Not only does this protect your privacy, but it also prepares the computer for its new owner, ensuring they have a clean slate. If your Mac is running OS X 10.11 El Capitan, this guide will walk you through the entire process of wiping all data before selling your device.
Importance of Securely Wiping Data
Before starting to wipe data, let's first understand why it's vital to wipe your data securely.
- Privacy Protection: Your Mac may contain sensitive personal information such as emails, photos, documents, and passwords. If not properly erased, this data could potentially be accessed by the new owner, leading to privacy breaches.
- Performance for the New Owner: A clean installation of macOS provides a fresh start for the new owner, ensuring they can enjoy optimal performance without the baggage of the previous user's files and settings.
- Legal Implications: In some instances, retaining personal data on a sold device can lead to legal complications, particularly if sensitive information is misused.
Preparing for the Data Wipe
Before you begin the data-wiping process, it's crucial to take some preparatory steps to ensure everything goes smoothly.
1. Backup Important Data
The first step before wiping your Mac is to back up any data you want to keep.
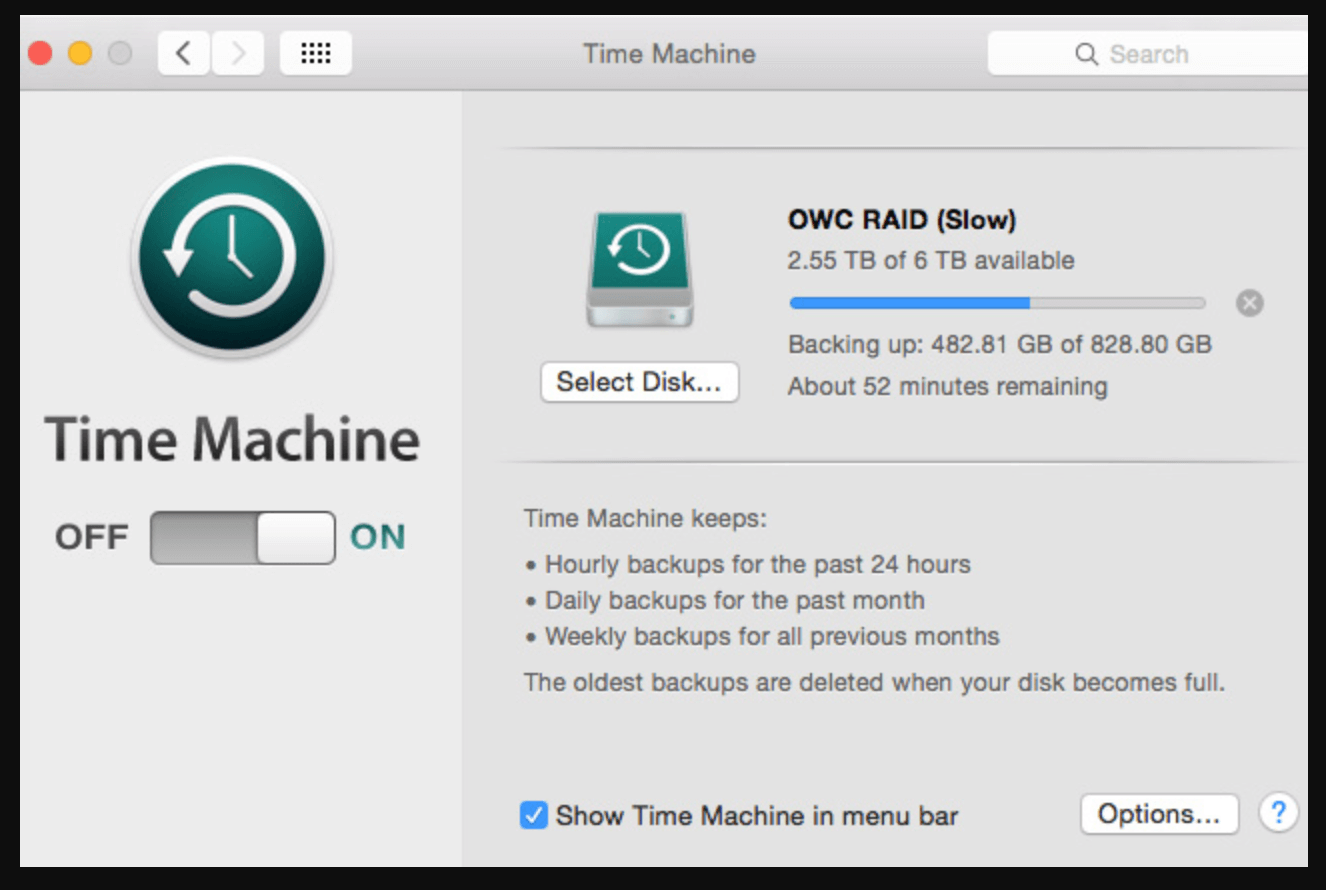
● Using Time Machine: Time Machine is a built-in backup feature on macOS that allows you to back up your files to an external hard drive. Here's how to set it up:
- Attach your Mac to an external hard disk.
- Select System Preferences by clicking on the Apple menu.
- Click Select Backup Disk after selecting Time Machine.
- Choose your external hard drive and enable Time Machine.
Time Machine will automatically back up your files hourly, daily, and weekly, ensuring your data is secure.
● Alternative Backup Methods: If you prefer other methods, consider manually copying important files to an external hard drive or using cloud storage solutions such as Google Drive or Dropbox.
2. Sign Out of Accounts
To ensure your personal information is no longer linked to the device, sign out of all your accounts.
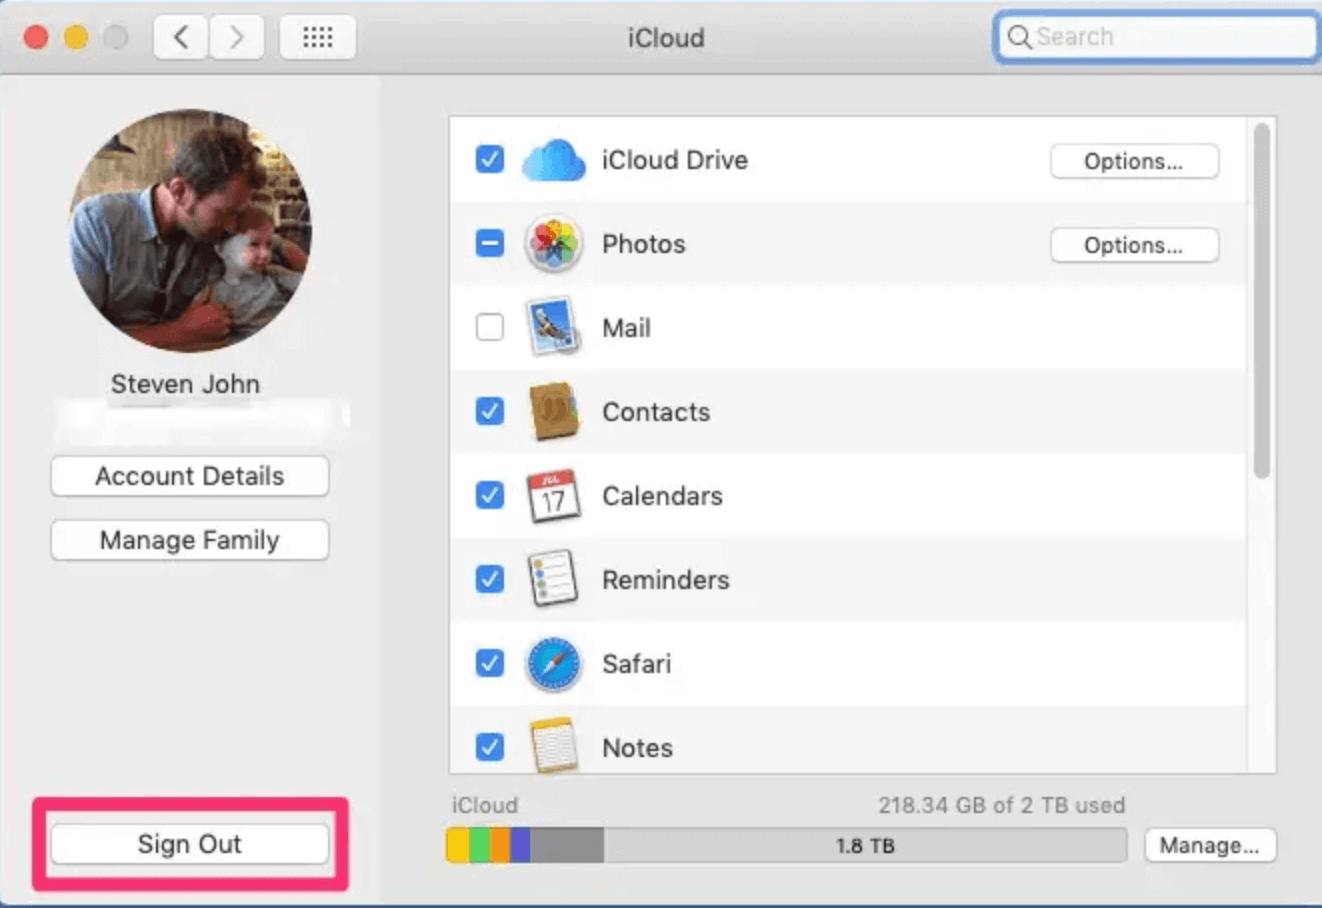
● iCloud:
- Open System Preferences.
- Click on iCloud and select Sign Out. You may be prompted to keep a copy of your data on this Mac, but since you're selling it, choose to remove it.
![Wipe data on OS X El Capitan]()
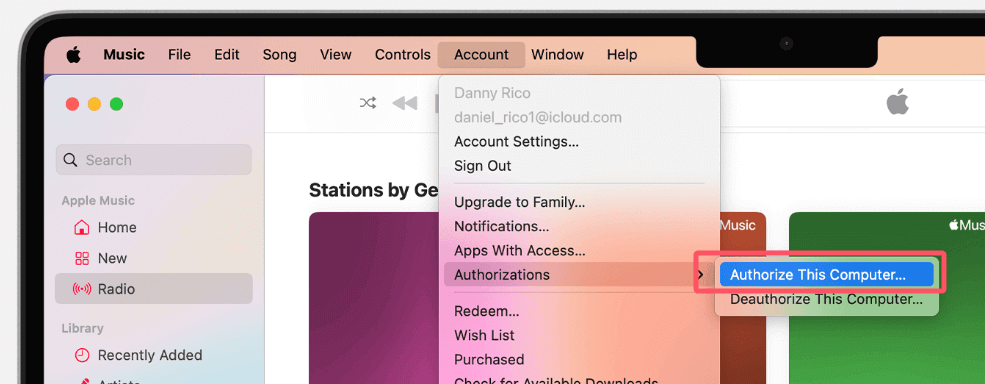
● iTunes:
- Launch iTunes.
- In the menu bar, click Account. Next, choose Authorizations. Finally, click Deauthorize This Computer.
![Wipe data on OS X El Capitan]()
● Other Accounts: Sign out of other relevant accounts, including Messages, FaceTime, and any other services you've used.
Steps to Erase Data on OS X 10.11 El Capitan
Once you have backed up your important data and signed out of your accounts, you are ready to wipe all data from your Mac which is running OS X 10.11 El Capitan. This process will erase everything on your hard drive and reinstall a fresh copy of macOS, making it ready for the new owner. Here's a comprehensive guide to help you through the process.
1. Restart the Mac in Recovery Mode
To begin the wiping process, you'll need to boot your Mac into Recovery Mode. This special mode allows you to access tools that are not available in the regular operating environment, such as Disk Utility.
- Shut Down Your Mac: Click the Apple menu in the upper left corner of the screen and choose Shut Down if your Mac is already running. Await the full shutdown of your Mac.
- Restart and Access Recovery Mode:
- Turn your Mac back on.
- As soon as you hear the startup chime or see the Apple logo, press and hold the Command + R keys simultaneously.
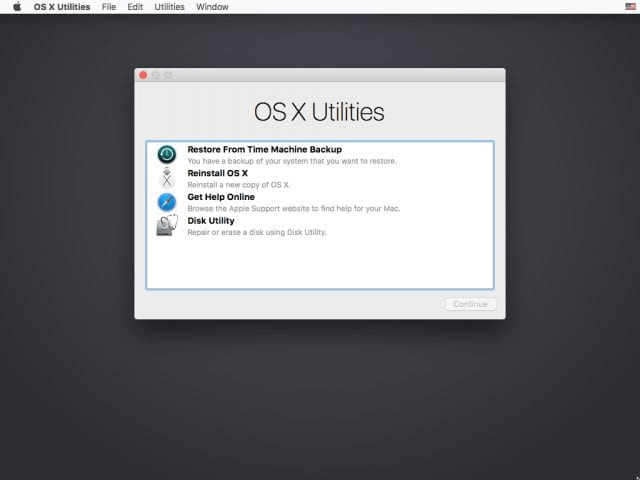
- Keep holding these keys until you see the macOS Utilities window appear. This indicates that you have successfully entered Recovery Mode.
![Wipe data on OS X El Capitan]()
- Important Note on Internet Recovery: If your Mac cannot access the Recovery partition (for example, if it's an older Mac), it may attempt to start Internet Recovery. In this case, you might see a spinning globe, indicating that your Mac is connecting to Apple's servers to download recovery tools. This process requires an active internet connection and may take longer than the standard Recovery Mode.
2. Use Disk Utility to Erase the Hard Drive
Once you are in Recovery Mode, the next step is to use Disk Utility to erase your hard drive completely. This step ensures that all your personal data is removed.
- Open Disk Utility:
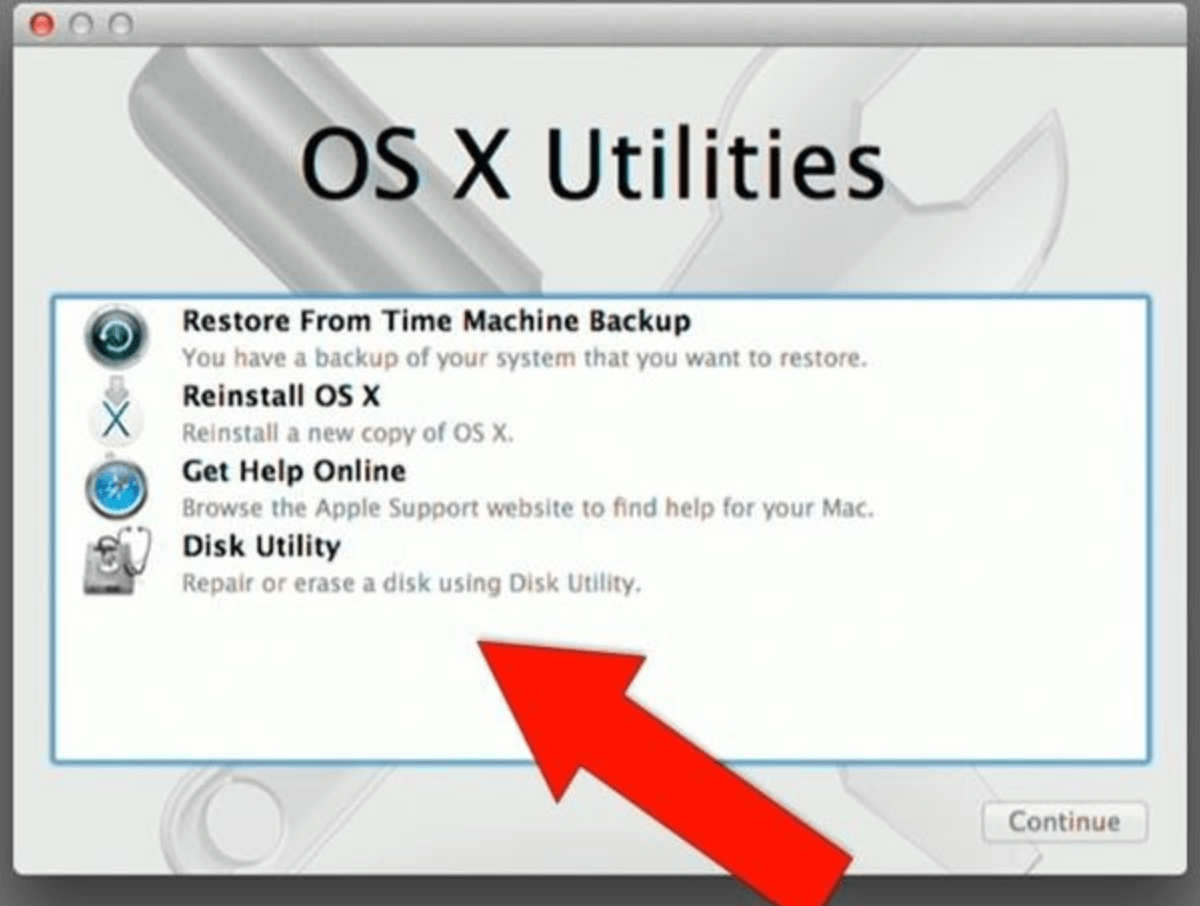
- To start the application, select Disk Utility from the macOS Utilities box and then click Continue.
![Wipe data on OS X El Capitan]()
- To start the application, select Disk Utility from the macOS Utilities box and then click Continue.
- Select the Hard Drive:
- In Disk Utility, you will see a list of available drives on the left sidebar. Look for your primary hard drive, which is usually named "Macintosh HD" unless you renamed it.
- If you don't see the drive, make sure to click on the View menu in the upper-left corner of the Disk Utility window and select Show All Devices. This will display all connected drives and their partitions.
- Initiate the Erasure Process:
- At the top of the Disk Utility window, choose your starting disk (often "Macintosh HD") from the list, then click the Erase button.
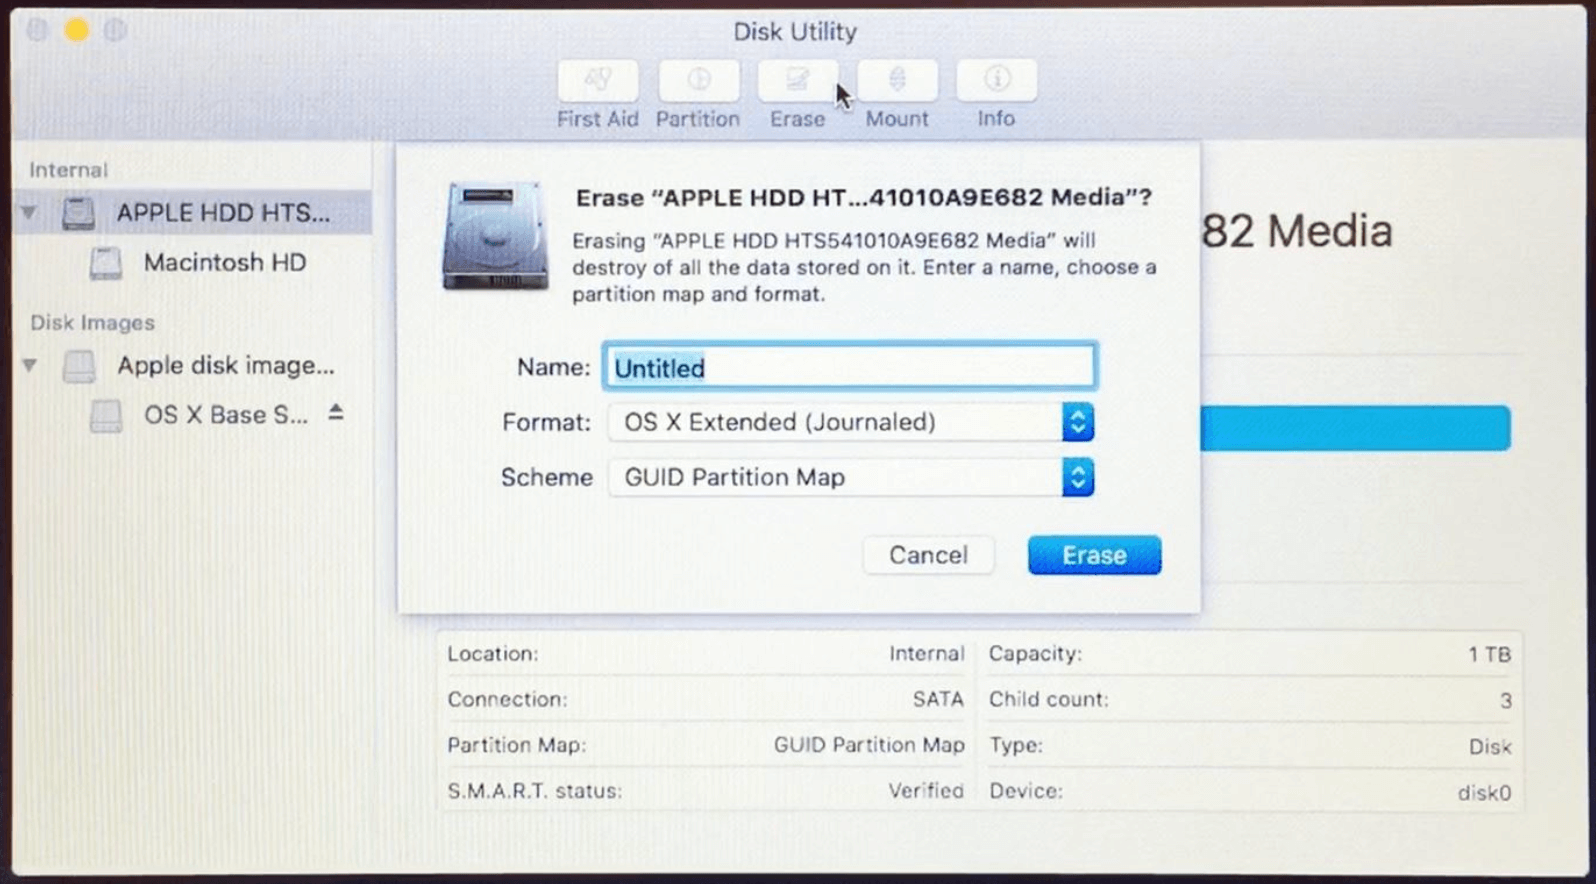
- Configure the Erase Settings: A dialog box will appear prompting you to configure the erase settings. Here’s what to do:
- Name: You can keep the default name "Macintosh HD" or choose a new name for the drive.
- Format: For most users, select Mac OS Extended (Journaled). This format is optimal for OS X 10.11 El Capitan.
- Scheme: If the option is available, choose GUID Partition Map. This is necessary for Macs and allows for compatibility with macOS.
- Erase the Drive:
- After selecting the name, format, and scheme, click the Erase button. Disk Utility will begin the process of erasing all data on the hard drive. This may take a few minutes, depending on the size of the drive.
- A confirmation message confirming that the drive has been successfully deleted will appear after the procedure is finished. To complete, click Done.
![Wipe data on OS X El Capitan]()
- Close Disk Utility:
- With your hard drive now wiped clean, you can close Disk Utility by selecting Disk Utility > Quit Disk Utility from the menu bar or simply clicking the red close button in the corner of the window.
3. Reinstall OS X
After wiping your hard drive, the next step is to reinstall a fresh copy of macOS. This ensures that the new owner has a clean system to work with.
- Return to OS X Utilities:
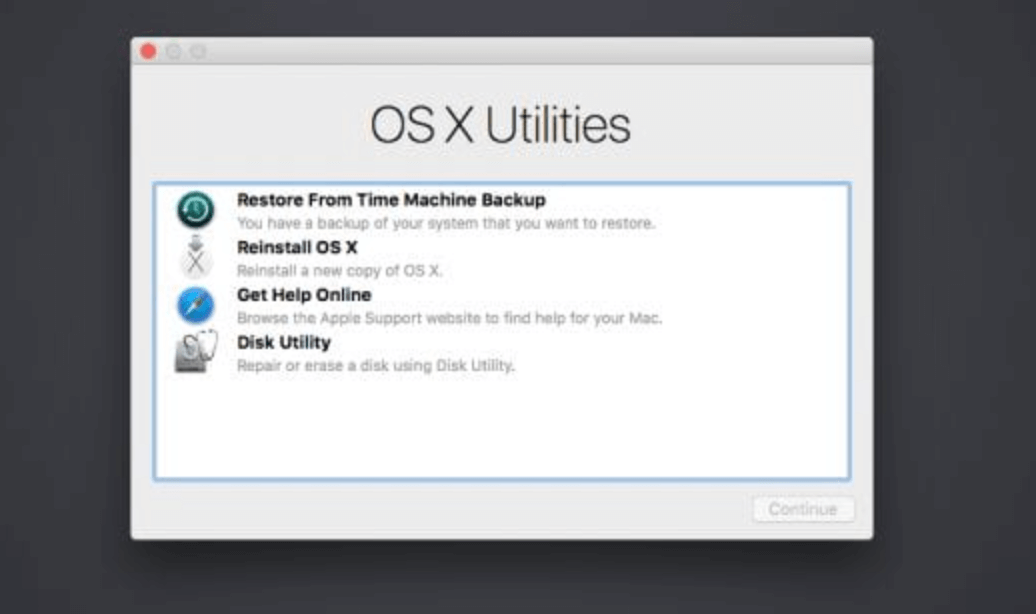
- You will automatically return to the OS X Utilities window after closing Disk Utility.
- Select Reinstall OS X:
- Choose Reinstall OS X from the list of options and click Continue.
![Wipe data on OS X El Capitan]()
- Choose Reinstall OS X from the list of options and click Continue.
- Agree to Terms and Conditions:
- Follow the prompts to agree to the software license agreement. You may need to click Agree to continue.
- Choose the Installation Drive:
- When prompted to select the installation disk, choose the hard drive you just erased (e.g., "Macintosh HD") and click Install.
- Installation Process:
- The macOS installation process will begin. Your Mac will download the necessary files from the internet, which can take some time depending on your internet connection speed.
- During the installation, your Mac may restart several times, and you will see a progress bar indicating the installation status.
- Completing the Installation:
- Once the installation is complete, your Mac will boot to the Setup Assistant. This is where you can configure settings such as language, Wi-Fi, and Apple ID.
- Important: At this stage, do not complete the setup process. Instead, you should shut down the Mac so the new owner can set it up with their own information.
💡 Note: The erased data is not lost for good and can be recovered by data recovery software. Check how to recover lost data after erasing startup disk of a Mac >>
4. Permanently Wipe Data on OS X El Capitan
To prevent the deleted or erased data on OS X El Capitan from being recovered by data recovery software, you can use data erasure software to permanently wipe the deleted/erased/lost data.
Step 1. Download and install the reliable Mac data erasure software - Donemax Data Eraser for Mac on the old Mac.
Step 2. Open Donemax Data Eraser for Mac, then choose Erase Free Space mode. Select the startup disk, click on Erase Now button. It can help you wipe free disk space of the Mac and permanently erase all deleted/erased/lost data.

💡 Note: Once the data is erased by Donemax Data Eraser for Mac, the data is lost for good, can't be recovered by any method.
Final Steps After Wiping
After wiping your Mac and preparing it for the new owner, there are a few final touches you should consider.
1. Clean the Mac Physically
A clean machine makes a better impression on potential buyers. Here are some cleaning tips:
- Screen: Use a microfiber cloth dampened with water or a screen-safe cleaner to wipe the display. Avoid using paper towels, as they can scratch the screen.
- Keyboard and Trackpad: Use a soft brush or compressed air to remove debris. Wipe the surface with a slightly damp cloth.
- Body: Clean the exterior with a cloth dampened with water. Ensure it’s dry before packaging.
2. Gather Accessories and Documentation
Having the original packaging and accessories can enhance the value of your Mac. Gather the following:
- Original box and manuals
- Power adapter and cables
- Any additional peripherals (mouse, keyboard, etc.)
3. List the Mac for Sale
With your Mac wiped and cleaned, you're ready to sell. Consider where to list your Mac for sale. Here are a few options:
- Online Marketplaces: Websites like eBay, Craigslist, or Facebook Marketplace can help you reach potential buyers in your area.
- Local Electronics Stores: Some stores offer trade-in programs for used electronics.
- Dedicated Resale Platforms: Consider using platforms like Gazelle or Swappa that specialize in buying and selling used electronics.
Conclusion
Wiping all data from your Mac running OS X 10.11 El Capitan is a straightforward process that ensures your personal information is protected while preparing the device for its new owner. By following the steps outlined in this guide - backing up your data, signing out of accounts, erasing the hard drive, and reinstalling macOS - you can confidently sell your Mac without the worry of leaving behind any sensitive information.
In today's digital age, where data privacy is paramount, taking these precautions before selling your device is not just a good practice; it's essential. With a clean slate and proper preparations, your Mac can find a new home, ready for another user to enjoy.


Donemax Data Eraser for Mac
100% safe and powerful Mac data erasure program. It offers certified data erasure standards including U.S. Army AR380-19, DoD 5220.22-M ECE to help in securely and permanently erase data from Mac HDD/SSD and external storage device, making data recovery be impossible.
Related Articles
- Oct 17, 2025Permanently Erase Data from Digital Camera on Mac
- Dec 03, 2024How to Factory Reset a Mac Without Password?
- May 10, 2024How to Erase SD Card on Mac?
- Oct 13, 2025Wipe MacBook Data Permanently before You Sell it
- Oct 22, 2025Permanently Erase Deleted Files on Mac
- Jun 17, 2025How to Factory Reset macOS Mojave?

Christina
Christina is the senior editor of Donemax software who has worked in the company for 4+ years. She mainly writes the guides and solutions about data erasure, data transferring, data recovery and disk cloning to help users get the most out of their Windows and Mac. She likes to travel, enjoy country music and play games in her spare time.

Gerhard Chou
In order to effectively solve the problems for our customers, every article and troubleshooting solution published on our website has been strictly tested and practiced. Our editors love researching and using computers and testing software, and are willing to help computer users with their problems
