Before we start: Donemax NTFS for Mac can help you force format an ExFAT or FAT32 drive to NTFS on Mac. It also can help grant full read-write access to NTFS drives on Mac so that Mac users can write data to NTFS drives without any limitation.
PAGE CONTENT:
When working across platforms like macOS and Windows, one of the most common tasks you might need to perform is formatting an external drive. While macOS supports several file systems such as HFS+, APFS, ExFAT, and FAT32, sometimes you may encounter situations where you need to format your drive to NTFS (New Technology File System). NTFS is the default file system for Windows, offering benefits like larger file sizes and better security features. However, macOS doesn't natively support writing to NTFS drives. If you're looking to format an ExFAT or FAT32 drive to NTFS on your Mac, you'll need a few tools and methods to get the job done.
In this guide, we'll walk you through the different ways to format your ExFAT or FAT32 drive to NTFS on a Mac and provide insights into the best tools and practices for each method.
Understanding File Systems: ExFAT, FAT32 and NTFS
Before diving into the process of formatting, it's essential to understand the differences between the file systems you'll encounter: ExFAT, FAT32, and NTFS. These file systems serve different purposes, and each has its own set of strengths and weaknesses.
ExFAT: Extended File Allocation Table
ExFAT is designed to be a modern and more flexible alternative to FAT32. It can handle larger file sizes (over 4GB), which makes it an excellent choice for external drives used on both macOS and Windows systems.
FAT32: File Allocation Table
FAT32 is an older file system that is still widely used, especially on flash drives, external hard drives, and memory cards. The main limitation of FAT32 is its file size restriction: it cannot handle individual files larger than 4GB. This can be a significant drawback when dealing with high-definition videos or large files.
NTFS: New Technology File System
NTFS is the default file system for Windows, and it offers several advantages over ExFAT and FAT32, including:
- Support for files larger than 4GB.
- Advanced features like file compression, encryption, and security permissions.
- Improved reliability with journaling. However, macOS can only read NTFS drives natively. To write to NTFS drives, you’ll need third-party software.
Why Convert ExFAT/FAT32 to NTFS on Mac?
There are several reasons why you might want to format an ExFAT or FAT32 drive to NTFS on your Mac:
- File Size Limitations: As mentioned earlier, FAT32 has a file size limitation of 4GB. If you need to store large files, such as high-definition videos or large software backups, NTFS is a better choice.
- Compatibility with Windows: If you regularly move files between Mac and Windows, formatting your drive to NTFS makes sense. While macOS can read NTFS drives, Windows cannot natively read ExFAT or FAT32 drives with certain restrictions, such as file size limits or inefficient management.
- Advanced Features: NTFS supports advanced features that ExFAT and FAT32 lack, including file permissions, disk quotas, and more robust file recovery capabilities.
Prerequisites Before Formatting Your ExFAT or FAT32 drive
Formatting your external drive will erase all data on the device. Therefore, the first and most important step is to back up all the files on the drive.
Tools Required:
- Disk Utility: macOS comes with a built-in tool called Disk Utility that can handle basic formatting tasks. However, it has limitations, especially when it comes to formatting external drives to NTFS.
- Third-Party Software: Since macOS cannot write to NTFS natively, you'll need third-party software like Donemax NTFS for Mac if you wish to format your drive to NTFS and also write to it on a Mac.
Drive Compatibility:
- Ensure the drive is connected to your Mac before beginning the process. If it’s an external USB or Thunderbolt drive, simply plug it into one of your Mac’s ports.
Methods to Format ExFAT/FAT32 to NTFS on Mac
There are several ways to format an ExFAT or FAT32 drive to NTFS on a Mac. Let's explore the most common methods:
Method 1: Using Disk Utility (for Formatting Only)
Disk Utility is macOS's built-in tool that helps manage and format drives. However, it's important to note that Disk Utility does not support formatting a drive to NTFS on macOS natively. It only supports ExFAT, FAT32, and macOS-specific file systems.
Steps:
- Start by opening Disk Utility by selecting it from Utilities via Applications.
- Choose the Drive: From the list of drives on the left sidebar of Disk Utility, choose the ExFAT or FAT32 drive.
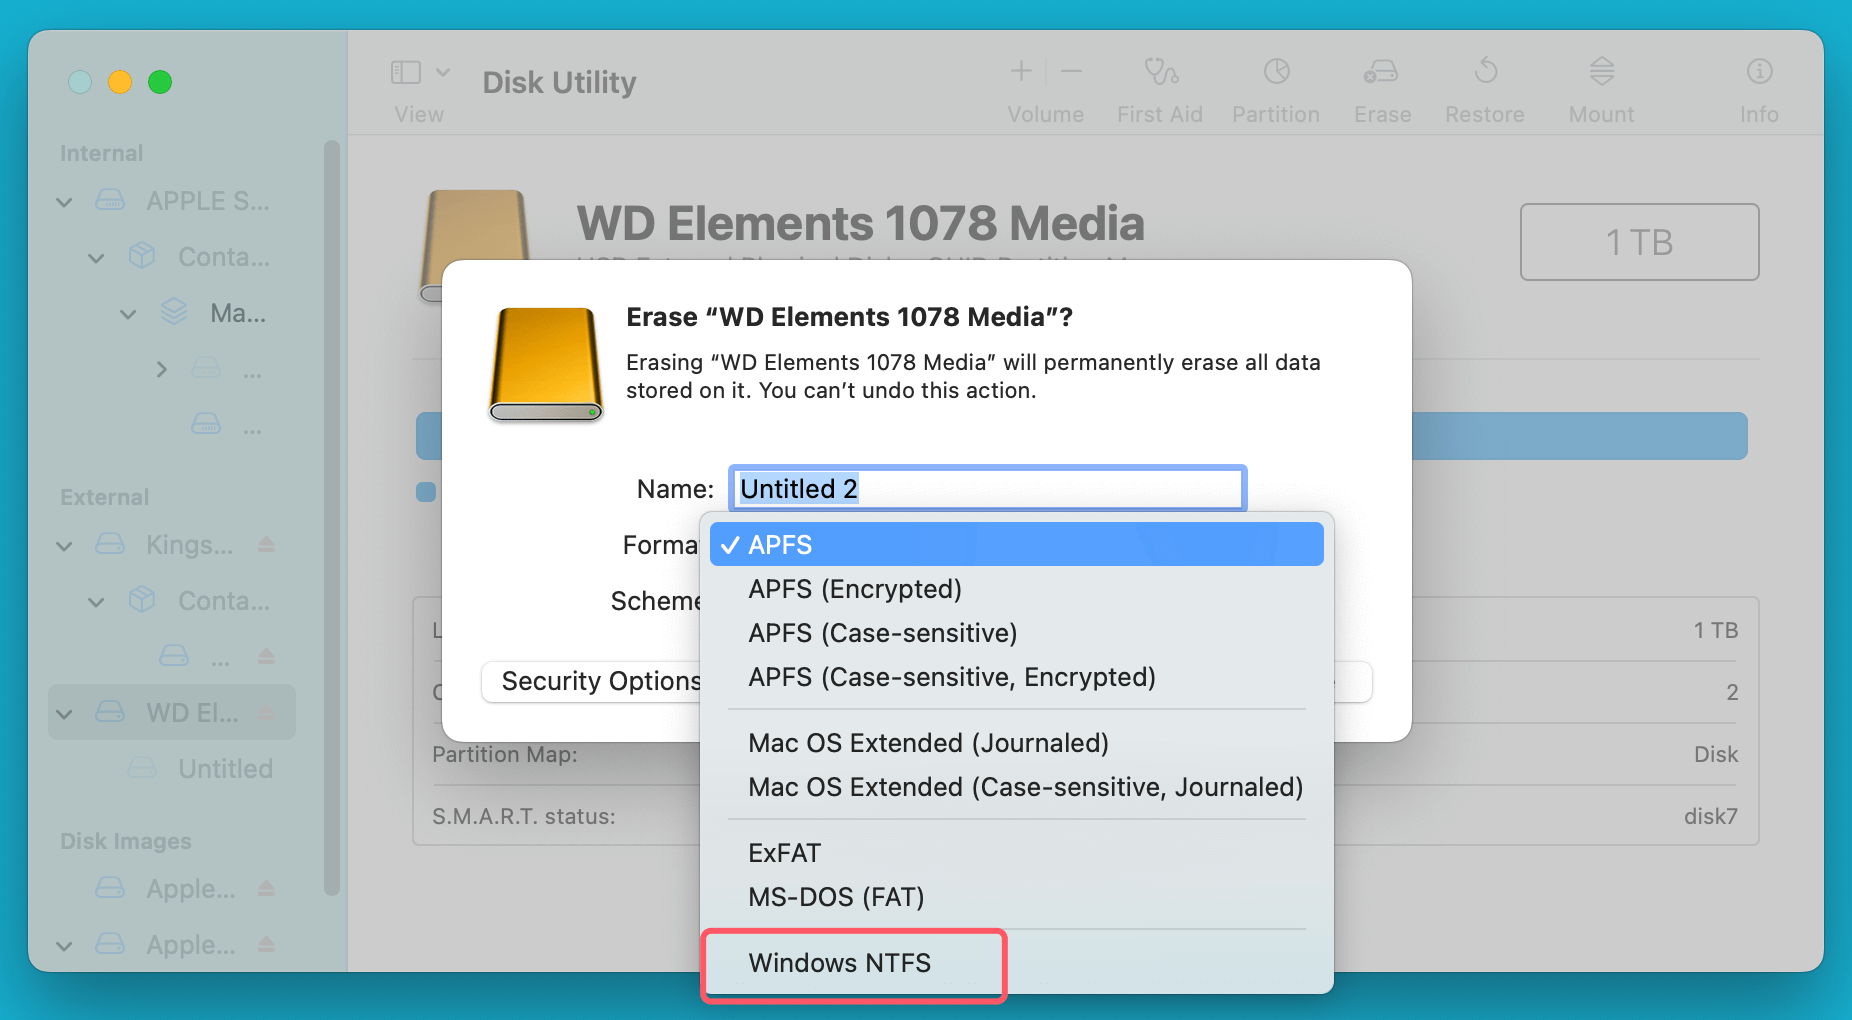
- Delete the Drive: Press the "Erase" button located at the window's top.
- Select the File System: You can choose between FAT32 and ExFAT from the dropdown menu. If NTFS is available, you can select NTFS as the file system.
![format your ExFAT or FAT32 drive to NTFS on a Mac]()
- Format the Drive: Click "Erase" to start the process.
Limitations:
- Disk Utility cannot 100% format drives to NTFS; in most cases, it cannot format the ExFAT or FAT32 to NTFS on Mac.
- If you want full NTFS write functionality, you will need third-party software.
Method 2: Using Third-Party NTS for Mac Software
To format your external drive to NTFS on macOS, you will need third-party software. Donemax NTFS for Mac is one of the most popular solutions for writing to NTFS drives on macOS. It offers full support for NTFS, making it easy to both format a drive and work with NTFS files.
Step 1. Download and install Donemax NTFS for Mac on your Mac, then open it from Launchpad.
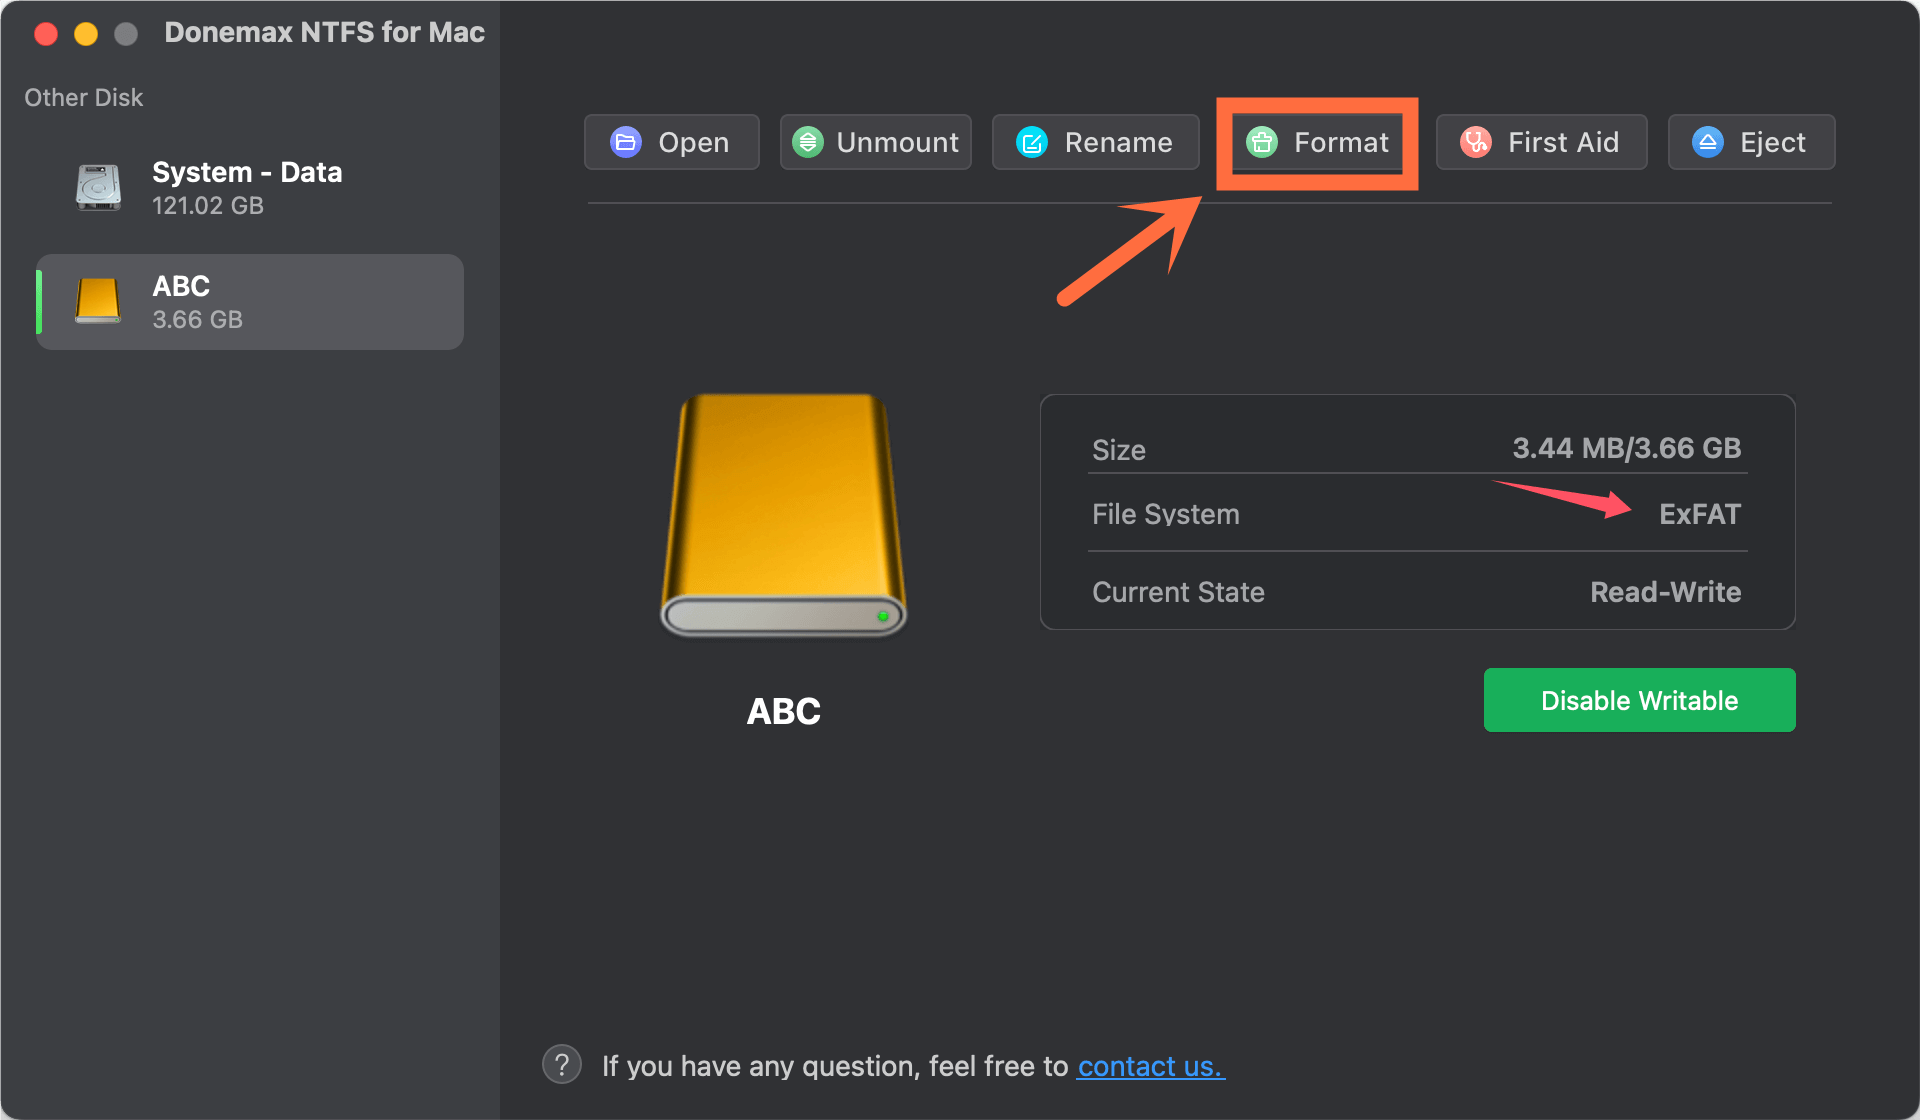
Step 2. Open Donemax NTFS for Mac, select the ExFAT or FAT32 drive, click Format button.
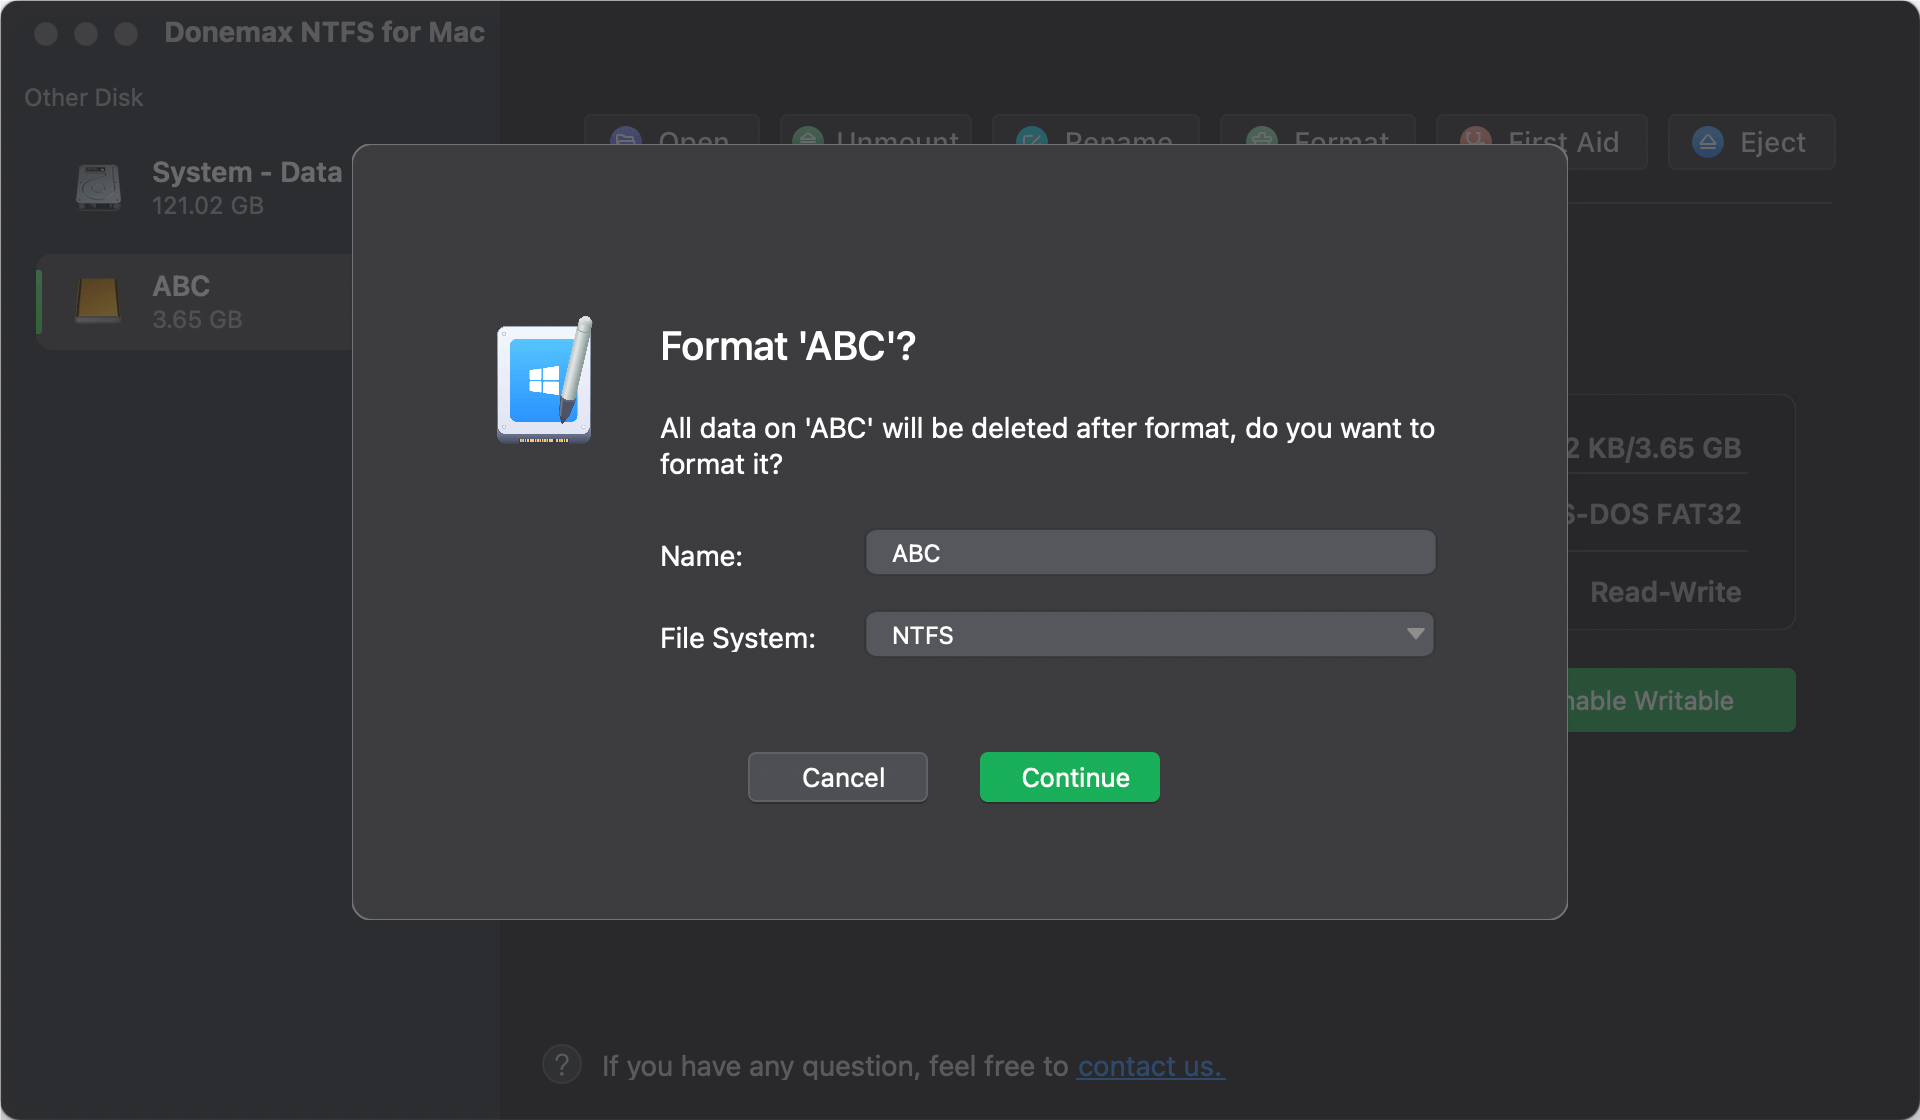
Step 3. Select NTFS as the Format, then click on Continue button to format the ExFAT or FAT32 drive to NTFS.
Donemax NTFS for Mac can 100% format or force format the ExFAT or FAT32 drive to NTFS on your Mac. If you want to write data to the NTFS drives, just select the NTFS drive, click on Enable Writable button.

Method 3: Using Terminal with NTFS-3G (Advanced)
For more advanced users, it's possible to use Terminal and the NTFS-3G tool to format an ExFAT or FAT32 drive to NTFS. This method involves using Homebrew, a package manager for macOS, to install the necessary software. While this option requires more technical knowledge, it's a powerful, free solution for advanced users.
Steps:
- Install Homebrew: Open Terminal and install Homebrew if you don't already have it by running the following command:
/bin/bash -c "$(curl -fsSL https://raw.githubusercontent.com/Homebrew/install/HEAD/install.sh)"
- Install NTFS-3G: Once Homebrew is installed, run the following command to install NTFS-3G:
brew install ntfs-3g
- Format the Drive: Use Terminal commands to format the drive to NTFS. For example:
sudo diskutil eraseDisk NTFS "Your Drive Name" /dev/disk2
- Complete the Process: After formatting, your drive will be ready to use as NTFS on your Mac.
Method 4: Using Disk Management in Windows
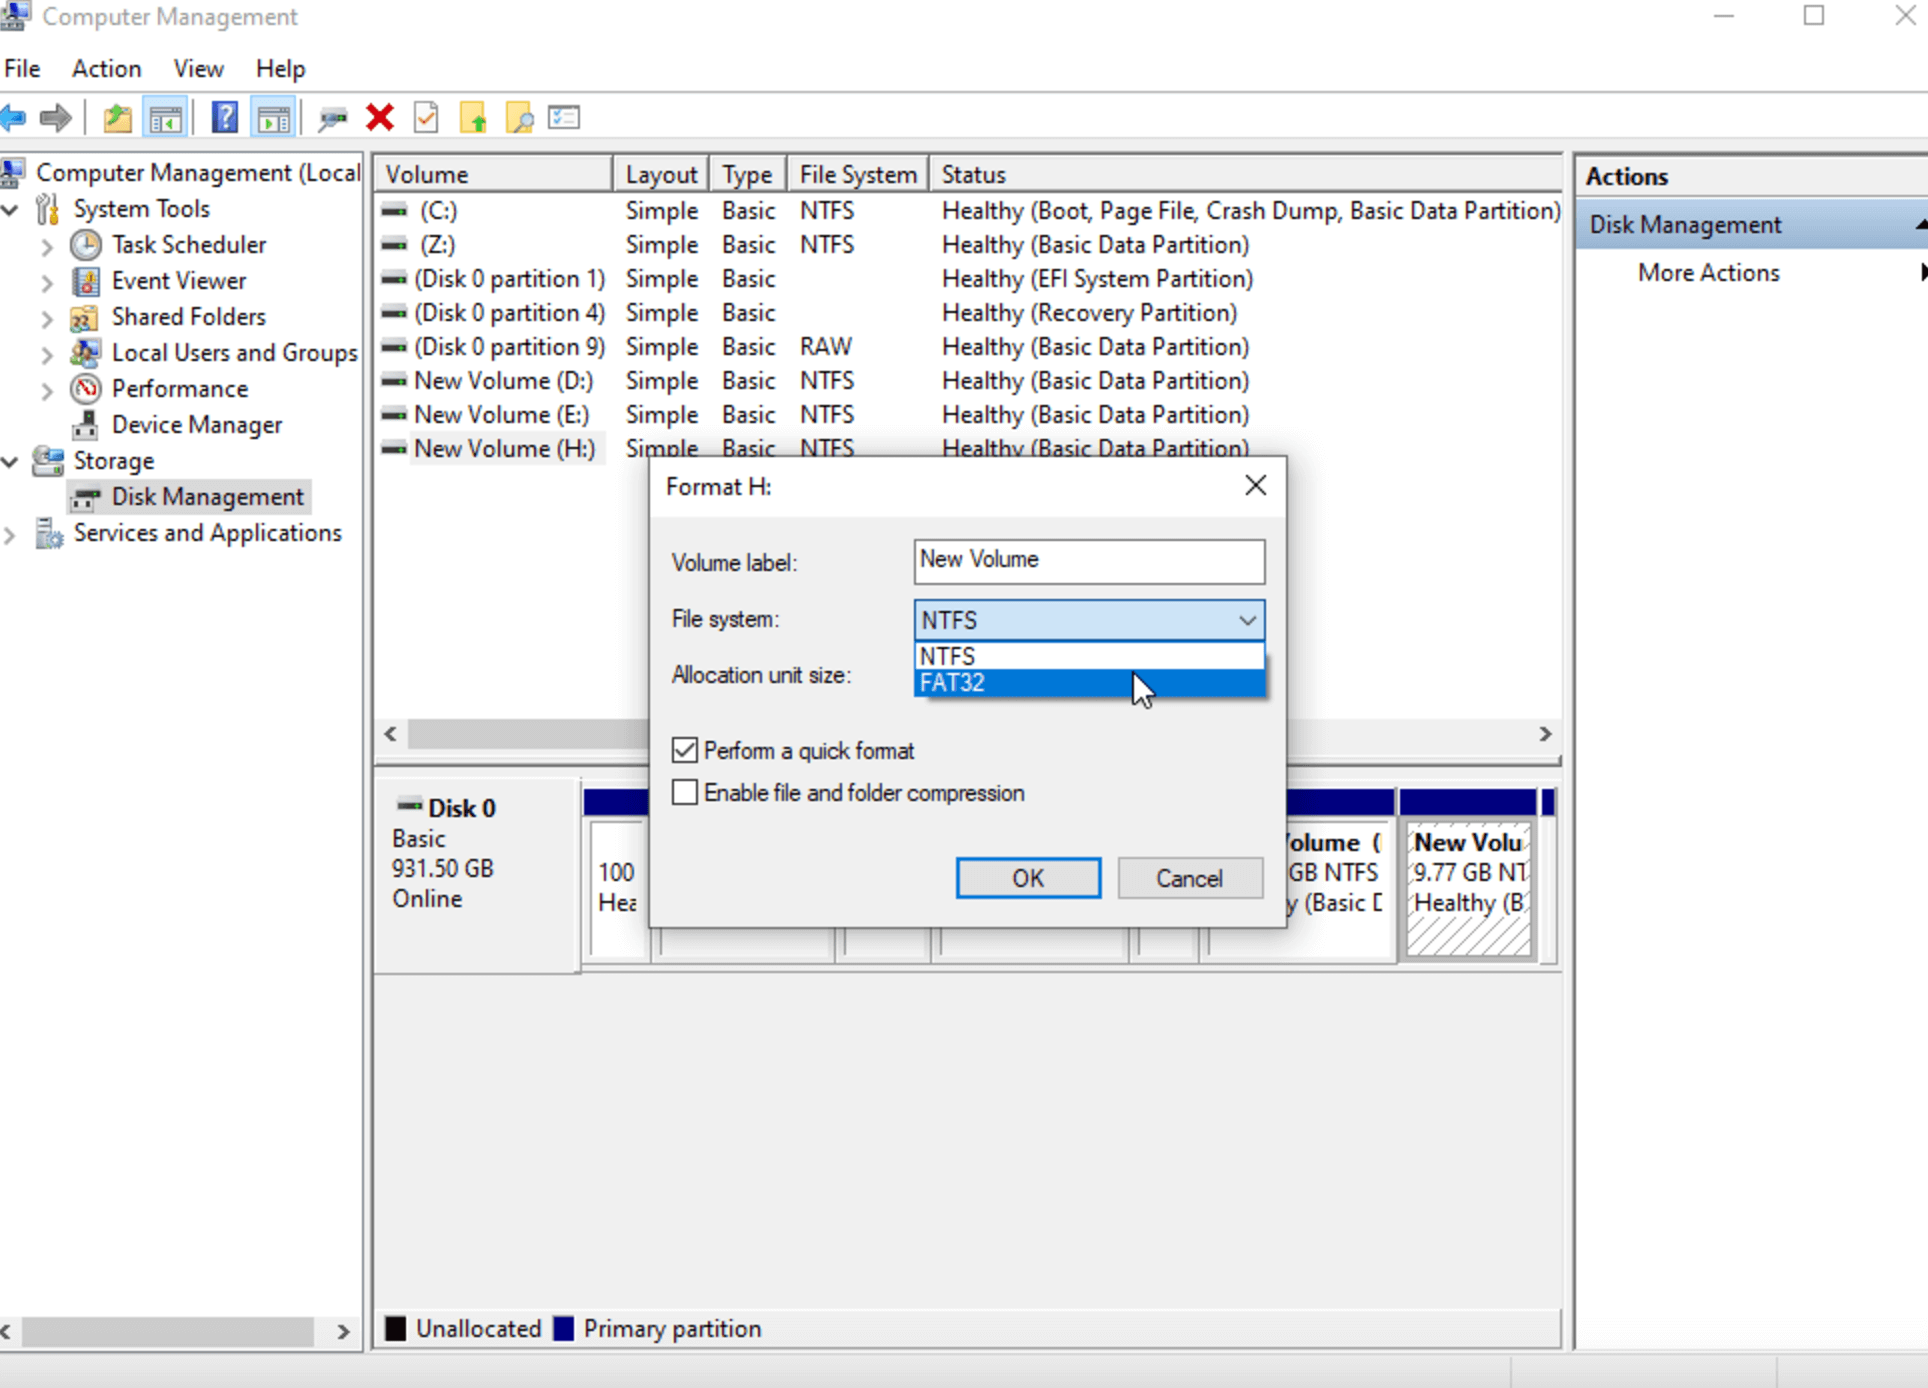
If you have access to a Windows PC, another easy option is to format the drive to NTFS using Windows Disk Management. Simply connect your drive to the Windows machine, open Disk Management, and format it to NTFS.
Post-Formatting Considerations:
After formatting your drive to NTFS, you may need to install third-party software on your Mac to enable full NTFS read and write access. Without such software, macOS will only be able to read the NTFS drive.
Recommended Software:
- Donemax NTFS for Mac
- DoYourData NTFS for mac
- Paragon NTFS for Mac
- Tuxera NTFS
- NTFS-3G (Free)
Troubleshooting:
After formatting, you might encounter a few issues, such as the drive not being detected or not being able to write to it. Here are some common problems and their solutions:
- Drive Not Showing Up: Ensure that the drive is properly connected and powered. Try connecting it to another USB port or computer.
- Write Issues: Install or update your NTFS driver software (e.g., Donemax NTFS for Mac, Tuxera NTFS).
Data Recovery:
If you lose data due to formatting your ExFAT/FAT32 drive to NTFS on Mac and don't have a backup, you can use Mac data recovery software to get the lost data back.
Step 1. Download and install the reliable data recovery software - Donemax Data Recovery for Mac.
Step 2. Open Donemax Data Recovery for Mac, select the drive which has been formatted to NTFS.

Step 3. Click on Scan button to deeply scan the NTFS drive and find all erased files.

Step 4. Once the scan is completed, you can preview all recoverable files. Select the wanted files, click on Recover button to save them.

Conclusion
Converting an ExFAT or FAT32 drive to NTFS on your Mac may seem like a challenge at first, but with the right tools and methods, it can be done easily. Whether you use Disk Utility for basic formatting or opt for third-party tools like Donemax NTFS for Mac, Paragon NTFS for Mac or Tuxera NTFS for more functionality, you'll be able to work with NTFS drives across both macOS and Windows without hassle. Remember to back up your data before formatting and choose the method that best suits your technical comfort level.

Donemax NTFS for Mac
An easy-to-use NTFS for Mac tool to help you enable writable for NTFS drives on Mac so that you can read-write NTFS drives on Mac without any limitation. It also can help you mount, format, repair, rename, open drive on your Mac.
Related Articles
- Jun 29, 2023How to Format A Hard Drive to NTFS on Mac?
- Apr 25, 2025How to Reformat BitLocker Encrypted Hard Drive – A Comprehensive Guide
- Mar 05, 2024How to Format Samsung Portable SSD X5 on Windows or Mac?
- Jul 27, 20256 Methods to Fix External Hard Drive Not Mounting on macOS Tahoe 26
- Dec 16, 2024My Brand New External Hard Drive is Read-Only on Mac, How to Fix This Issue?
- Jan 12, 2025How to Fix Uninitialized USB Flash Drive on Mac?

Christina
Christina is the senior editor of Donemax software who has worked in the company for 4+ years. She mainly writes the guides and solutions about data erasure, data transferring, data recovery and disk cloning to help users get the most out of their Windows and Mac. She likes to travel, enjoy country music and play games in her spare time.

Gerhard Chou
In order to effectively solve the problems for our customers, every article and troubleshooting solution published on our website has been strictly tested and practiced. Our editors love researching and using computers and testing software, and are willing to help computer users with their problems

