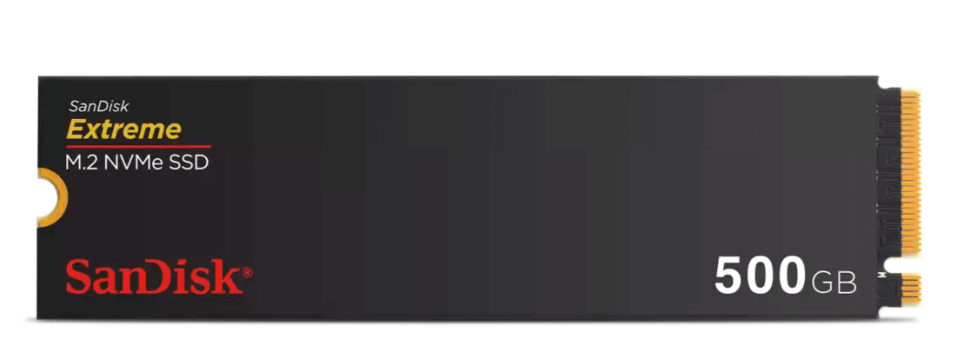
Before we start: Donemax Disk Clone is a powerful disk cloning program. It can clone everything from a hard drive to a new SanDisk Extreme M.2 NVMe Internal SSD and it supports to create a full bootable clone backup.
PAGE CONTENT:
If you upgrade to a SanDisk Extreme M.2 NVMe SSD, your computer will run much faster, with shorter boot times, faster program launches, and smoother operation. Cloning your old hard drive to a new solid-state drive (SSD) allows you to move your data, programs, and settings without loading everything from scratch.
This guide will show you how to clone your drive to a new SanDisk Extreme M.2 NVMe Internal SSD, from making a copy of your files to setting up your system to boot from the new SSD. If you want to speed up your system or get better storage, these steps will help you make the change smoothly, with as little downtime and efficiency as possible.

Gathering the Essentials for Upgrading to SanDisk Extreme M.2 NVMe Internal SSD
Make sure you have everything you need before you start the cloning process:
- SanDisk Extreme M.2 NVMe Internal SSD: Choose an SSD with enough space to hold all your information from the hard drive. Thoughtfully choose the size based on your future needs.
- A cloning software program: There are several free and paid choices. Some well-known options are Donemax Disk Clone, Clonezilla (free), Macrium Reflect (free), AOMEI Backupper (free and paid), and EaseUS Disk Copy (paid).
- Screwdriver: A screwdriver is compatible with your computer's case.
- If your computer doesn't have an extra M.2 slot, you can add an NVMe case. You'll need a USB to connect the new SSD to your computer and start cloning.
Getting your new SanDisk Extreme M.2 NVMe SSD ready:
- Install the SSD: If your computer has an open M.2 slot, carefully install the SanDisk Extreme M.2 NVMe SSD by following the directions in the manual that came with your motherboard or from the maker. For this, you might have to take off a case panel and use a screw to hold the SSD in place.
- Initialize the SSD (if necessary): Your working system might sometimes be able to find the new SSD on its own. But it might need to be set up before it can be used. Find "Disk Management" in the Start menu to find the disk management tool on your machine. Use that to do this.
Step-by-Step to Clone Hard Drive to SanDisk Extreme M.2 NVMe Internal SSD
Step 1: Backup Your Data
It's very important to back up your information before starting the cloning process. Cloning is usually safe, but it's better to have a copy if something goes wrong.
Step 2: Install the SanDisk Extreme M.2 NVMe SSD
Power Off Your Computer: Make sure that no power is going to your computer and that it is fully turned off.
- Open Your Computer Case: Take out the screws with a screwdriver to open the case.
- Locate the M.2 Slot: Look for the M.2 slot on your processor. If you can't find it, look in the instructions on your motherboard.
- Install the SSD: When you put the SanDisk Extreme M.2 NVMe Internal SSD into the M.2 slot, tilt it 30 degrees and slowly press it down until it is flat. Use the screw that came with your motherboard to hold it in place.
Step 3: Initialize the SSD
- Boot Up Your Computer: Your computer should start into your running system after turning it on.
- Open Disk Management: Press Windows + X, then choose "Disk Management."
- Initialize the SSD: If the SSD doesn't show up immediately, you will be asked to set up the disk. For new computers, choose GPT (GUID Partition Table).
Step 4: Choose Cloning Software
There are several good choices for cloning software. This guide will show you how to use Donemax Disk Clone to clone old hard drive to a new SanDisk Extreme M.2 NVMe Internal SSD. It's a free and strong disk cloning and imaging tool.
Donemax Disk Clone
- Clone all data from a hard drive to a new SanDisk Extreme M.2 NVMe Internal SSD.
- Best disk cloning software for Windows and macOS.
- Create bootable clone for Windows and macOS.
Step 5: Start the Cloning Process
Open Donemax Disk Clone on your computer and choose Disk Clone mode. Select the old hard drive as the source disk, select the SanDisk Extreme M.2 NVMe Internal SSD as the destination disk. Then click Next.

You can preview and edit the clone layout, tick "Check the option if the destination is SSD," then click on Clone button.

It will clone everything including operating system, user data, programs from the hard drive to the new SanDisk Extreme M.2 NVMe Internal SSD, making a full bootable clone.

Depending on the size of your files and your computer's speed, it could take a while.
Step 6: Verify the Cloning Process
Check the Cloned Data: Once done, ensure your data was copied correctly to the new SSD.
Boot from the New SSD:
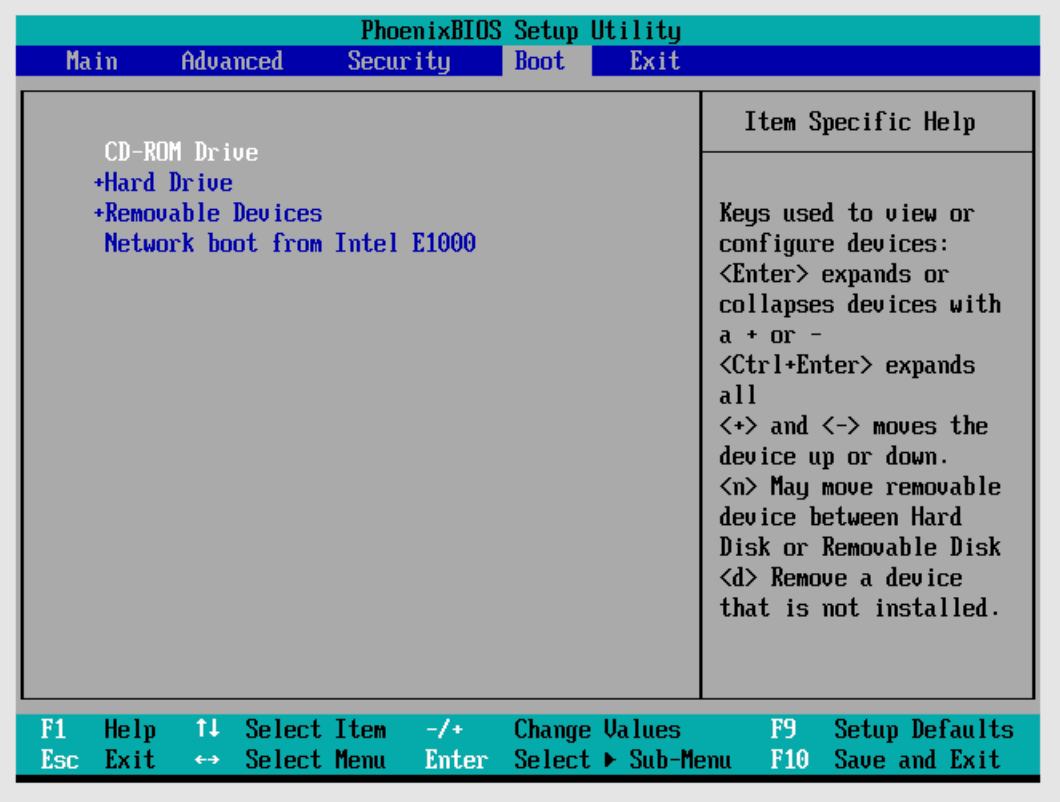
- Enter BIOS/UEFI: Start your computer again and get into the BIOS/UEFI options by pressing Del, F2, or another key during startup.
- Change Boot Order: Set the SanDisk Extreme M.2 NVMe SSD as the main start device.
![Clone Hard Drive to SanDisk Extreme M.2 NVMe Internal SSD]()
- Save and Exit: Take out BIOS/UEFI and save the changes.
Step 7: Enjoy Your New SSD
Now that you've done everything right, your computer should start with the SanDisk Extreme M.2 NVMe Internal SSD. You should see much faster boot times and better speed all around.
Post-Cloning Considerations:
- Formatting the old hard drive (optional): After ensuring the SSD can boot, you can decide what to do with your old hard drive. If you don't want to use it longer, you can format it to eliminate any data still on it.
- Optimizing the SSD: Since switching to an SSD, you should turn off some settings that work best with HDDs. That could mean turning off defragmentation and turning on TRIM support, which keeps SSD speed high. For specific steps, look at the documentation for your operating system.
- Data transfer (if keeping both drives): If you decide to keep both drives, you can move more things to the new SSD to make it faster to access them.
Conclusion:
Making a copy of your hard drive on a SanDisk Extreme M.2 NVMe SSD is an easy process that makes your computer run much faster. By following this guide, you can ensure the change goes smoothly and keep your data, apps, and settings without restarting everything.
Don't forget to back up your data before you begin, and follow each step to avoid any problems carefully. With your new SanDisk Extreme M.2 NVMe SSD, your system will boot up faster, apps will open faster, and it will be more responsive overall, so it can easily handle more difficult tasks.

Donemax Disk Clone
An award-winning disk cloning program to help Windows users and Mac users clone HDD/SSD/external device. It also can create full bootable clone backup for Windows PCs and Macs.
Related Articles
- Jul 28, 2024How to Boot from An External Hard Drive?
- Apr 21, 2024How to Replace A Hard Drive in HP Laptops
- Jun 09, 2023Full Guide to Clone SSD to Larger SSD | SSD Cloning Software
- Oct 09, 2023Copy Hard Drive Partitions with A Partition Cloning Software
- Apr 09, 2024How to Replace Computer HDD With Samsung SSD?
- Apr 16, 2024How to Upgrade HDD to SSD on Windows 7?

Charles
Charles, who lives in Sydney, Australia, is an editor & writer of Donemax Team. He is good at writing articles related with Apple Mac computers, Windows operating systems, data recovery, data erasure, disk clone and data backup, etc. He loves reading and playing tennis in his spare time and is interested in testing new digital devices such as mobile phones, Macs, HDDs, SSDs, digital cameras, etc.

Gerhard Chou
In order to effectively solve the problems for our customers, every article and troubleshooting solution published on our website has been strictly tested and practiced. Our editors love researching and using computers and testing software, and are willing to help computer users with their problems
