What are Mac hidden files and folders? Hidden files or folders are not visible by default and cannot be opened, modified or deleted on a Mac. Apple usually hides first option, cache, logs, and other system files from users. Therefore, you can clean up your Mac without deleting system files by mistake. But if you need to show hidden files and folders on Mac, we will tell you how to do it.
PAGE CONTENT:
- How to show hidden files or folders on Mac?
- Method 1: Use Finder to show hidden files on Mac
- Method 2: Use Terminal to display invisible files or folders on your Mac
- Method 3: Use DMmenue to show or hide files and folders
- Method 4: Unhide files on Mac via AppleScript Scripts
- Method 5: Use Mac data recovery software to recover lost hidden files
- How do I make the files and folders invisible on Mac?
How to show hidden files or folders on Mac? 5 Methods to Try
In this article you will get 5 methods to show and view hidden files on your Mac by using Finder, Terminal, AppleScript Scripts or a third-party file manager toolkit. Moreover, you can hide your sensitive files and folder on Mac with 2 solutions, making them invisible.
Method 1: Use Finder to show hidden files on Mac
1.Open Finder.

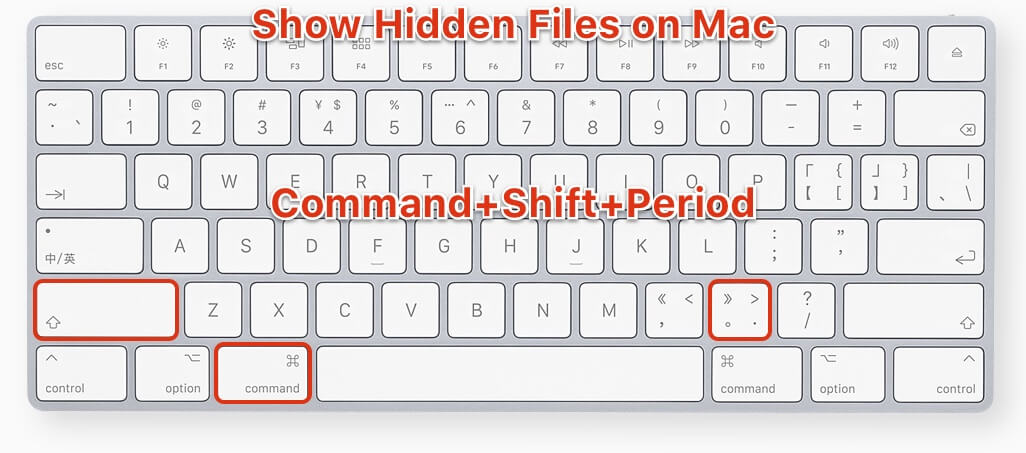
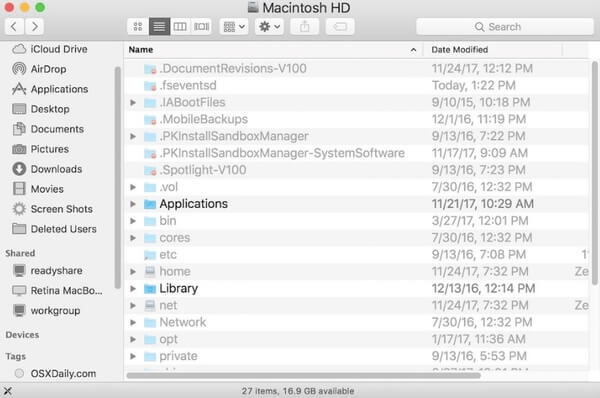
2. Press command + shift + . (period key) at the same time. It will show the hidden files and folders. Press it again and the displayed hidden files will be hidden.
Method 2: Use Terminal to display invisible files or folders on your Mac
Terminal is a built-in command-line tool for mac. If you are familiar with command-line, you can use the command prompt to view hidden files on your Mac.
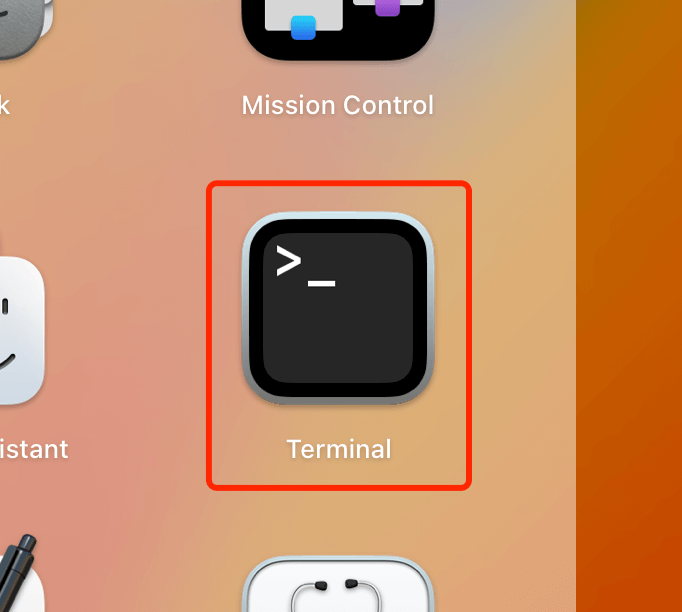
Step 1.Open Terminal. (Run Launchpad -> Other -> Terminal)
Step 2. In Terminal, enter the following command:
com.apple.Finder AppleShowAllFiles true, and press Enter.

The command to hide files is as following, just changing true to false: com.apple.Finder AppleShowAllFiles false, and then press Enter.
Step 3. Enter killall Finder and press Enter.

Method 3: Use third-party software - DMmenu to show or hide files and folders
DMmenu is a menu-bar software for Mac to display hidden files, hide desktop icons and Dock, enable dark mode, connect Bluetooth, monitor system memory, or uninstall apps.
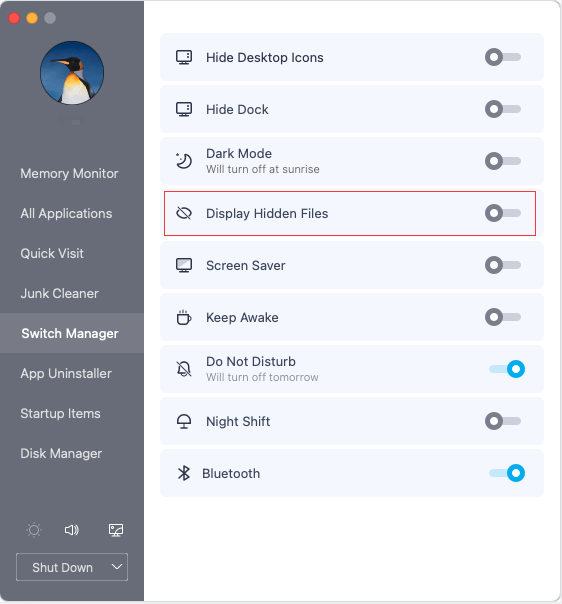
1. Launch DMmenu and select Switch Manager.
2. Find Display Hidden Files, and turn on or off the switches behind to show or hide files and folders.
Method 4: Unhide Files on Mac via AppleScript Scripts
Use Script Editor to create script commands. This method is more suitable for users who have some programming foundation.
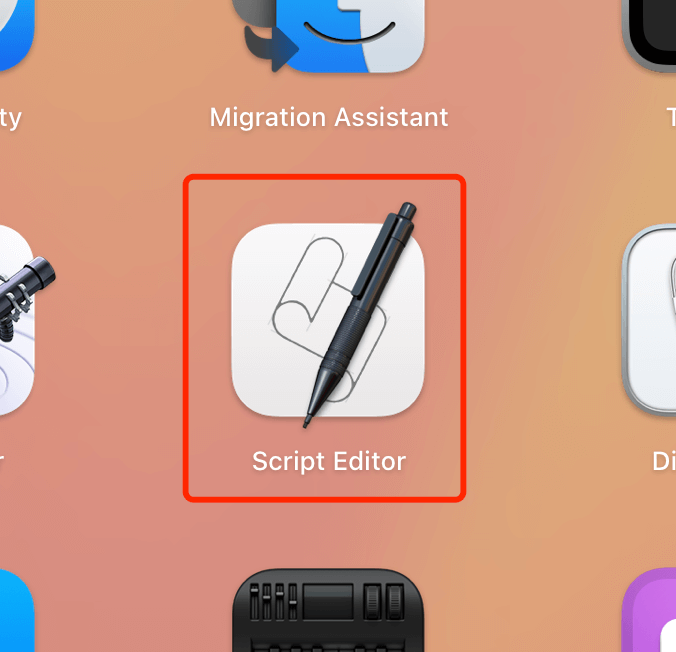
1. Open Script Editor. (Run Launchpad -> Other -> find Script Editor)
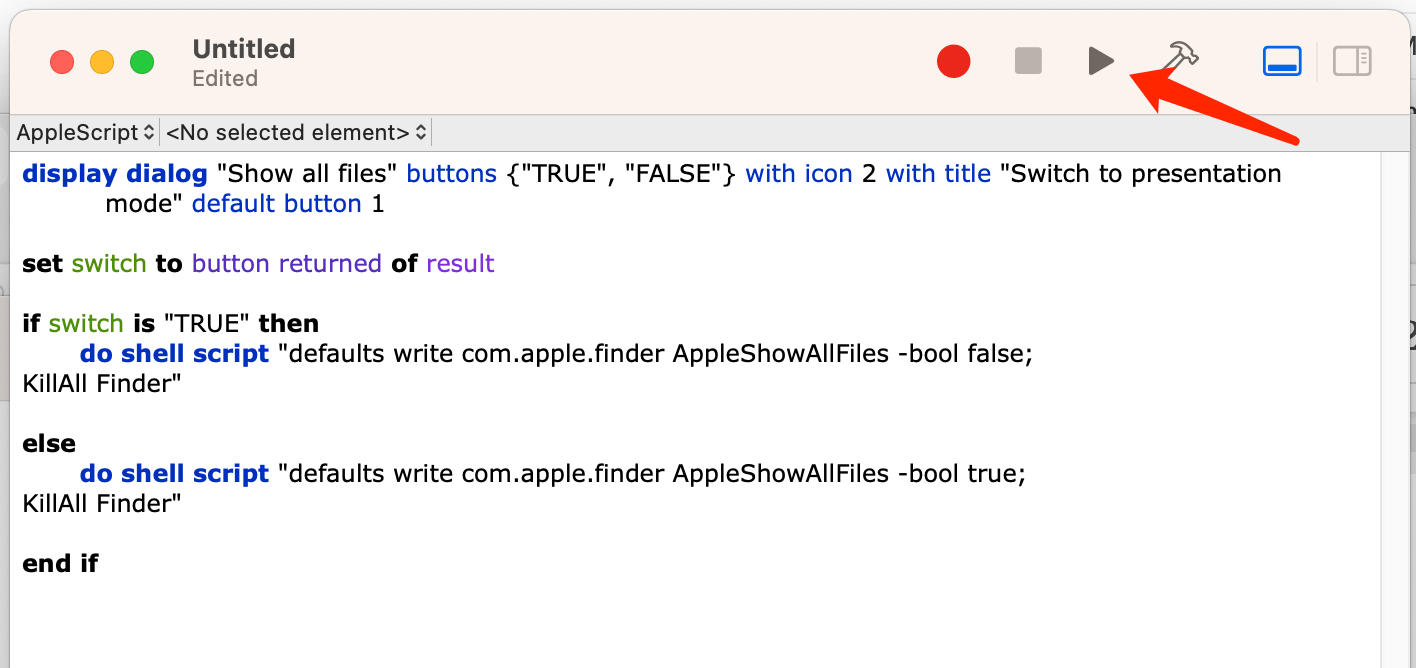
2. Copy the following Apple script to Script Editor, and click to run.
set switch to button returned of result
if switch is "TRUE" then
do shell script "defaults write com.apple.finder AppleShowAllFiles -bool false;
KillAll Finder"
else
do shell script "defaults write com.apple.finder AppleShowAllFiles -bool true;
KillAll Finder"
end if
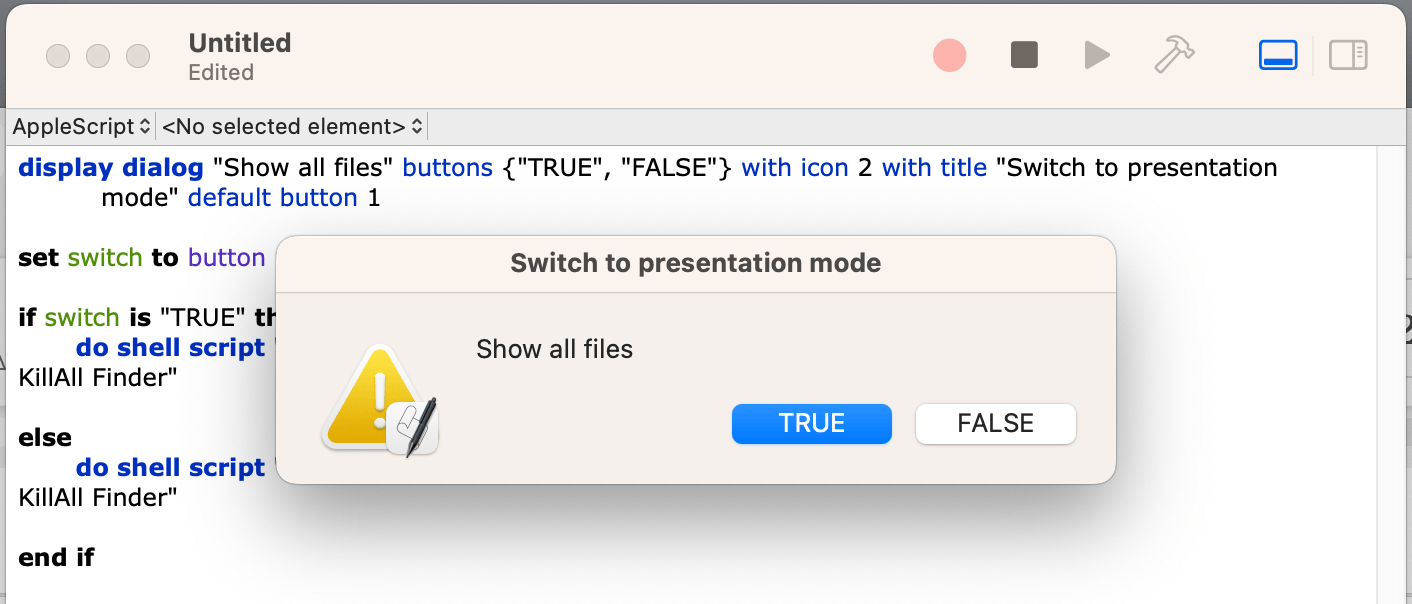
3. Click TRUE to show all files and folders, and click the FALSE button to hide them.
Method 5: Use Mac data recovery software to recover lost hidden files
What to do if you can't find the hidden file you want on your Mac after trying the above methods? Or you just deleted it by mistake after showing it? Is it possible to get back your deleted or lost hidden files?
Of course, you can recover lost hidden files and folders with a data recovery software for Mac, such as Donemax Data Recovery for Mac:
1. Download and run Donemax Data Recovery.
2. Select the location of lost hidden files and click Scan.

3. Preview the files while scanning to see if the files are found.
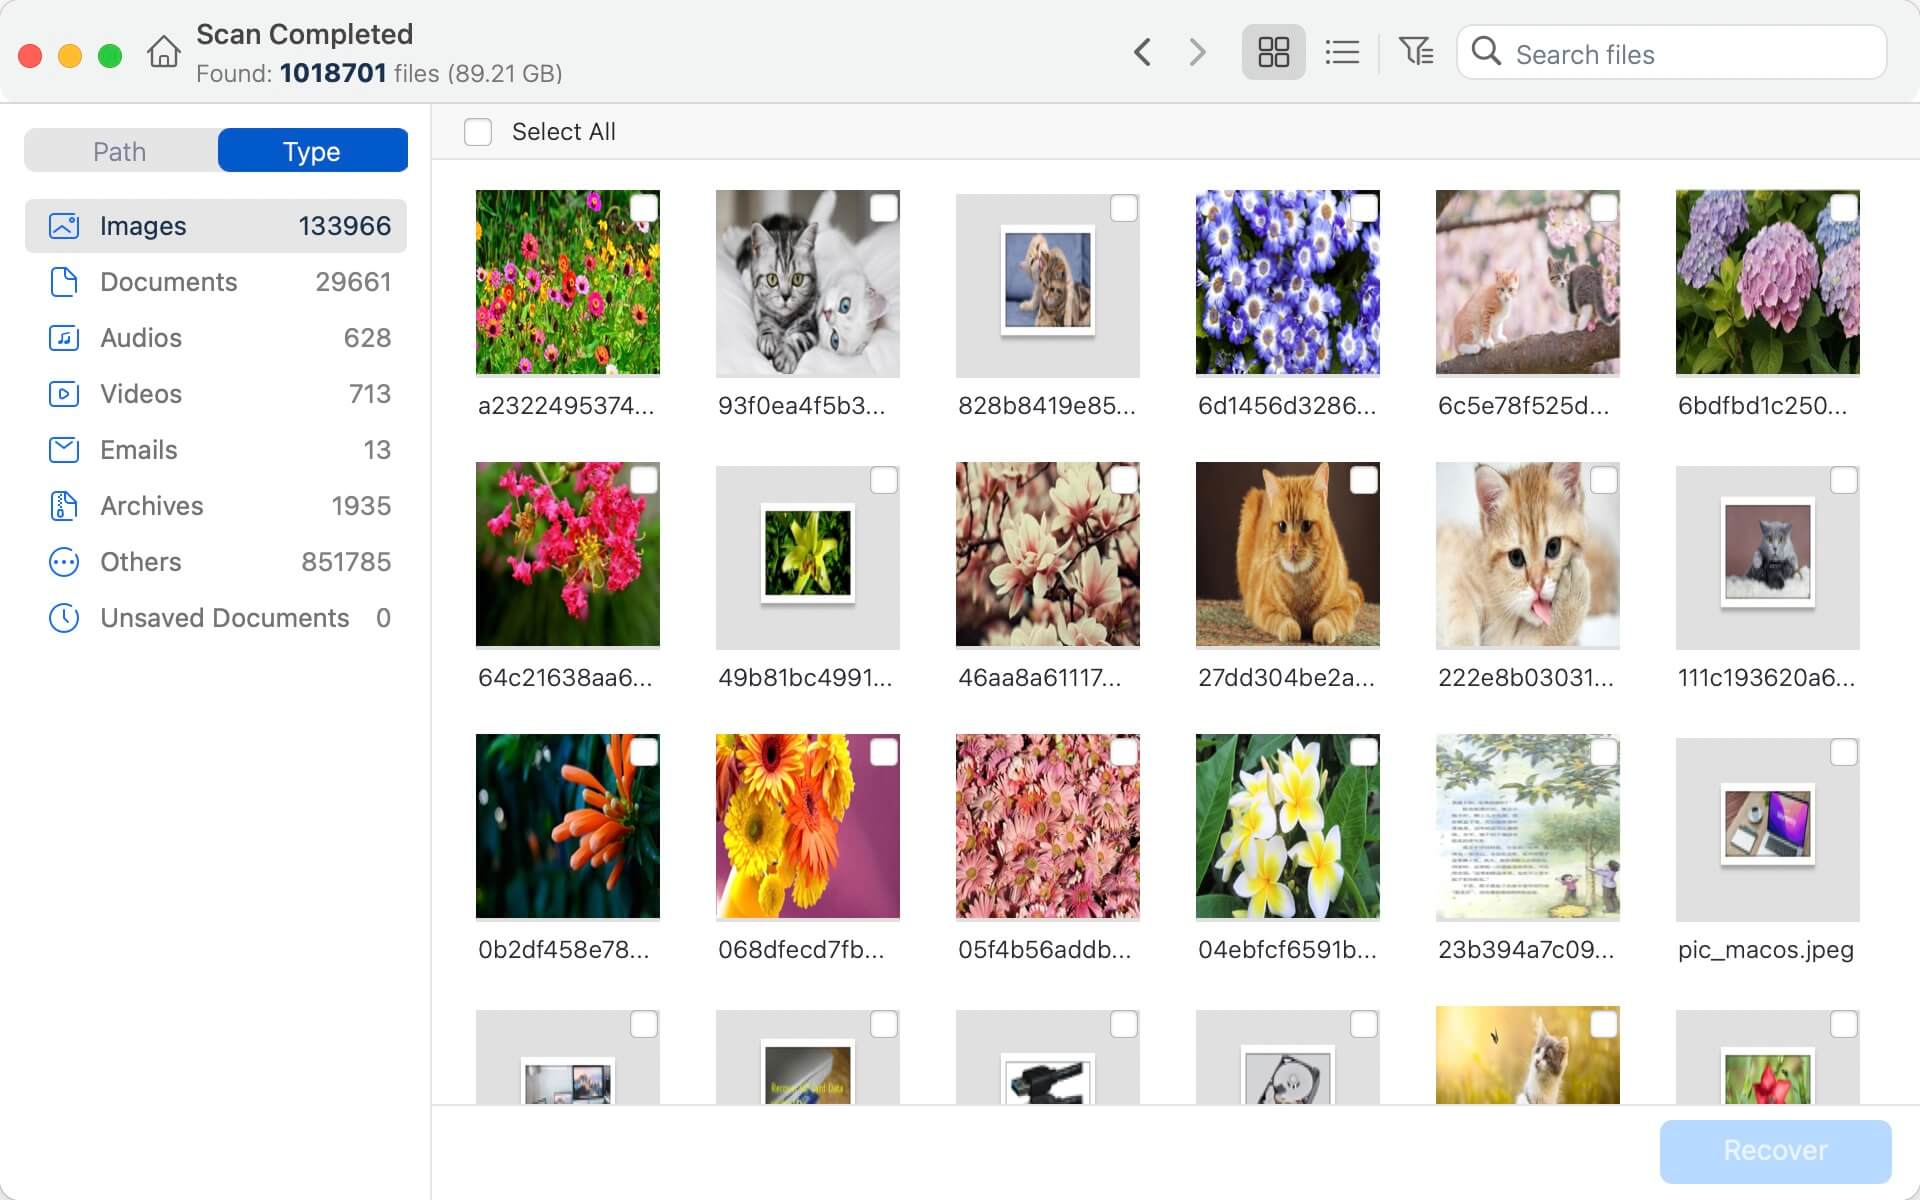
4. Select the location and click Recover to recover the lost hidden files.
How do I set the hidden attributes of files and folders?
Through the above methods, we know how to show files and folders with hidden attributes. But how do we set a file and folder to invisible on a Mac? Here are two methods to hide your private files from others below.
Method 1: Use Terminal to modify the file name
Step 1. Run Launchpad -> Other -> open Terminal. Enter mv /path/filename /path/.filename.
/path/filename is the file to be hidden and its path, and /path/.filename is to add '.' in front of the file name.

Step 2. Press Enter.
Method 2: Hide files by command line.
1. Open Terminal and type chflags hidden path. You can drag and drop the file you want to hide into Terminal.

2. Press the Enter button to hide files or folders.
FAQs
By default, all hidden files are invisible. But you can make the hidden files visible on Mac by simultaneously pressing the [command + shift + .] keys. It can switch the status of files and folders with hidden attributes between hiding and unhidding.
Hiding a file can ensure that it won't be deleted by mistake. However, you can not prevent others from opening it if they know how to display the hidden files. It can not guarantee the security of the file content.
- Open Terminal and type 'mv /path/filename /path/.filename'.
- Press Enter and the files will be invisible on Mac.
Related Articles
- May 12, 2025How to Upgrade from Windows 10 to Windows 11?
- Feb 23, 2024How to Format and Unformat Sony SD Card on Windows & macOS?
- Mar 19, 2025How to Use Seagate Game Drive PS5 SSD?
- May 19, 2025Clean Install macOS Ventura: A Comprehensive Guide
- Apr 18, 2025How to Format a Drive to exFAT by Using CMD (Command Prompt - diskpart)?
- Mar 25, 2025How to Restart or Force Restart A Windows PC?

Christina
Christina is the senior editor of Donemax software who has worked in the company for 4+ years. She mainly writes the guides and solutions about data erasure, data transferring, data recovery and disk cloning to help users get the most out of their Windows and Mac. She likes to travel, enjoy country music and play games in her spare time.

Gerhard Chou
In order to effectively solve the problems for our customers, every article and troubleshooting solution published on our website has been strictly tested and practiced. Our editors love researching and using computers and testing software, and are willing to help computer users with their problems