Written byMariaUpdated on Feb 21, 2025
How to Use Windows File History?
Approved byGerhard Chou
Before we start: Learn how to set File History on Windows 11/10/8 and how to use File History to restore files. If you can't restore lost files via Windows File History, you can use Donemax Data Recovery to help you recover deleted, formatted and lost files on Windows.
PAGE CONTENT:
- Introduction to Windows File History: A Backup & Restore Tool
- How Windows File History Works?
- Set Up Windows File History on Windows 11/10/8/8.1
- Configuring File History Settings
- Restore Files with File History on Windows 11/10/8
- Bonus: Using File History with Multiple Devices
- Troubleshooting Common File History Issues
- Best Practices for Using Windows File History
- Recover Lost Data Without File History & Backup
- Conclusion
Data loss is one of the most frustrating things that can happen to a computer user. Whether due to accidental deletion, file corruption, or malware, losing your files can be devastating. Fortunately, Windows provides an in-built backup tool called File History that helps you back up important files and, even better, lets you restore different versions over time. File History is designed to give you peace of mind without complex configuration, especially if you need to access previous versions of files. Here's everything you need to know to set up, configure, and get the best out of Windows File History.
Introduction to Windows File History: A Backup & Restore Tool
Windows File History is a simple yet powerful backup feature first introduced in Windows 8 and retained in later versions. Its main purpose is to regularly back up files in specific folders, such as Documents, Pictures, Videos, Music, and your Desktop folder, along with any OneDrive files saved offline. Unlike some backup solutions that copy your entire system, File History focuses on personal data, which makes it perfect for users who want a quick, reliable way to protect essential files without having to perform full system backups.
With Windows File History, you can restore lost files or access previous versions of files without hassle. It's particularly useful for retrieving a file you might have accidentally overwritten or deleted. Let's dive into how this feature works and how to set it up.
How Windows File History Works?
At its core, File History is a versioning tool for files. It continuously monitors your chosen folders for any changes and periodically saves copies to an external drive or network location. Unlike System Restore (which is designed to restore system settings and applications) or System Image Backup (which captures a full image of the operating system), File History doesn't back up Windows or application files. Instead, it saves incremental backups of user files, making it easy to roll back to previous versions or recover deleted files.
Set Up Windows File History on Windows 11/10/8/8.1
Before using File History, you'll need an external hard drive or network storage location to save your backups. Here's a step-by-step guide to setting up File History:
Step 1. Connect Your Backup Drive: Insert an external hard drive or connect to a network location where you want to store your backups.
Step 2. Access File History Settings:
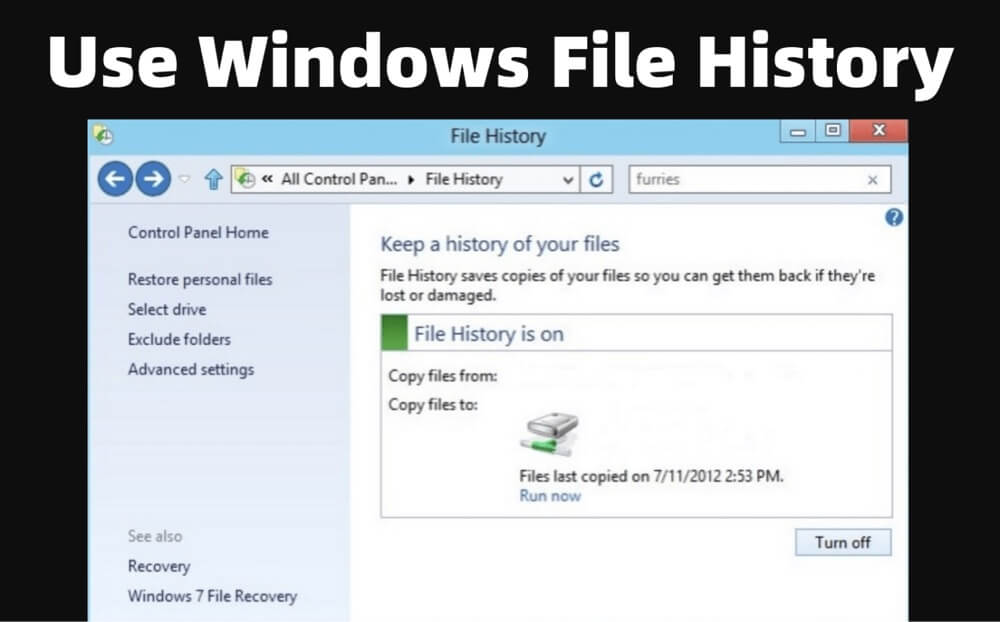
- In Windows 8/8.1: Open Control Panel > System and Security, select File History. File History is off by default.
![Use Windows File History]()
- In Windows 10: Settings > Update & Security > Backup.
![Use Windows File History]()
- In Windows 11: Open Settings, type File History in search box, then press Enter. Open File History.
![Use Windows File History]()


Step 3. Turn on File History: Once Windows detects your backup drive, select it to begin the backup process. Click Turn On or Add a Drive to activate File History and start the initial backup of your files.

Step 4. Automatic Backups: File History will now run in the background, saving versions of files in designated folders as changes are made. You don't need to manually back up files once you've set up File History - it automatically saves updated versions based on your configured settings.

This initial setup will provide you with a basic level of protection for your files. However, it's often worth customizing the File History settings to better align with your backup needs.
Configuring File History Settings
Once File History is enabled, you can customize its settings to fit your needs better.
a) Choosing Which Folders to Back Up
File History automatically backs up essential folders, but you can easily add or exclude folders based on your preferences.
- Go to Settings > Update & Security > Backup and click on More Options.
- To add a folder, click on Add a Folder and navigate to the desired folder.
- To exclude folders from backup, click Exclude these folders and select the folders you want to omit. This is useful if you have folders with files you don’t need backed up, saving space and backup time.
b) Setting Backup Frequency
By default, File History saves a new backup every hour. You can adjust this frequency from every 10 minutes to once daily, depending on how frequently you modify files and the available storage on your backup drive.
- Go to More Options in File History.
- Under Back up my files, choose a preferred time interval.
c) Managing Version History
Another customizable setting is the retention period for saved versions of your files. File History gives options to keep saved versions indefinitely, until space is needed, or for a set period, such as 1 month, 6 months, or 2 years.
Choose Keep saved versions and select a retention period. Keeping versions indefinitely is beneficial if you have abundant storage, but for limited space, shorter periods are more practical.
Restore Files with File History on Windows 11/10/8
Restoring files is straightforward, and you can choose to restore individual files or entire folders.
▪️ Restoring a Specific File
- Go to Control Panel, open File History, and click Restore personal files.
![Use Windows File History]()
- Navigate to the file or folder you want to recover. You can browse through different versions by clicking the arrows.
- Select the version you want to restore, then click Restore. It will recover the file to its original location, or you can choose Restore to to save it in an alternate location.

▪️ Restoring All Files
If you've reset your PC or need to recover files after a fresh installation, File History can restore all backed-up files.
- Connect your backup drive.
- Go to Settings > Update & Security > Backup and click Restore files from a current backup.
![Use Windows File History]()
- Select the files or folders you want to restore.

▪️ Accessing Previous Versions Directly in File Explorer
To retrieve a past version, open File Explorer, right-click the file or drive, select Properties, and navigate to the Previous Versions tab. This will show previous copies available through File History.

Bonus: Using File History with Multiple Devices
If you use multiple Windows devices, File History can help you keep backups organized across different computers. Here’s how:
- External Drive for Each Device: If each computer has its own external drive for backups, configure File History individually for each one. This way, you avoid cross-device conflicts.
- Single Network Location: Alternatively, you can designate a single network location as the backup destination for multiple devices. When setting up File History, connect each computer to the network location, ensuring that you label backups or use separate folders for each device.
With these steps, you can efficiently restore and manage backups, making the most of File History's versatile file recovery features. Whether you're restoring single files or entire folders, File History simplifies the process, offering a seamless way to safeguard your data.
Troubleshooting Common File History Issues
While File History is generally reliable, you may occasionally encounter issues. Here are solutions to common problems:
▪️ File History Drive Not Recognized
If Windows can't detect your backup drive, try these solutions:
- Ensure the drive is connected and powered on.
- Test the drive with a different USB port or restart your computer.
- Check that the drive has enough storage space for backups. If it's running low, clear older backups or switch to a larger drive.
▪️ Backup Interrupted
Backups can be interrupted if the external drive disconnects. To avoid interruptions:
- Make sure your drive remains connected while backing up.
- Use a reliable external drive and avoid any movement during backups.
▪️ Error Messages
If File History displays an error, such as "File History cannot back up because there's an error with the drive," try:
- Running CHKDSK to scan for drive errors.
- Updating your Windows version, as certain updates may resolve File History bugs.
- Reconnecting the drive or restarting the backup process from Settings.
Best Practices for Using Windows File History
To get the most out of File History, follow these best practices:
1. Use an External Drive with Ample Storage
Since File History saves multiple versions, storage requirements can grow over time. For reliable, long-term use, invest in a high-capacity external drive. The larger the storage, the longer you can retain file versions without worrying about running out of space.
2. Pair with Other Backup Solutions
While File History is ideal for data files, it doesn’t cover system files or applications. For full protection, consider pairing File History with a System Image Backup or a cloud storage solution. Cloud storage can be particularly useful for accessing files from different locations or devices.
3. Monitor and Adjust Settings Regularly
Periodically check File History settings to ensure they’re optimal for your current needs. For example, if you recently added a large project, back up the folder or consider excluding unnecessary files to save space.
4. Test Your Backups
Every few months, test the restore function to ensure your backups are functioning correctly. This also familiarizes you with the restore process, so you're prepared in case of data loss.
Recover Lost Data Without File History & Backup
Data recovery program can help you recover lost data from a drive without backup. It can deeply scan the drive and find all deleted/formatted/lost data. Donemax Data Recovery is a powerful data recovery program. It can help you securely and completely recover lost data from HDD, SSD, USB flash drive, SD card, RAID, etc.
Step 1. First of all, you just need to download and install Donemax Data Recovery on your computer.
Step 2. Open Donemax Data Recovery, select the drive where you delete or lose your data to scan.

Step 3. Once you've selected the drive, click on Scan button to deeply scan the drive and find all deleted, formatted or lost data.
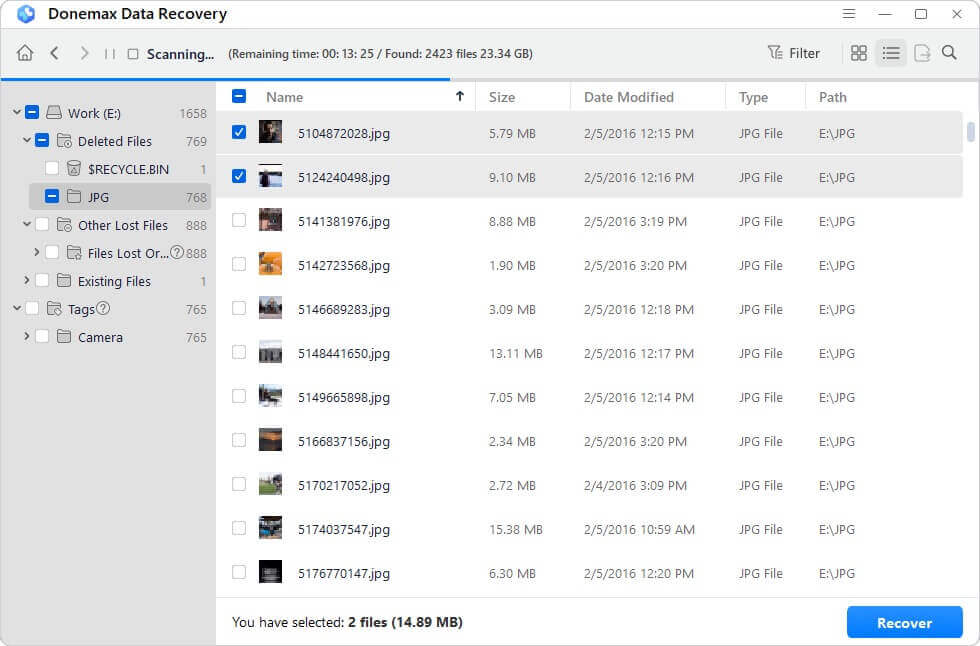
Step 4. After deep scan, you can check what it has found. Then select the wanted data, click on Recover button to save it.

Conclusion
Windows File History is a straightforward yet powerful tool to keep your personal files safe and accessible. By following the steps outlined here, you can set up, configure, and customize File History to provide reliable backups. It's a practical solution for anyone who values easy access to previous versions of files or peace of mind with automatic backups.
While File History alone doesn't provide a comprehensive backup solution, pairing it with other methods will help you create a resilient data protection strategy. If you haven't enabled File History yet, there's no better time than now to safeguard your valuable data. Just set it up, adjust your preferences as needed, and let Windows handle the rest!
Donemax Data Recovery
One of the best data recovery programs to recover deleted, formatted or lost data from PC, Mac, HDD, SSD, USB drive, SD card, camera, RAID, Sever or other storage devices.
Related Articles
- Oct 31, 2023Recover Data from External Hard Drive with Best Data Recovery Software
- Mar 07, 2024How to Recover Lost Data from Kingston SD Card or Memory Card?
- Mar 01, 2025How to Recover Lost Data from ADATA SD Card?
- Feb 11, 2025How to Recover Deleted or Lost FLAC Audio Files? [3 Methods]
- May 10, 2024How to Recover Lost Data from GoPro HERO12 Black?
- Jan 21, 2025Downloads Get Deleted, How to Fix It

Contributing Writer
Maria
Maria is one of the senior writers & editors of Donemax who lives and works in Sydney, Australia. She loves PC, Mac and Internet Technology. She has 6 years of writing articles about data recovery on PC/Mac, disk cloning solution, data eraser and computer OS optimization, etc. She is also interested in testing various software and digital products.

Editor in chief
Gerhard Chou
In order to effectively solve the problems for our customers, every article and troubleshooting solution published on our website has been strictly tested and practiced. Our editors love researching and using computers and testing software, and are willing to help computer users with their problems